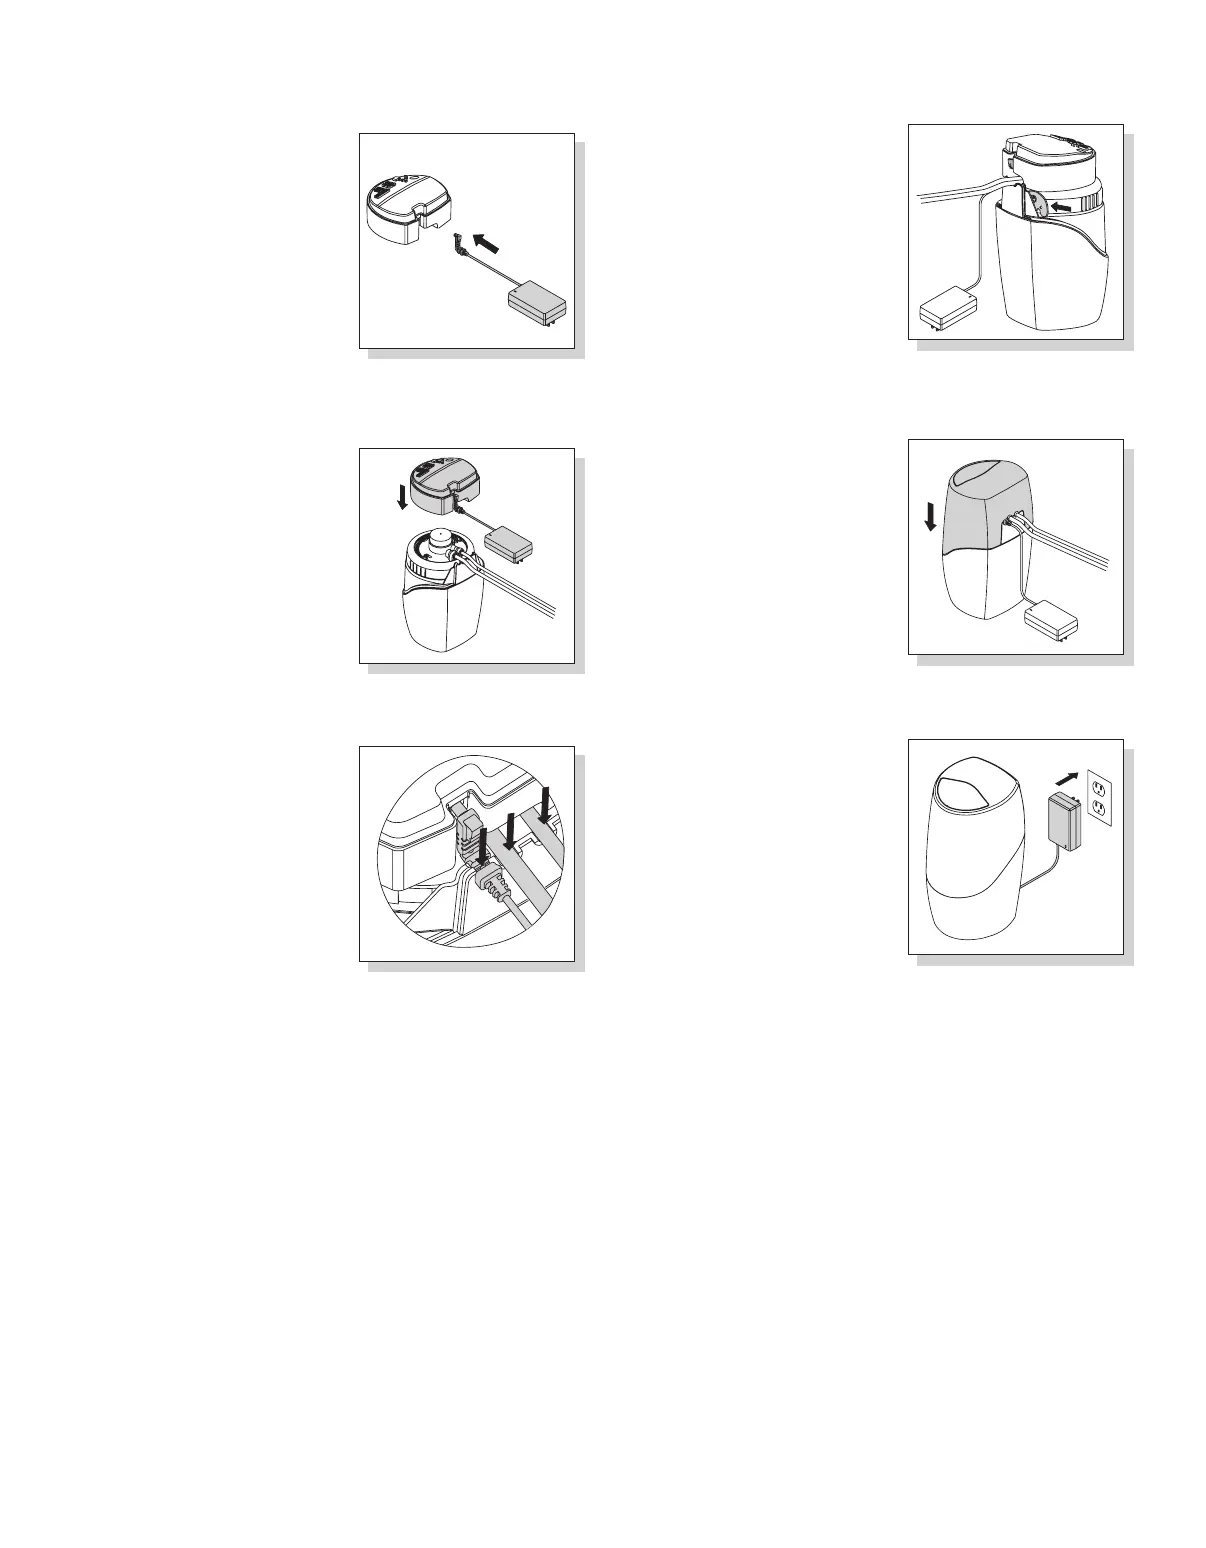
4. Store the removal tool for future
use (Fig. 20B).
5. Place the Top Shroud onto Base
Housing (Fig. 21B).
6. Plug the Power Adapter into the
wall outlet (Fig. 22B).
7. Wait for monitor to signal with a
beep. This may take 30 seconds.
8. Open the Auxiliary Faucet to
run water through the Water
Purifi er. Make sure the display
has a blue cup. If not, refer
to Troubleshooting, Auditory
Warnings (p. 13).
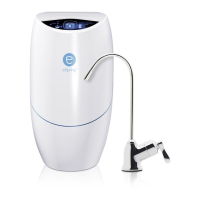
1. Insert Power Adapter into
Electronic Module (Fig. 17B).
2. Replace the Electronic Module
(Fig. 18B).
3. Push cord strain relief into notch
on Base Housing (Fig. 19B).
NOTE: Make sure the tubes are in the
notches on the back of the Base Housing.
COMPLETING THE INSTALLATION
10
Fig. 17B
Fig. 18B
Fig. 19B
Fig. 20B
Fig. 21B
Fig. 22B