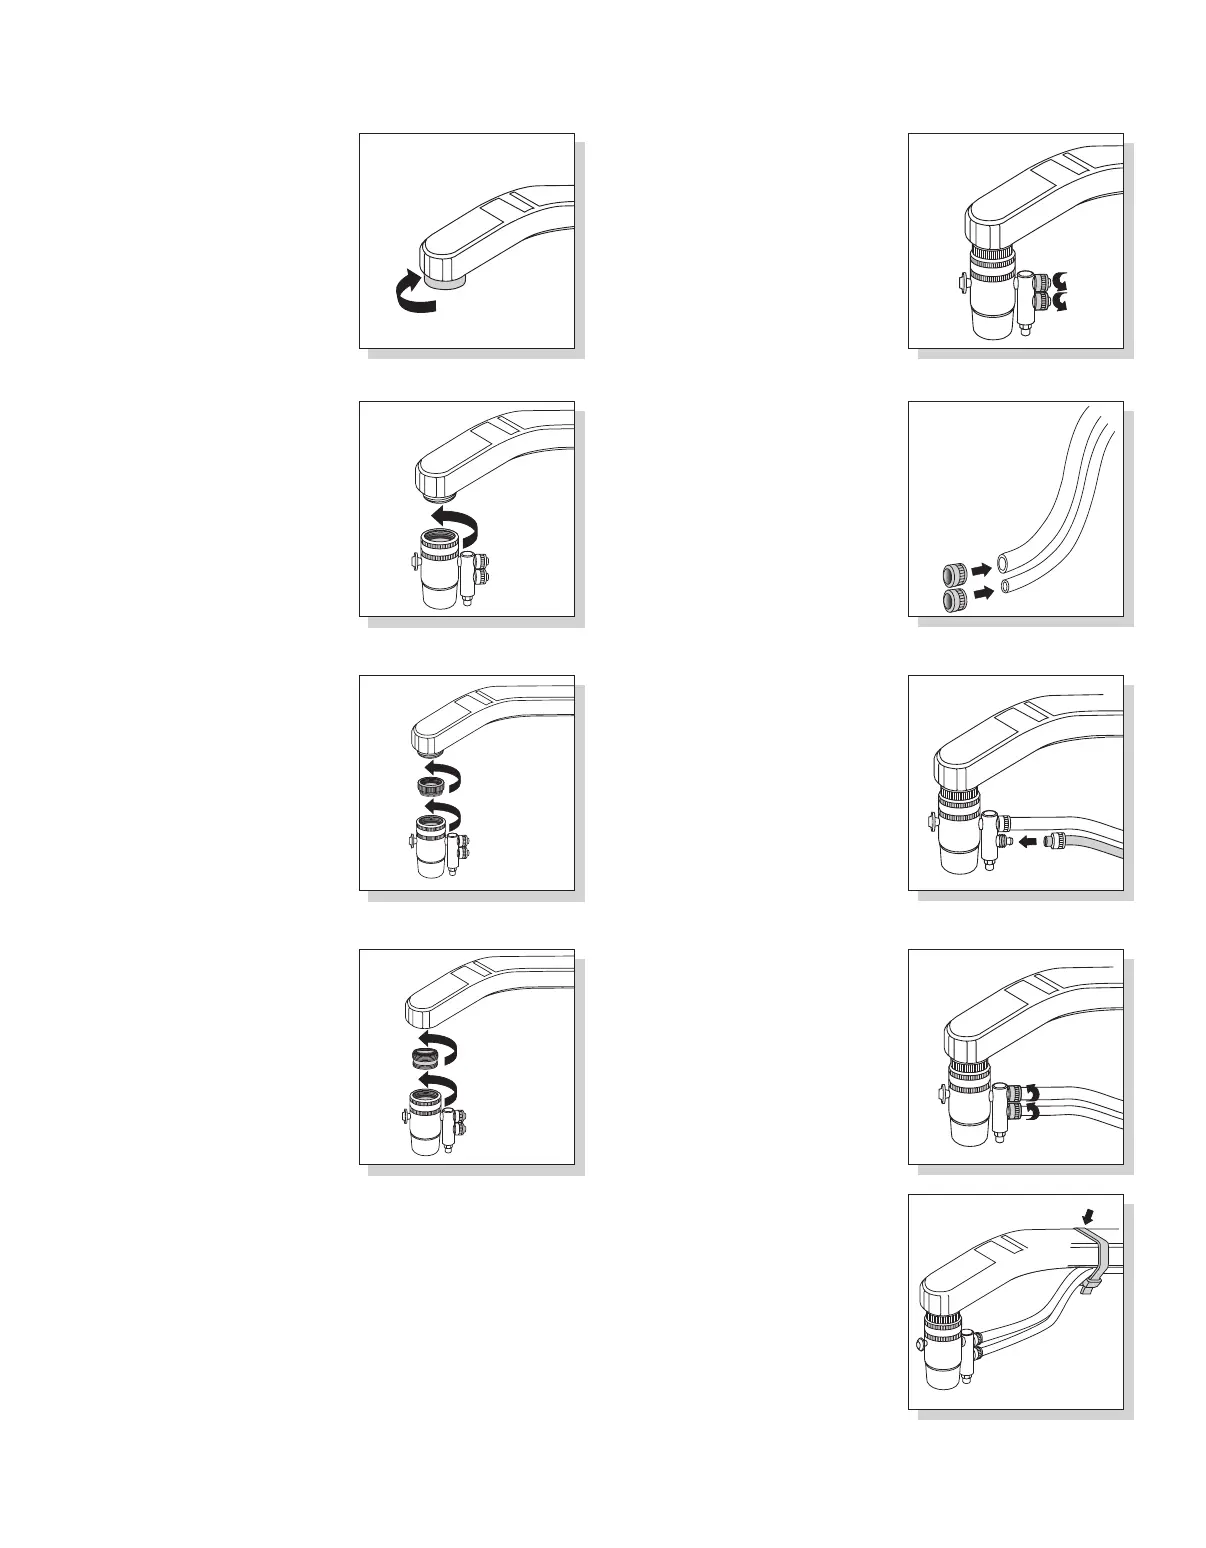
1. Unscrew to remove the aerator
(wire screen) and washer from the
end of your faucet (Fig. 2A).
2. There are three options for attach-
ing the Diverter to the faucet.
a) Position the Diverter onto the
faucet and hand tighten the
textured collar counterclock-
wise until secure (Fig. 3A).
b) If that does not fi t, attach the
appropriate textured adapter
with internal threads and
washer to the end of your
faucet (Fig. 4A).
c) If the threads on your faucet
are internal, attach the
appropriate adapter with
external threads to the end
of your faucet (Fig. 5A).
1. Unscrew to remove the textured
nuts (Fig. 6A).
2. With the threads facing out, push
the large nut on the large tube and
the small nut on the small tube
(Fig. 7A).
3. Firmly push the large tube onto the
large barb and the small tube onto
the small barb (Fig. 8A).
4. Screw the nuts onto the barbs and
hand tighten (Fig. 9A).
5. Use the tie straps to secure the
tubing to the faucet (Fig. 10A).
ATTACHING THE DIVERTER ATTACHING THE TUBING
TO THE DIVERTER
3
Fig. 3A
Fig. 10A
Fig. 9A
Fig. 8A
Fig. 7A
Fig. 6A
Fig. 5A
Fig. 4A
Fig. 2A