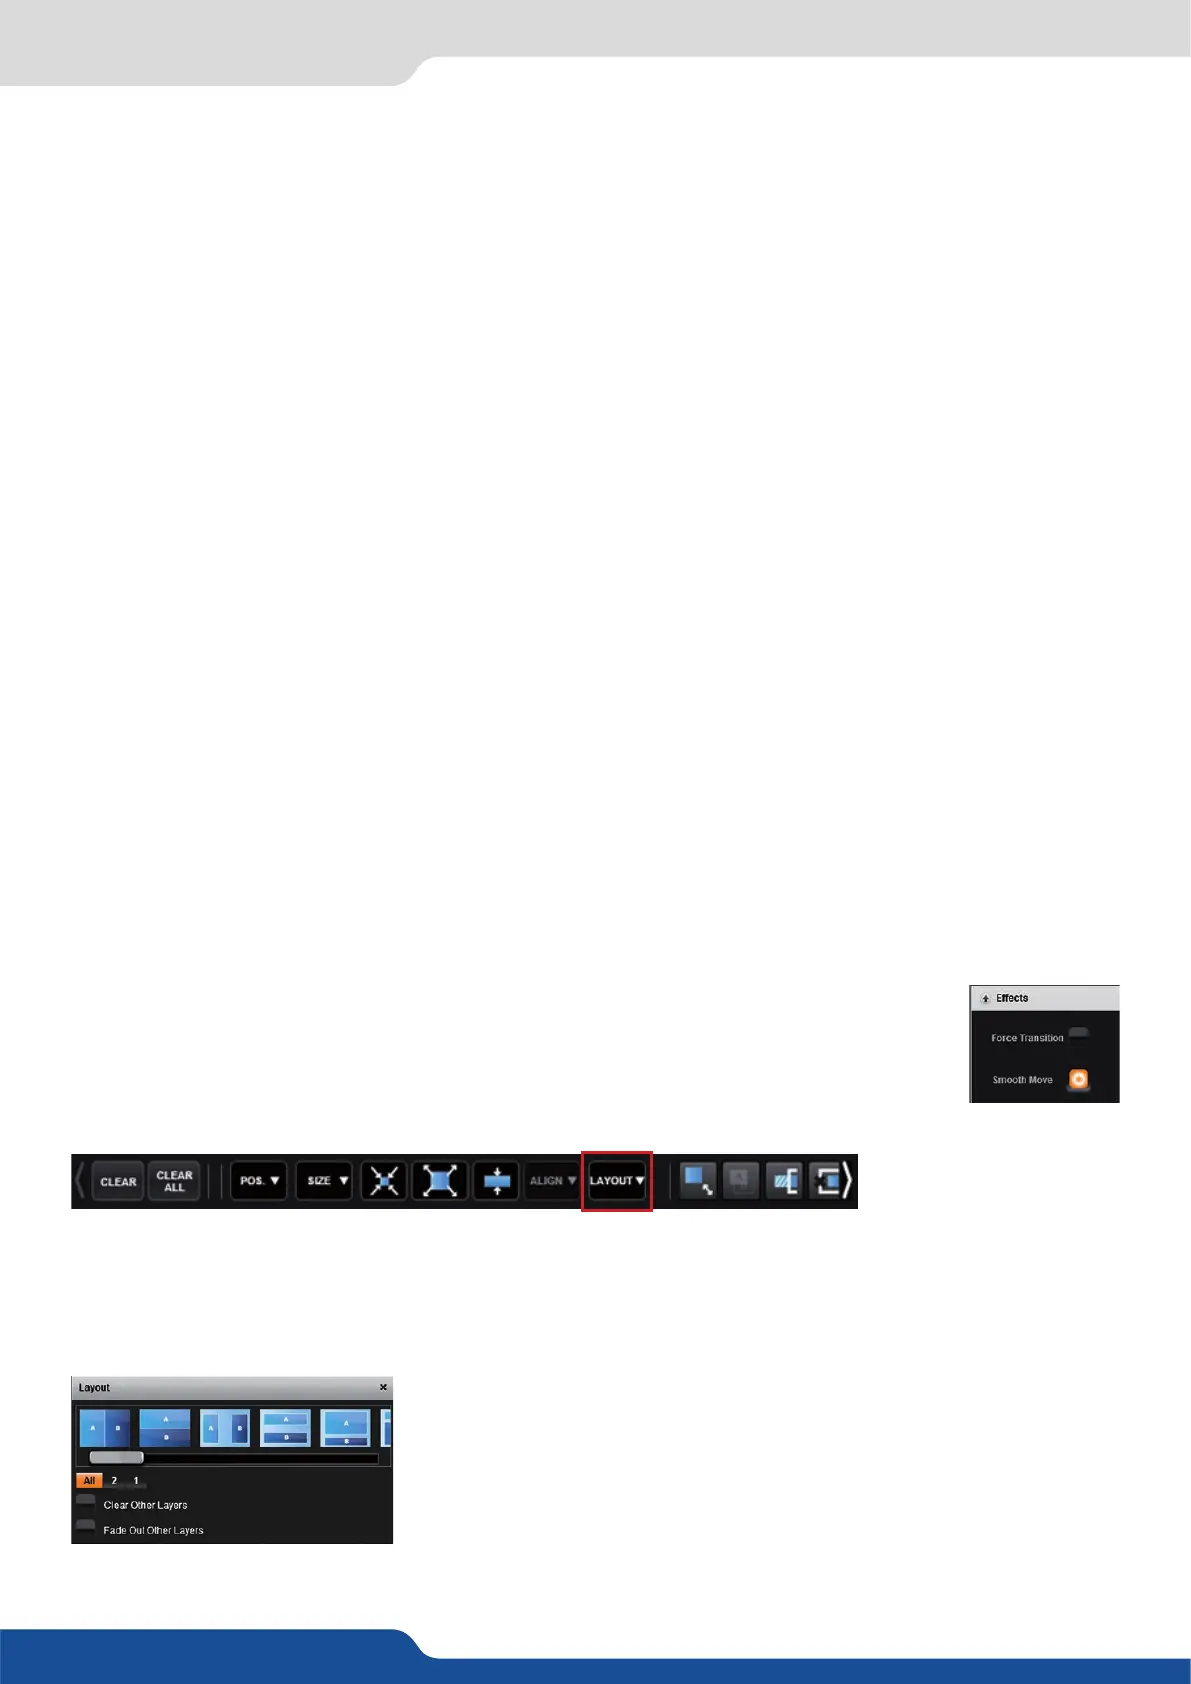
41
The layer layout gives you access to several predened layouts with 2 or 1 layers already sized and placed into
the output.
Once clicking on the layout buon, you have access to the presets with 2, 1 layers or all layouts.
Two other opons are available below:
layers already displayed and not included into the
chosen layout will be cleared
layers already displayed and not included into
the chosen layout will be faded out during the transion. They are sll
present on the preset but with a 100% transparency.
7.3.3 Eects
Adjust the size horizontally (X) or vercally (Y), then adjust the width and the height of your layer. You can
use the cursor or directly enter a value. To keep the aspect rao by using the cursor, please enable the KEEP
ASPECT RATIO buon. You will nd it on the right of the width and height cursors.
Transparency
Use the Transparency to give at your layer a transparent eect. Layers behind the transparency layer will
show through more or less based on the transparency value.
The Cropping feature allows you to cut the part of the image you don’t want. Simply adjust the size horizontally
or vercally and then adjust the posion to display only the desired content. This crop is a layer property, all
inputs displayed in this layer will be cropped. Do not confuse this seng with the input crop which is specic
to an input.
On the Transions secon, you can lter which transions you want to see. For Example, you can show just
the Slide, Wipe transions.
Each layer has an opening and a closing transion. The opening eect will be applied when the layer switch
from a source to another source or when the layer is switching from empty and appears with a source.
To set up the duraon of the transion, please see below the ming and duraon sengs. If you want to
force the layer to perform a closing and opening transion, see FORCE TRANSITION.
The Force Transion buon disables the cross-transion between two sources into the same layers. Enabling
the Force Transion, it forces the layer to go out and then go in with the desired eect instead of mixing
directly the two sources.
Enable the Smooth Move to perform a smooth transion on the layer. Disable the smooth
move if you require a constant speed move.