— 12 —
Installation
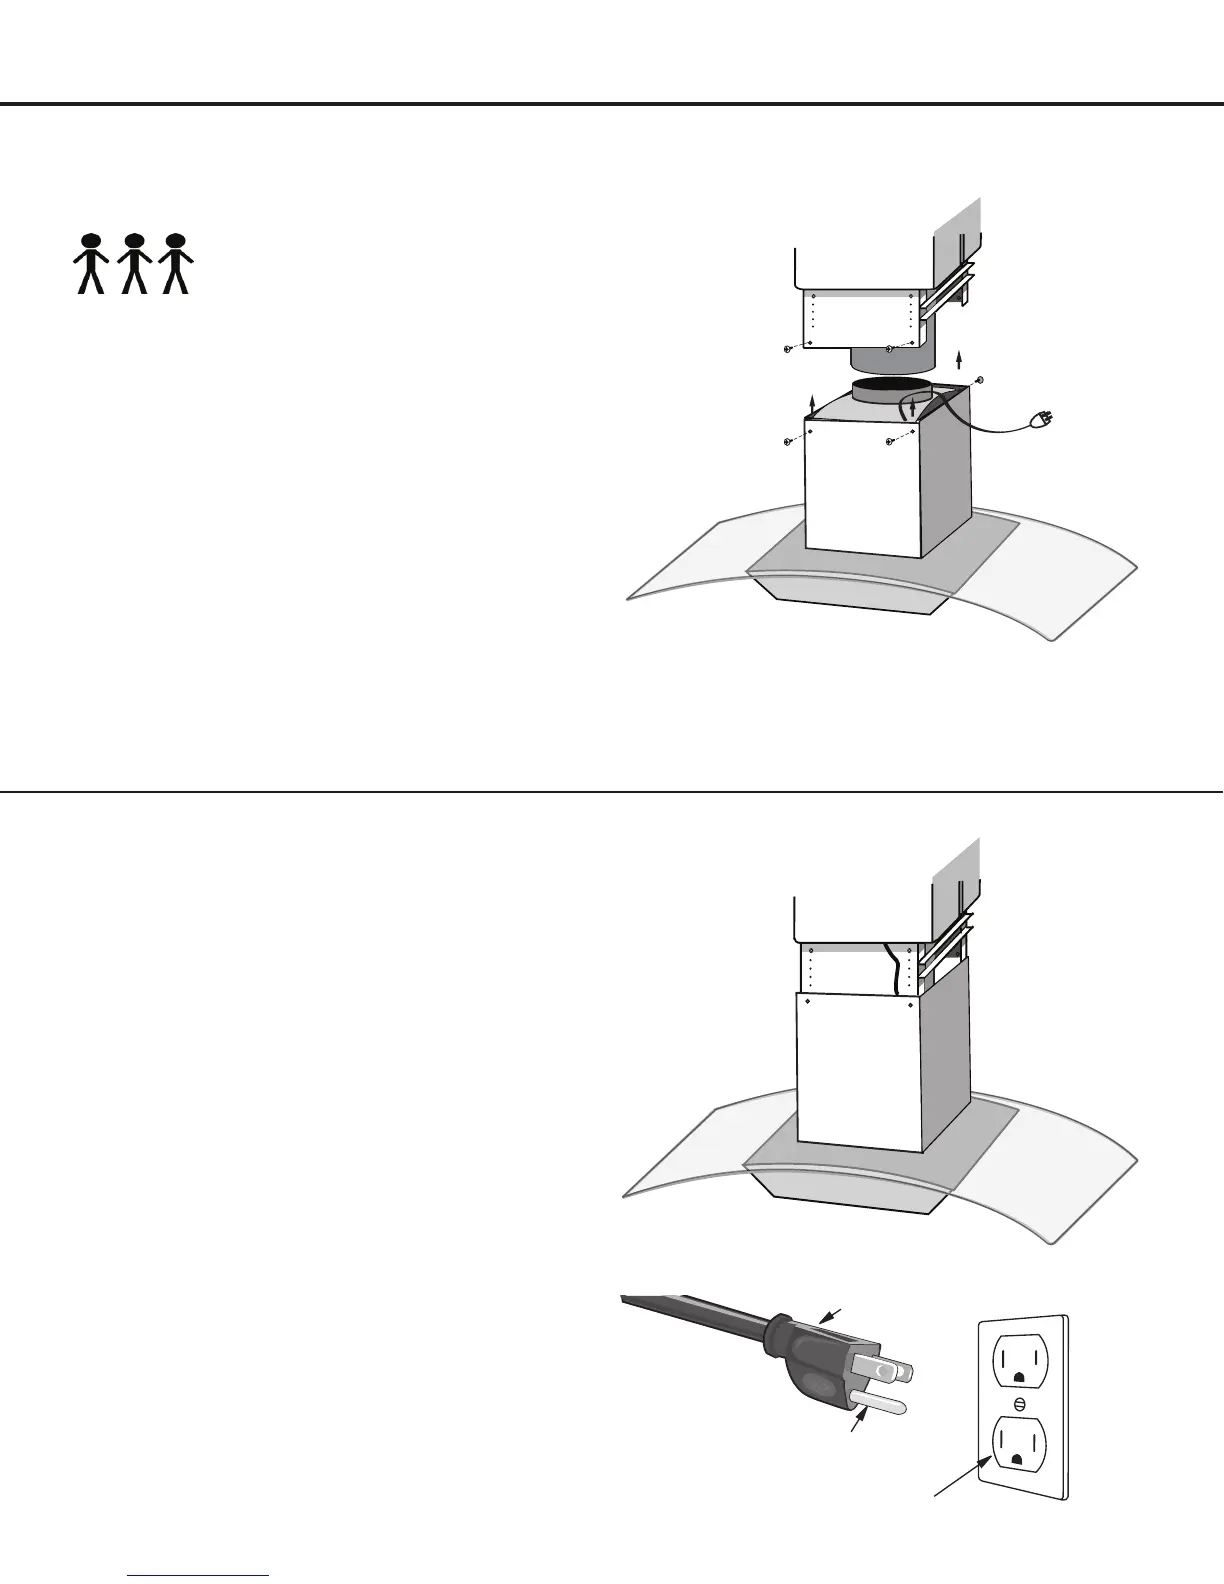
STEP 12
Connect to AC
• Remove the two temporary screws holding the lower
outer decorative chimney piece in place and gently
slide into place.
• Unscrew the upper inner decorative chimney from
the ceiling bracket and lower 6 inches. Have second
person hold the chimney in place so that it does not
slide all the way down.
• Reach in and connect the AC plug into the grounded
ACoutlethaving120V,60Hz.
• Pull up the upper inner decorative chimney and re-
attach to the ceiling bracket.
• SEE IMPORTANT INSTRUCTIONS ON THE
FOLLOWING PAGE.
Ground Plug
3-Prong Receptacle
STEP 11
Install Range Hood
Note: To avoid personal
injury and/or damage to the
range hood, this installation
step requires three people.
• Removethetwobafeltersfromtherangehood.
• With the assistance of two other people holding the
range hood from below, position the lower chimney
bracket onto the motor box of the range hood and
screw together using the four screws provided.
• Secure the ductwork to the damper with duct tape to
make sure joints are secure and air- tight.
• Do not install the duct tape too tightly as this may
preventthedamperapsfromopeningwhichwill
overwork the motor and cause improper functioning of
the unit.
3-Pronged Plug


 To Next Page