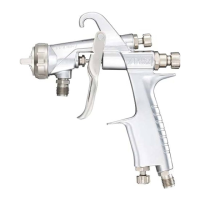
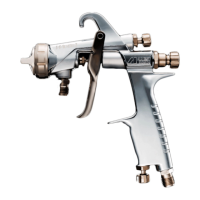
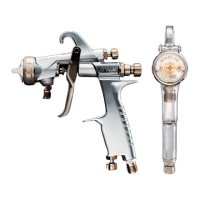
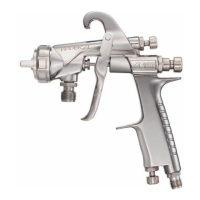
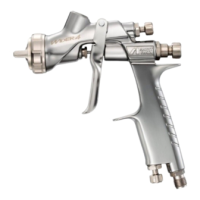
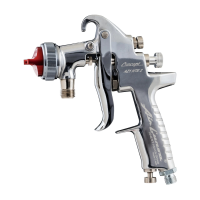
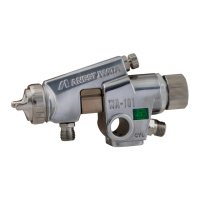
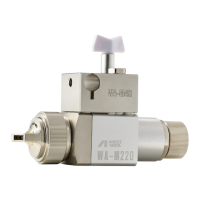
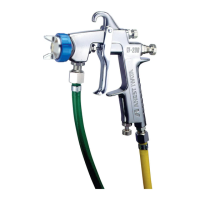
This document describes the ANEST IWATA WIDER1A and WIDER2A automatic spray guns, designed exclusively for painting purposes. Operators must be fully conversant with the instruction manual, including warnings, cautions, and correct handling, before use. The manual should be retained for future reference.
Function Description
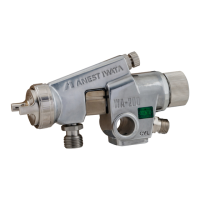
The WIDER1A and WIDER2A are automatic spray guns used for applying paint. They are designed to atomize paint using compressed air, creating a spray pattern for coating surfaces. The guns are compliant with the 2014/34/EU Directive for equipment and protective systems intended for use in potentially explosive atmospheres, indicated by the CE Ex II 2 G Ex h IIB T6 Gb X marking. This marking signifies that the equipment is suitable for use in Group II, Category 2 gaseous explosive atmospheres (Zone 1 & 2), where the explosive substance is gas (Type of Atmosphere: GAS), specifically Ethylene (Explosion Group: IIB), with a maximum surface temperature of 85°C (Temperature Class: T6) and an Equipment Protection Level (EPL) of Gb. The "X" indicates specific conditions for safe use, requiring any static electricity to be discharged and diverted to the ground via a conductive air hose (not included).
Important Technical Specifications
The spray guns have a maximum operating pressure of 0.70 MPa (7.0 bar / 100 psi) and a noise level of 83 dB(A). The recommended spray condition involves measuring 1 meter backwards from the spray gun at a height of 1.6 meters. The maximum operating temperature for the atmosphere is 5°C to 40°C (41°F to 104°F), while the air and fluid temperatures can range from 5°C to 43°C (41°F to 109°F).
Key specifications for various models include:
- WIDER1A-08E2P: 0.8 mm orifice, E2P air cap, 0.29 MPa (2.9 bar / 43 PSI) atomizing air pressure, 150 ml/min fluid output, 190 l/min (7.5 cfm) air consumption, 220 mm (8.7 in) pattern width.
- WIDER1A-10E2P: 1.0 mm orifice, E2P air cap, 0.29 MPa (2.9 bar / 43 PSI) atomizing air pressure, 200 ml/min fluid output, 270 l/min (9.5 cfm) air consumption, 220 mm (8.7 in) pattern width.
- WIDER1A-13H2: 1.3 mm orifice, H2 air cap, 0.29 MPa (2.9 bar / 43 PSI) atomizing air pressure, 250 ml/min fluid output, 260 l/min (9.2 cfm) air consumption, 230 mm (9.1 in) pattern width.
- WIDER2A-12G2P: 1.2 mm orifice, G2P air cap, 0.29 MPa (2.9 bar / 43 PSI) atomizing air pressure, 500 ml/min fluid output, 530 l/min (18.7 cfm) air consumption, 400 mm (15.7 in) pattern width.
- WIDER2A-15K2: 1.5 mm orifice, K2 air cap, 0.29 MPa (2.9 bar / 43 PSI) atomizing air pressure, 270 ml/min fluid output, 330 l/min (11.7 cfm) air consumption, 340 mm (13.4 in) pattern width.
- WIDER2A-20R2: 2.0 mm orifice, R2 air cap, 0.29 MPa (2.9 bar / 43 PSI) atomizing air pressure, 400 ml/min fluid output, 360 l/min (12.7 cfm) air consumption, 320 mm (12.6 in) pattern width.
- WIDER2A-25W1: 2.5 mm orifice, W1 air cap, 0.29 MPa (2.9 bar / 43 PSI) atomizing air pressure, 500 ml/min fluid output, 360 l/min (12.7 cfm) air consumption, 330 mm (13.0 in) pattern width.
The air and fluid connections are G1/4 for WIDER1A models and G3/8 for WIDER2A models. The mass of the guns is 400g (0.88 lbs) for WIDER1A and 420g (0.93 lbs) for WIDER2A.
Usage Features
Connection:
- Fixation: Secure the gun to a fitting stay, aiming it in the spraying direction.
- Air Hose Connection: Connect the atomizing air hose to the "CAP" marked side and the operating air hose to the "CYL" marked side.
- Fluid Hose Connection: Connect the fluid hose to the fluid inlet.
- Initial Cleaning: Before first use, supply thinner to the automatic gun to clean fluid passages and remove rust preventive oil. Incomplete cleaning can cause painting failures like "fish eyes."
- Test Spray and Adjustment: Supply paint, test spray, and adjust air volume, fluid output, and pattern width as needed.
Operation:
- Air Pressure Adjustment: Adjust operating air pressure to 3 to 4 bar (43 to 57 PSI). The three-way solenoid valve orifice should be at least 4mm (0.157 in) and the operating air hose length within 10m (32.8ft) with an inner diameter greater than 6mm (0.236in) to avoid delayed operation.
- Atomizing Air Pressure: With the pattern adjustment set fully open, adjust atomizing air pressure to 3 to 4 bar (43 to 57 PSI) for WIDER1A/WIDER1A-05R/WIDER2A.
- Paint Viscosity: Recommended paint viscosity is 15 to 23 seconds (Ford cup #4), varying with paint properties and painting conditions.
- Spray Distance: Set the spray distance from the gun to the workpiece within 150-200 mm (5.9-7.9 in) for WIDER1A/WIDER1A-05R, and 200-250 mm (7.9-9.8 in) for WIDER2A.
Safety Precautions:
- Fire and Explosion: Sparks and open flames are strictly prohibited. Paints are highly flammable. Avoid ignition sources like smoking or electrical goods.
- Solvent Compatibility: Never use halogenated hydrocarbon solvents (e.g., methyl chloride, dichloromethane) as they can cause cracks or dissolution of the aluminum gun body. Ensure all fluids and solvents are compatible with gun parts.
- Grounding: Securely ground the spray gun using a grounded gun stay with resistance less than 1 MΩ. Check earth stability periodically to prevent fire and explosion from static electric sparking.
- Improper Use: Never point the spray gun towards people or animals. Never exceed maximum operating pressure or temperature. Release air and fluid pressures before cleaning or servicing. Avoid touching the sharp tip of the fluid needle or nozzle during maintenance.
- Personal Protection: Use in a well-ventilated area (e.g., spray booth) to prevent organic solvent poisoning and fire hazards. Always wear protective gear (safety glasses, mask, gloves) to prevent irritation from paint/solvents. Wear earplugs if necessary, as noise levels can exceed 80 dB(A).
- Modifications: Never alter the spray gun or use non-genuine parts, as this can lead to insufficient performance, failure, or accidents.
- Food/Chemicals: Never spray foods or chemicals through this gun, as it can cause corrosion or adversely affect health.
- Malfunction: If anything goes wrong, immediately stop operation and find the cause.
Maintenance Features
General Maintenance:
- Pressure Release: Always release air and fluid pressure before performing any maintenance or inspection.
- Qualified Personnel: Only experienced personnel knowledgeable about the equipment should perform maintenance and inspection.
- Cleaner: Use neutral cleaner with a pH value of 6 to 8 to prevent corrosion.
- Genuine Parts: Only use genuine ANEST IWATA parts for maintenance or repairs.
Cleaning Procedure:
- Empty Paint: Pour remaining paint into another container. Clean fluid passages and the air cap assembly. Spray a small amount of thinner through fluid passages.
- Wipe Down: Clean each section with a brush soaked in thinner and wipe with a waste cloth.
- Avoid Soaking: Do not soak the entire spray gun in solvent, as this can cause malfunction. Avoid soaking the air cap assembly for extended periods.
- Handle with Care: Never scratch the air cap assembly, fluid nozzle, or fluid needle during cleaning. Avoid touching or damaging the tip of the fluid nozzle or needle.
Disassembly and Assembly:
- Fluid Nozzle: Disassemble the fluid nozzle using a ring spanner, box wrench, or optional exclusive spanner. Remove the fluid nozzle after removing the fluid needle set or while keeping the fluid needle pulled to protect the seat section.
- Fluid Needle Assembly: Remove the fluid adjustment set and pull out the fluid needle set from the gun body. Be careful, as the fluid adjustment set is strongly pushed by the fluid needle spring and piston spring. Pull the fluid needle set after loosening the fluid needle packing set to protect the packing set.
- Piston Set: Screw the rear section of the fluid needle set into the piston and pull out the piston set. Be careful not to damage the piston packing when pulling out the piston set.
- Air Valve Seat Assembly: Use a 14mm box wrench. Be careful not to damage the O-ring and seat section when disassembling the air valve seat assembly.
Adjustments:
- Fluid Needle Packing Set: If adjusting, first tighten by hand while the fluid needle set is inserted, then tighten further about 1/6 turn (60 degrees) with a spanner. If tightened too much, the fluid needle set will not move smoothly, causing paint leakage. Adjust carefully while pulling the piston and confirming movement. If tightened too much, first fully loosen it and then tighten again carefully.
- Pattern Adjustment Knob: Turn counterclockwise to fully open, then tighten the pattern adjustment guide into the gun body. If the fluid adjustment set is not fully opened, its tip can contact and damage the gun body set, causing seizure of the thread.
- Fluid Adjustment Assembly: To install, open fully and apply silicone-free grease or oil to the threads. To install/remove, turn the knurled part. To adjust, turn the groove on the knob part. The standard gap between the guide and knob is 2mm for WIDER1A and 1mm for WIDER2A. Do not overtighten. If the fluid adjustment set is not fully opened, its seat section can contact and damage the fluid nozzle, causing seizure of the thread. Over-tightening can deform the nozzle. Do not disassemble the fluid adjustment assembly, as parts may be lost.
Troubleshooting (Where to Inspect):
The manual provides a detailed table for troubleshooting common spray pattern problems (e.g., fluttering, crescent, inclined, split, heavy center) and paint leaks or flow issues. It lists potential causes (e.g., dirt, damage, wear, loose parts, clogged filters) and corresponding remedies (retighten, adjust, clean, or replace parts). For instance, if paint leaks from the fluid nozzle, causes could be dirt/damage on the seat surface, a loose fluid needle adjustment knob, or wear on the needle spring. Remedies include cleaning the seat surface, tightening the knob, or replacing the needle spring.