Rev 05/12/21 pg. 31
Periodic Maintenance
Initial Maintenance (after 10 hours of operation)
After the first 10 hours of operation, follow the procedure below:
Remove the back panel of the instrument.
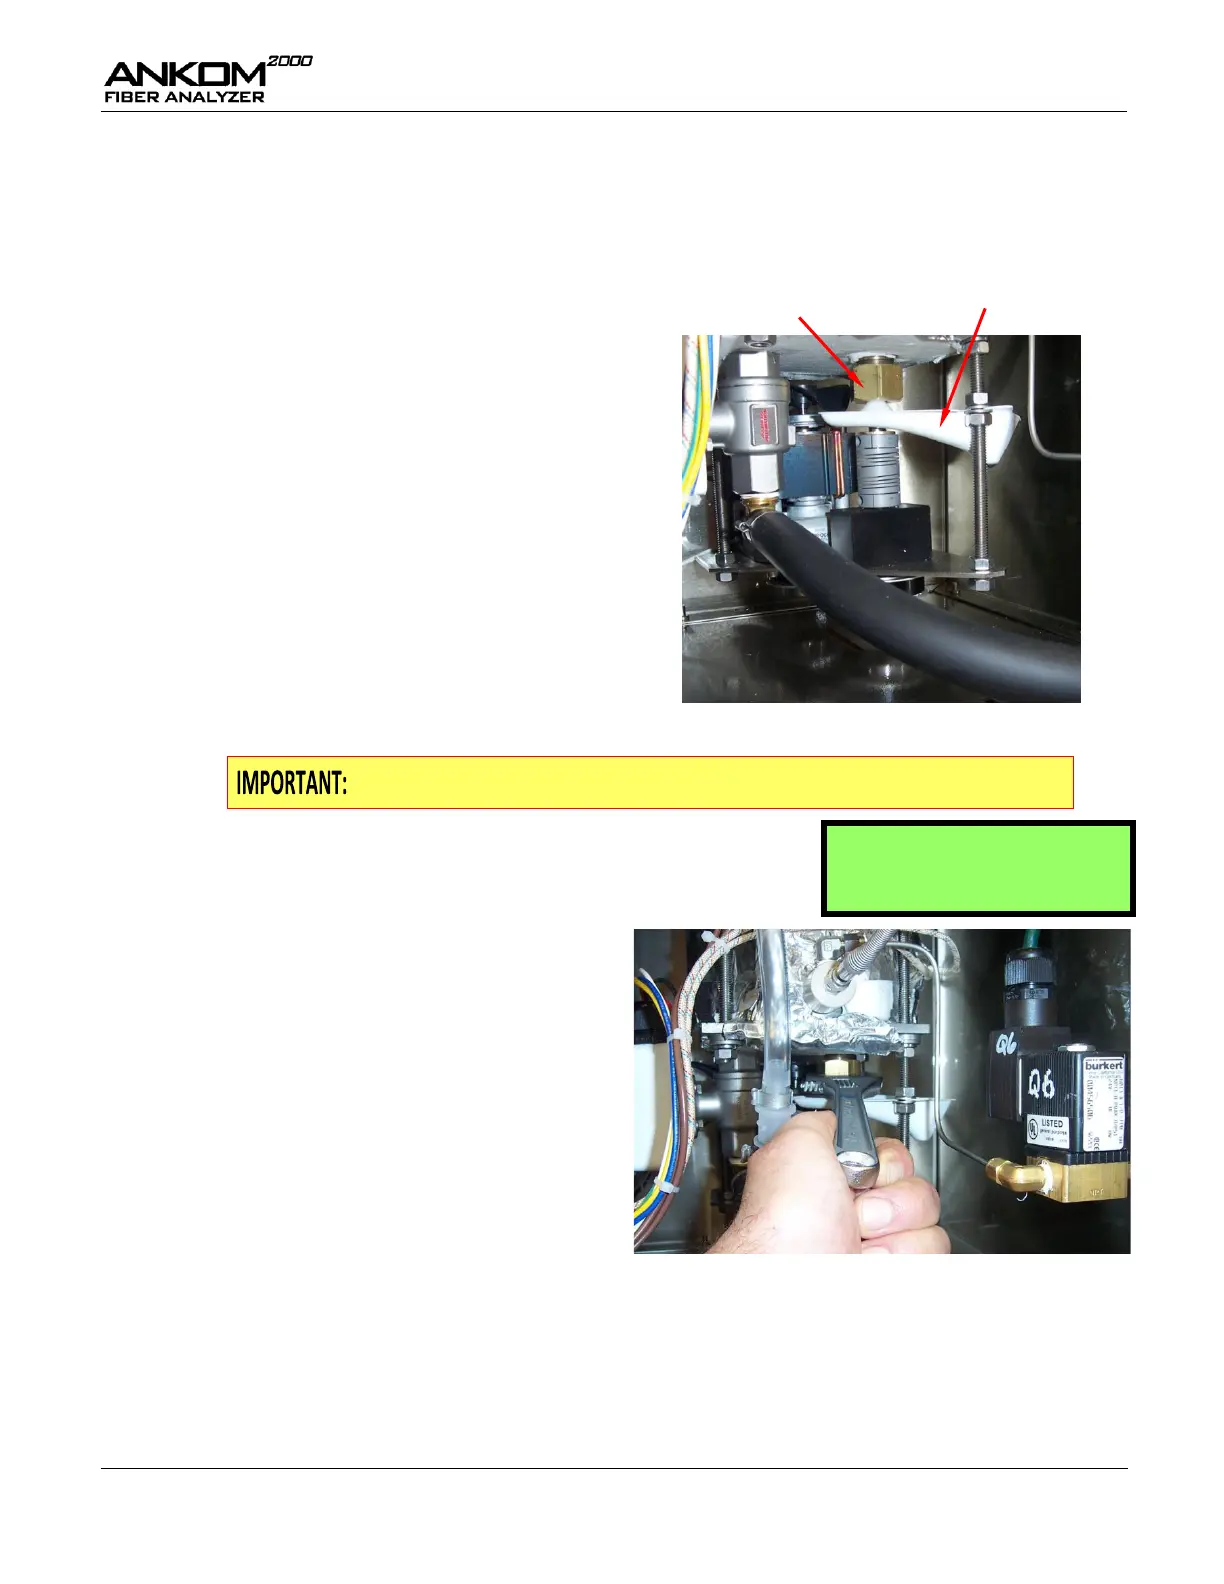
Rear View of instrument with cabinet back removed
Inspect the Maintenance Alert Collector.
Clean any residue from the collector.
Unscrew the filter body (the fixture on the
outside of the instrument that attaches to the
water supply).
Unscrew and clean the metal filter screen.
Reassemble the filter and compression fitting.
Make sure the valve body is tight and the
washer has not come out of the filter body.
Do NOT insert the Bag Suspender into the instrument for this procedure.
Press the arrow keys on the Keypad until you see “Select Flush” on
the Display. Press “ENTER” on the Keypad to turn the agitator on.
When the motor is activated, turn the Packing
Nut to the RIGHT until you hear a change in
the sound of the motor. (The motor will start to
labor as the packing nut gets harder to turn.)
Loosen the Packing Nut slightly until the
motor stops laboring.
Turn off the instrument and re-install the back
panel.
Repeat the Initial Maintenance procedure (steps 1 – 10 above) every month of operation (120 hours) for the first 3
months. After that, execute the procedure once every 2 months.
If you see a leak
If you see a leak, execute the Initial Maintenance procedure above, loosening the Packing Nut 1/16 of a turn. If the
leak continues, replace the packing and agitator.
Maintenance Alert Collector