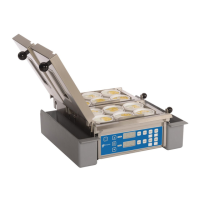
MANUAL EGG COOKER/STEAMER
8
P/N 1011407 Rev. D 03/18
McDonald’s
Troubleshooting for Under Cooked Eggs
1. Level unit - adjust feet if necessary. The unit must
be level before use. Before using the unit, adjust
the legs of the unit as needed and use a level. If a
level is not available, pour a small amount of wa-
ter directly onto the center of the cool grill surface.
The water should pool in the middle and not drain
toward a certain section of the unit. Make adjust-
ments as required. Turn legs clockwise to shorten
or counter-clockwise to lengthen. See image
below (Side view of unit).
Troubleshooting Eggs leaking out of Egg
Rings
Egg Ring Replacement depends on usage but in gen-
eral, Egg Rings should be replaced yearly. If eggs begin
to leak out of the Egg Rings:
1. Inspect the Egg Rings for damage regularly. Clean
the unit and ip the Egg Rings 180° degrees or
replace the Egg Rings if required.
2. Egg Rings should be installed in the Egg Rack so
they can move up and down to ensure they are
ush against the grill surface. If the Egg Rings
do not move freely up and down within the Rack,
remove the Egg Ring and reshape it to its nor-
mal form, and reinstall. Replace the Egg Ring if
required.
3. The Egg Rings should sit ush against the grill
surface and hold the egg inside the Egg Ring
while cooking. Review the section titled Best
Practices/Troubleshooting for Under Cooked Eggs
in this manual. Inspect the Egg Rings for damage.
Flip or replace as required.
Turn Leg
Clockwise
to shorten.
Turn Leg
Counter-clockwise
to lengthen.
2. Be sure you are using the correct cycle to cook
eggs. Refer to the section titled Timer Interface in
this manual.
3. Do not use cold water in trough. Use room tem-
perature water. Warm water is preferred.
4. Ensure trough is lled to the tup and not over/
under-lled.
5. Ensure Start button is pressed promptly after lid is
closed and trough is lled.
6. Yolks must be broken with spatula.
7. Clean the grill surface after each cooking cycle.
8. Use the correct amount of butter/oil on grill sur-
face.
9. Conrm ready light is solid green prior to starting
another cooking cycle.
10. Check grill temperature according to the section
titled Checking Grill Platen Temperature in the
Maintenance section of this manual.
11. Regularly check the holes in the trough to ensure
there are no clogs.
BEST PRACTICES
 Loading...