8.3 Wire for Power
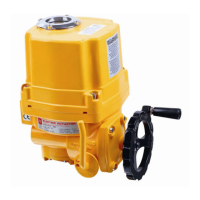
8.3.1 Remove the metallic plug and insert cables, pls use 3/4” explosion-proof joint in male thread or
explosion-proof flexible tube.
8.3.2 If the joint is mismatch to the actuator, will result in destroying the sealing that can not meet the enclosure
requirement.
8.3.3 Adopt water-proof arrangement when use wire pipe.
8.3.4 Take off shell cover,Press down the metallic dome in the hole of terminal by screwdriver, meanwhile, insert
the leadwire to lateral cavity. And then remove screwdriver.
Picture10 Picture 11
9. Debug Description
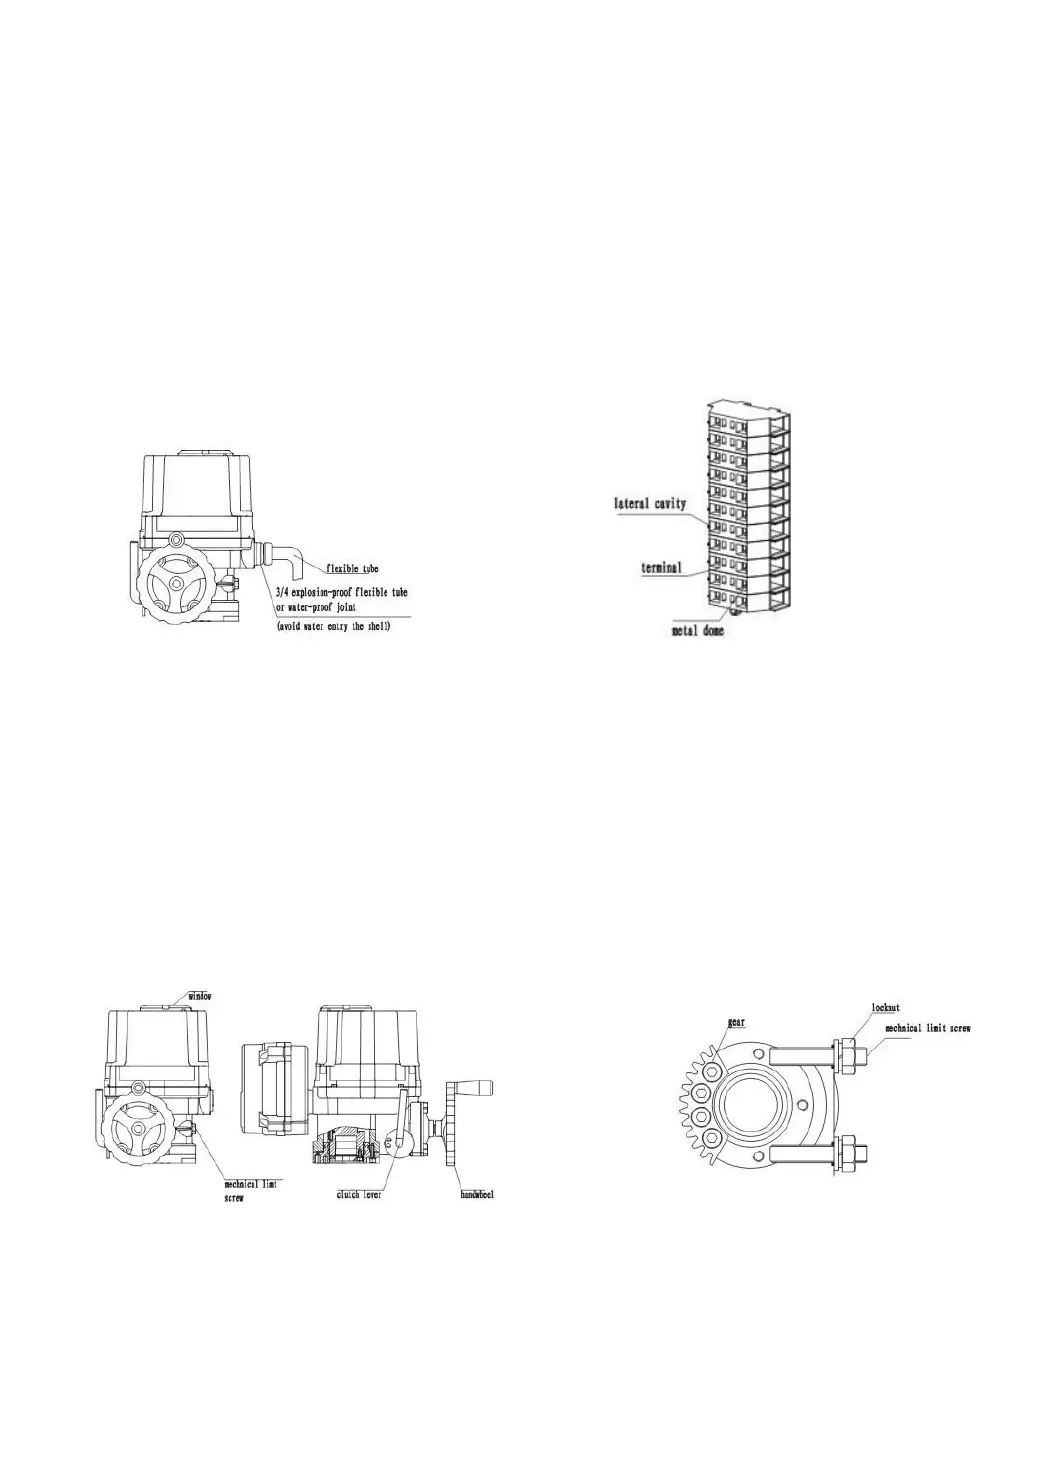
9.1 Adjustment of Mechanical Limit
Loosen the mechanical limit stoppers and locknuts, turn handwheel one circle, one side move the clutch
handle in left until occlude, continue to turn the handwheel until the actuator move to the full-close position. Turn
nuts until touch the fan-shaped gear, then turn two circles in anticlockwise direction, tight the locknuts at lastly. It
is the way to set the full-closed position of actuator , the same way to set full-open position.
Picture 12 Picture 13
 Loading...