14
MTX-R 2nd Stage Maintenance Manual
FINAL TESTING
Setting the Lever Height
2. Screw the Inline
Adjustment Tool onto
the threaded end of the
2nd stage. Attach the
rst stage to a cylinder
containing 207 Bar
(3000 psi). Slowly open
the cylinder valve and
pressurise the reguator.
3. Purge the 2nd stage 2
to 3 times to check there
is air ow.
1. Attach an Inline
Adjustment Tool (AT72)
to a regulator hose
on a correctly set rst
stage. Refer to the
appropriate rst stage
technical manual before
attempting to perform
any adjustments.
4. Strike the purge
button again 3 times to
check there is no free
ow. If the 2nd stage
does freeow check
the following 3 notes to
determine the reason.
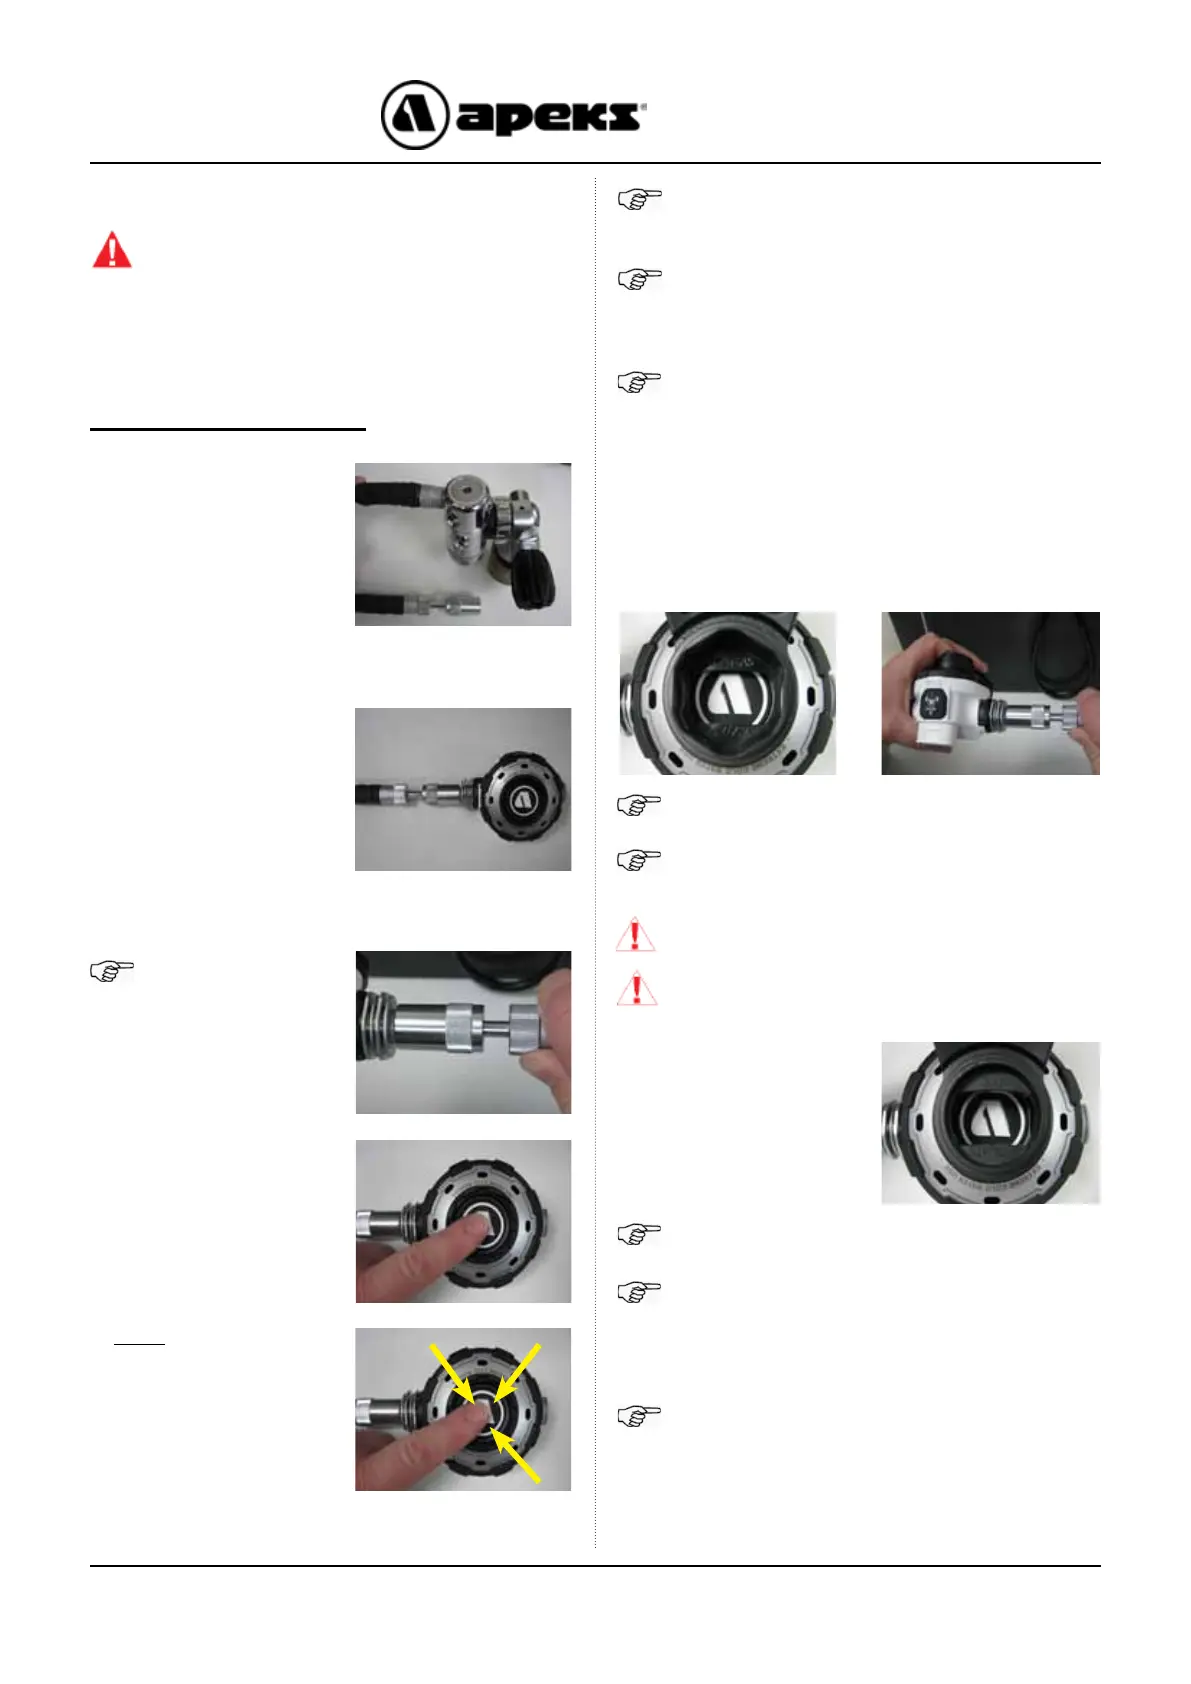
5. Place the “GAS FLOW” side of the testing puck
section on the Front Cover Tool (AT94) over the purge
button.There should be a ow of air, if not adjust the
inline adjuster counter clockwise in 1/16 turns until
there is a steady ow.
NOTE: It is important to ensure that the rim of
the tool is concentric with the rim of the purge
button throughout. Pressing on the logo with the
tool misaligned will not measure the purge button
depth and therefore give incorrect results.
NOTE: If there is gas ow, keep the puck on
“NO GAS FLOW” and turn the inline adjuster
clockwise in 1/16 increments until the ow
ceases. Turn the puck back to “GAS FLOW” to
make sure there is still air ow.
Warning: Compressed air can be highly
explosive and is dangerous if misused.
Ensure cylinder valve is opened slowly. Use
eye and ear personal protective equipment
when performing any tests involving
compressed air.
6. Turn the puck section
of the adjustment tool to
the opposite side “NO
GAS FLOW” to check
that the lever is set
correct and there is no
ow of air.
NOTE: If the 2nd
stage is leaking
turn the inline
adjuster clockwise
until the leaking
stops.
NOTE: Check that the two ats and the two
Lever feet engage in the tabs of the Blanking
Piece. Refer to step 18 on page 12.
NOTE: Check that the Venturi lever body is lined
up with the venturi blank. Refer to step 15 on
page 11.
NOTE: Check the lever is vertical. Refer to steps
20 & 21 on page 12
CAUTION: The air ow should be continuous
with no uttering
NOTE: Keep the puck in place whilst making
adjustments
CAUTION: Free ow test should be done
every time the lever height has been adjusted.
NO GAS
MTX/ATX
NOTE: “NO GAS” will be visible when performing
gas ow setting.
GAS
MTX/ATX
NOTE: “GAS” will be visible on the tool when
checking no gas ow.
 Loading...


