18
MTX-R 2nd Stage Maintenance Manual
CAUTION: Ensure Diaphragm is seated
correctly and not creased.
Before tting hose, carry out vacuum test by
holding thumb over Valve Spindle (17) to seal and
trying to breathe through mouthpiece outlet port.
No air should be inhaled.
This Ends the Conversion Procedure,
Proceed to Final Testing
NOTE: If your facility is equipped with a test bench,
remove the mouthpiece as described on page 6.
General instructions for performing bench tests are
located in the section, “Final Testing” on page 14.
CAUTION: Excessive tightening of the Heat
Exchanger will damage the Blanking Piece
and Case.
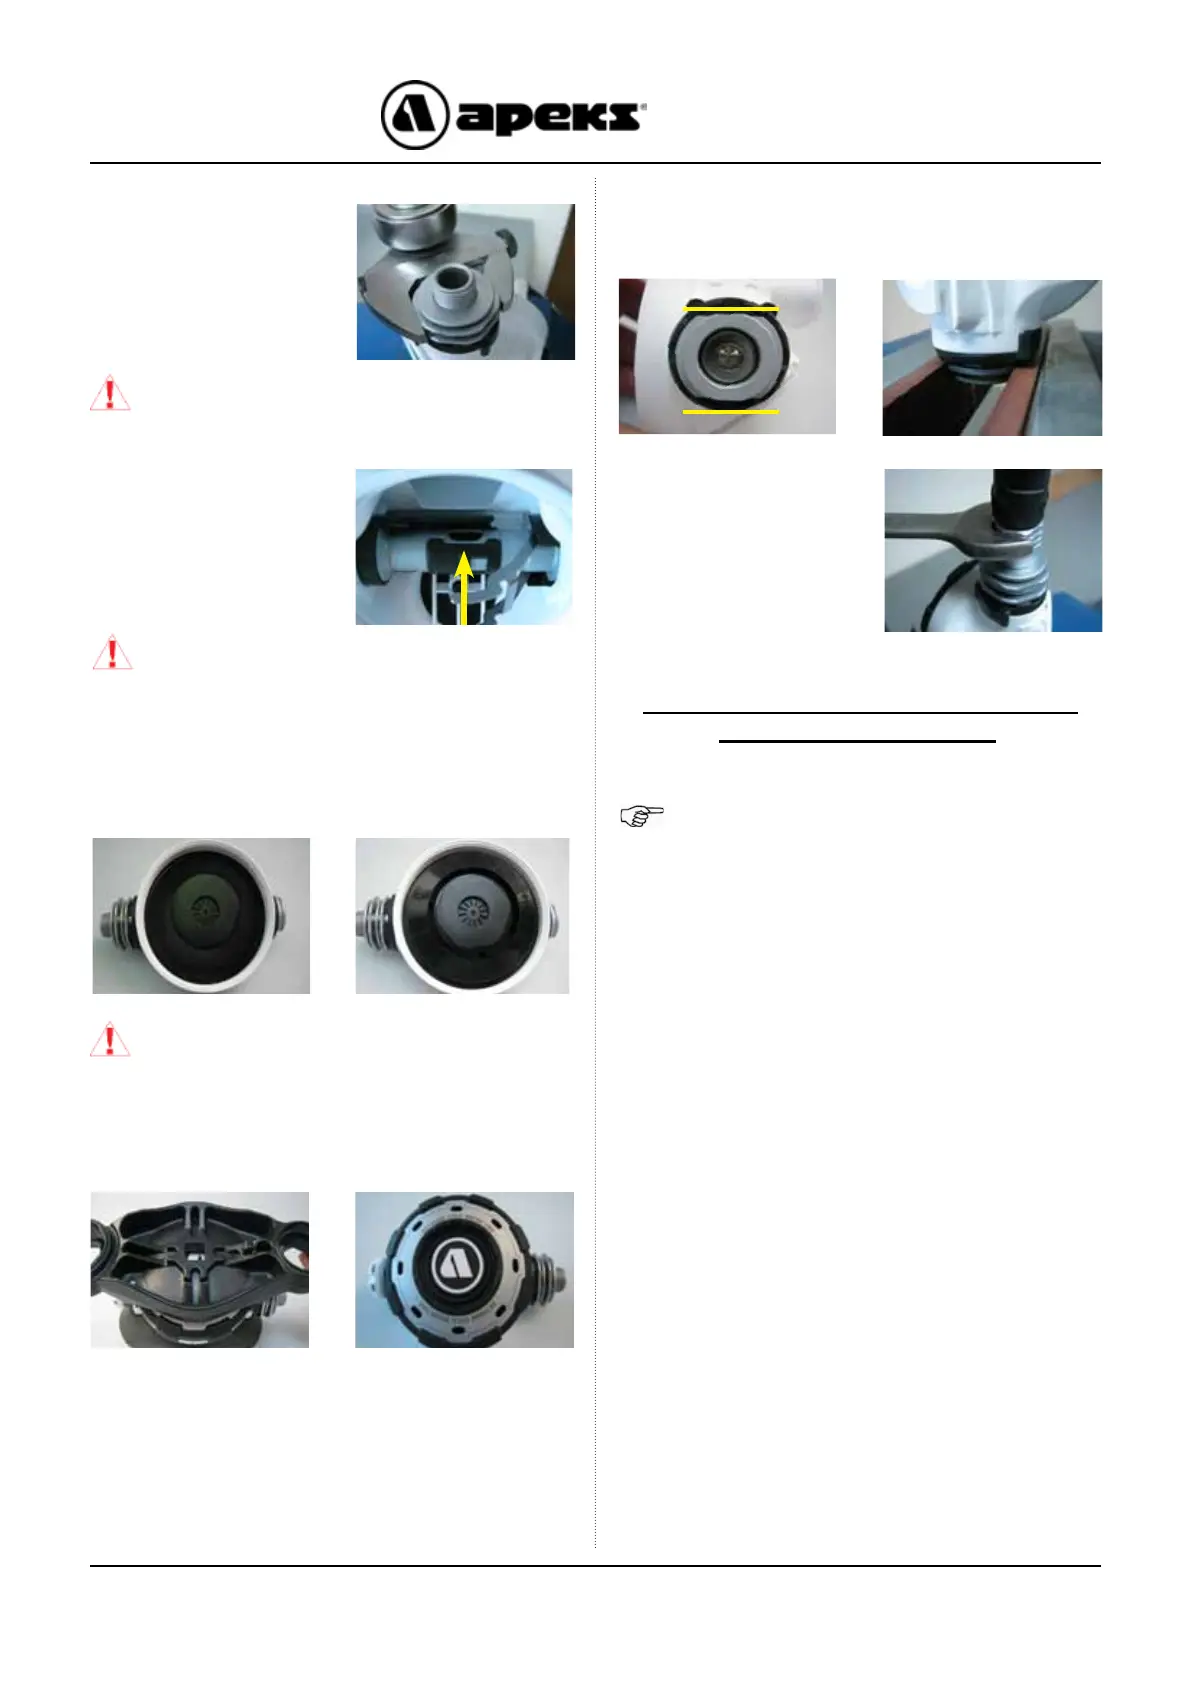
16.Using an 28mm
crows foot, tighten the
Heat Exchanger (9) to
a torque of 3 Nm (2.2
ft/lb).
CAUTION: Ensure that the Lever is vertical
after tightening.
20. Fix the second stage into a soft jawed vice as
explained in section 15.
21. Screw the Hose
onto the second
stage. Using an 11/16”
crowsfoot and torque to
5Nm (
3.7 ft/lb).
18. Position the Diaphragm (4) into the Case (6). Using
your nger, work the edges of the Diaphragm into place so
it sits evenly in the Case . Install the Diaphragm Cover (3)
into the Case, over the Diaphragm.
17. Ensure the Valve
Spindle hole points to the
top of the case.
19. Screw the Case Cover (2) onto the Case (6). Using
Tool AT94 tighten the Cover until it stops. Conrm that the
Purge Button is properly aligned.

 Loading...


