7
XL4 2nd Stage Maintenance Manual
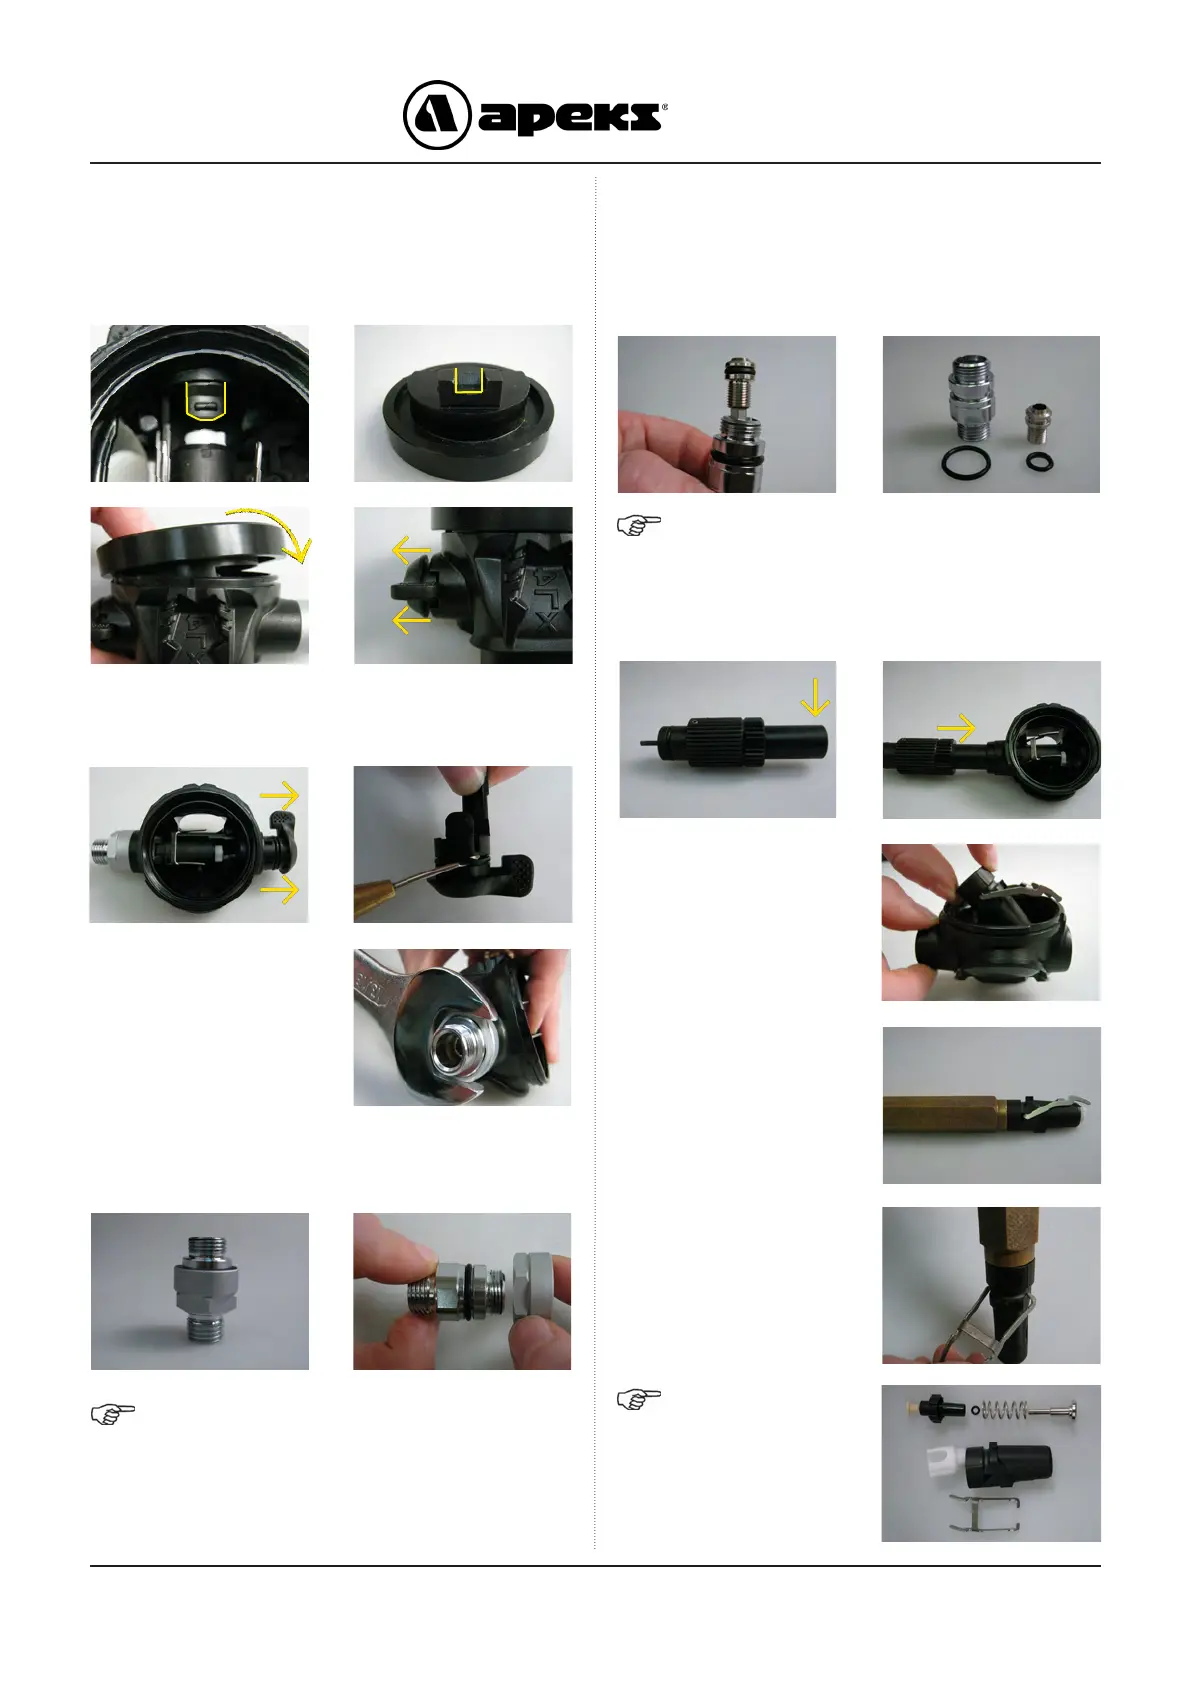
8. To remove the Venturi Lever (9) from the Case (13),
position the lever vertically so that the tab is visible as
shown in the rst image below. Locate the venturi lever
removal tool (AT77) slot on the venturi lever, then press
down on the opposite side to push out the venturi lever.
9. Totally slide out the Venturi Lever (9) from the body (13).
Remove the ‘O’ ring (10) from the Venturi Lever (9) taking
care not to scratch the ‘O’ ring Groove.
10. Using a 13/16” Spanner
unscrew the Inlet Shroud
(18).
11. The Inlet Shroud assembly will remove as one. To
separate grip the 3/8” regulator hose thread on the Inlet
Shroud Fitting (20) and slide off the Inlet Shroud (18).
NOTE: There will be some slight resistance
removing the two parts above due to the O Ring
(19) underneath the Inlet Shroud (18).
12. Using a 5mm Hex Key (AT37) unscrew the Valve Seat
(16) from the Inlet Shroud Fitting (20). Once satised that
the thread has disengaged, the Valve Seat may need a little
push as the O ring will be holding it in the bore of the Inlet
Shroud Fitting. Remove O Rings (19) and (17).
NOTE: Hold the Inlet Shroud Fitting and unscrew
the Valve Seat clockwise.
13. To remove the spindle assembly from the Case (13) use
the opposite end of the cracking effort adjuster tool (AT76) to
push it out.
14. Once the Lever
assembly is free from
the Case (13) push it
backwards towards the
Venturi Lever hole, then lift
out as shown.
15. To remove the Lever
(15) from the Spindle
Body (14) screw the
AT48 tool into the spindle
to compress the spring.
Carefully pull one of the
legs out of the Valve Body
and then ease the second
leg out. Separate the
Shuttle Valve assembly
(22-27) as shown below,
making sure that the ‘O’
ring (25) is removed from
the Shuttle Valve (26).
NOTE: NOTE:
O-Ring (25) may
remain in the shuttle
valve (26) when
disassembled, make
sure it is removed
before proceeding.

 Loading...