Do you have a question about the Apeks XL4+ and is the answer not in the manual?
Instructions on how to adjust the lever setting for optimal performance.
Method to check for air leaks using a test tank.
The document provided is a technical maintenance manual for the Apeks XL4 Second Stage regulator, including the XL4+ variant. This manual is intended for authorized technicians and outlines the procedures for the correct service and repair of these diving regulators.
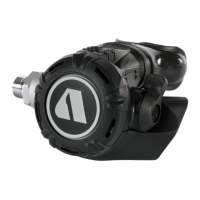
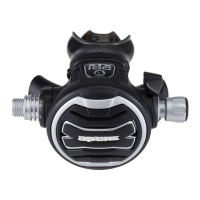
The Apeks XL4 Second Stage regulator is a critical component of a scuba diving system, responsible for delivering breathable air to the diver on demand at ambient pressure. It functions by reducing the medium pressure air supplied by the first stage regulator to a pressure suitable for breathing. Key features of the second stage include a mouthpiece for the diver, a purge button to clear water, and a venturi lever to adjust breathing performance.
The primary function of the XL4 Second Stage regulator is to provide a comfortable and consistent supply of air to the diver. When the diver inhales, a diaphragm inside the second stage flexes inward, pushing a lever that opens a valve. This allows medium pressure air from the first stage to flow into the second stage and then to the diver's mouth. When the diver exhales, the diaphragm returns to its resting position, closing the valve and allowing exhaled air to exit through the exhaust valve.
The regulator incorporates a venturi lever, which allows the diver to control the airflow characteristics. In the "+" position, the venturi effect is maximized, assisting airflow and making breathing easier, particularly at depth or during strenuous activity. In the "-" position, the venturi effect is reduced, which can help prevent free-flow when the regulator is not in the diver's mouth. The purge button, when pressed, manually opens the valve, allowing a burst of air to clear water from the regulator housing.
The XL4 Second Stage is designed for ease of use and reliability in underwater environments. It connects to the first stage regulator via a medium pressure hose. The mouthpiece is designed for comfort and secure fit, ensuring a good seal to prevent water ingress. The exhaust tee efficiently directs exhaled bubbles away from the diver's face, improving visibility. The overall design prioritizes smooth and effortless breathing, which is crucial for diver comfort and safety.
The maintenance manual details a comprehensive set of procedures for disassembling, inspecting, reassembling, adjusting, and testing the XL4 Second Stage regulator. These procedures are critical to ensure the regulator performs safely and reliably.
Disassembly: The disassembly process involves carefully removing components such as the mouthpiece, exhaust tee, clamp ring, diaphragm, inner locking ring, friction ring, venturi lever, inlet shroud, seat, lever, spindle body, shuttle valve, and various o-rings. Specific tools are required for certain steps, such as the venturi lever removal tool and the locking ring tool, to prevent damage to delicate parts. Technicians are cautioned to use only plastic or brass o-ring removal tools and avoid hardened steel instruments to protect sealing surfaces.
Inspection: Before reassembly, all parts, both new and reused, must be thoroughly inspected. This includes checking for cracks, deep scratches, excessive wear and tear, and distortion. Sealing faces, grooves, and bores are meticulously examined for scratches. The front cover assembly, venturi lever tab, spindle body, and exhaust valve are specific areas requiring close attention. The exhaust valve, if in good condition, can be reused, but any sign of deterioration necessitates replacement.
Cleaning and Lubrication: A dedicated procedure (Procedure A) outlines the cleaning and lubrication requirements, especially for nitrox compatibility. Brass and stainless steel parts are pre-cleaned in soapy water, then ultrasonically cleaned, potentially with white distilled vinegar for stubborn deposits. Anodized aluminum, plastic, and rubber parts are cleaned with warm soapy water and a soft nylon brush. All parts are rinsed with fresh water and blown dry with filtered air. O-rings are lubricated with Christo-Lube® MCG-111, applied as a very light film to prevent attracting particulate matter. Technicians are instructed to wear powderless latex gloves to prevent contamination from skin oils.
Reassembly: Reassembly follows a reverse order of disassembly, with specific instructions for positioning components and ensuring proper alignment. Mandatory replacement parts, such as o-rings and the MP seat, must be replaced with new, genuine Aqua Lung or Apeks parts. The exhaust valve, if replaced, requires careful threading and trimming. The lever and shuttle valve assembly are reinstalled, ensuring the lever has a full range of movement and does not catch.
Adjusting & Testing: After reassembly, the regulator undergoes a series of adjustments and tests.
Torque Specifications: The manual provides specific torque values for critical connections, such as the inlet shroud (27 in-lbs / 3 Nm) and the MP Flex Hose (45 in-lbs / 5 Nm), to ensure secure assembly without over-stressing components.
Test Bench Specifications: Detailed conditions and specifications for leak tests, medium pressure (MP) checks, and opening effort tests are provided, ensuring consistent and accurate testing.
The manual emphasizes the importance of following each step exactly, using genuine parts, and performing service in a clean, well-lit, and equipped work area. It also highlights the need for proper documentation of all inspections and overhauls to maintain the Limited Lifetime Warranty.
| Type | Regulator |
|---|---|
| Series | XL4+ |
| Second Stage Type | Pneumatically balanced |
| Environmentally Sealed | Yes |
| Cold Water Suitable | Yes |
| First Stage | XL4 |
| First Stage Material | Marine brass |
| First Stage Type | Diaphragm |
| Second Stage | XL4+ |
| First Stage Ports | 4 LP, 2 HP |
| Material | Chrome-plated brass |
| Nitrox Compatibility | Up to 40% O2 |