6
XTX FSR & FST First Stage Regulator Maintenance Manual
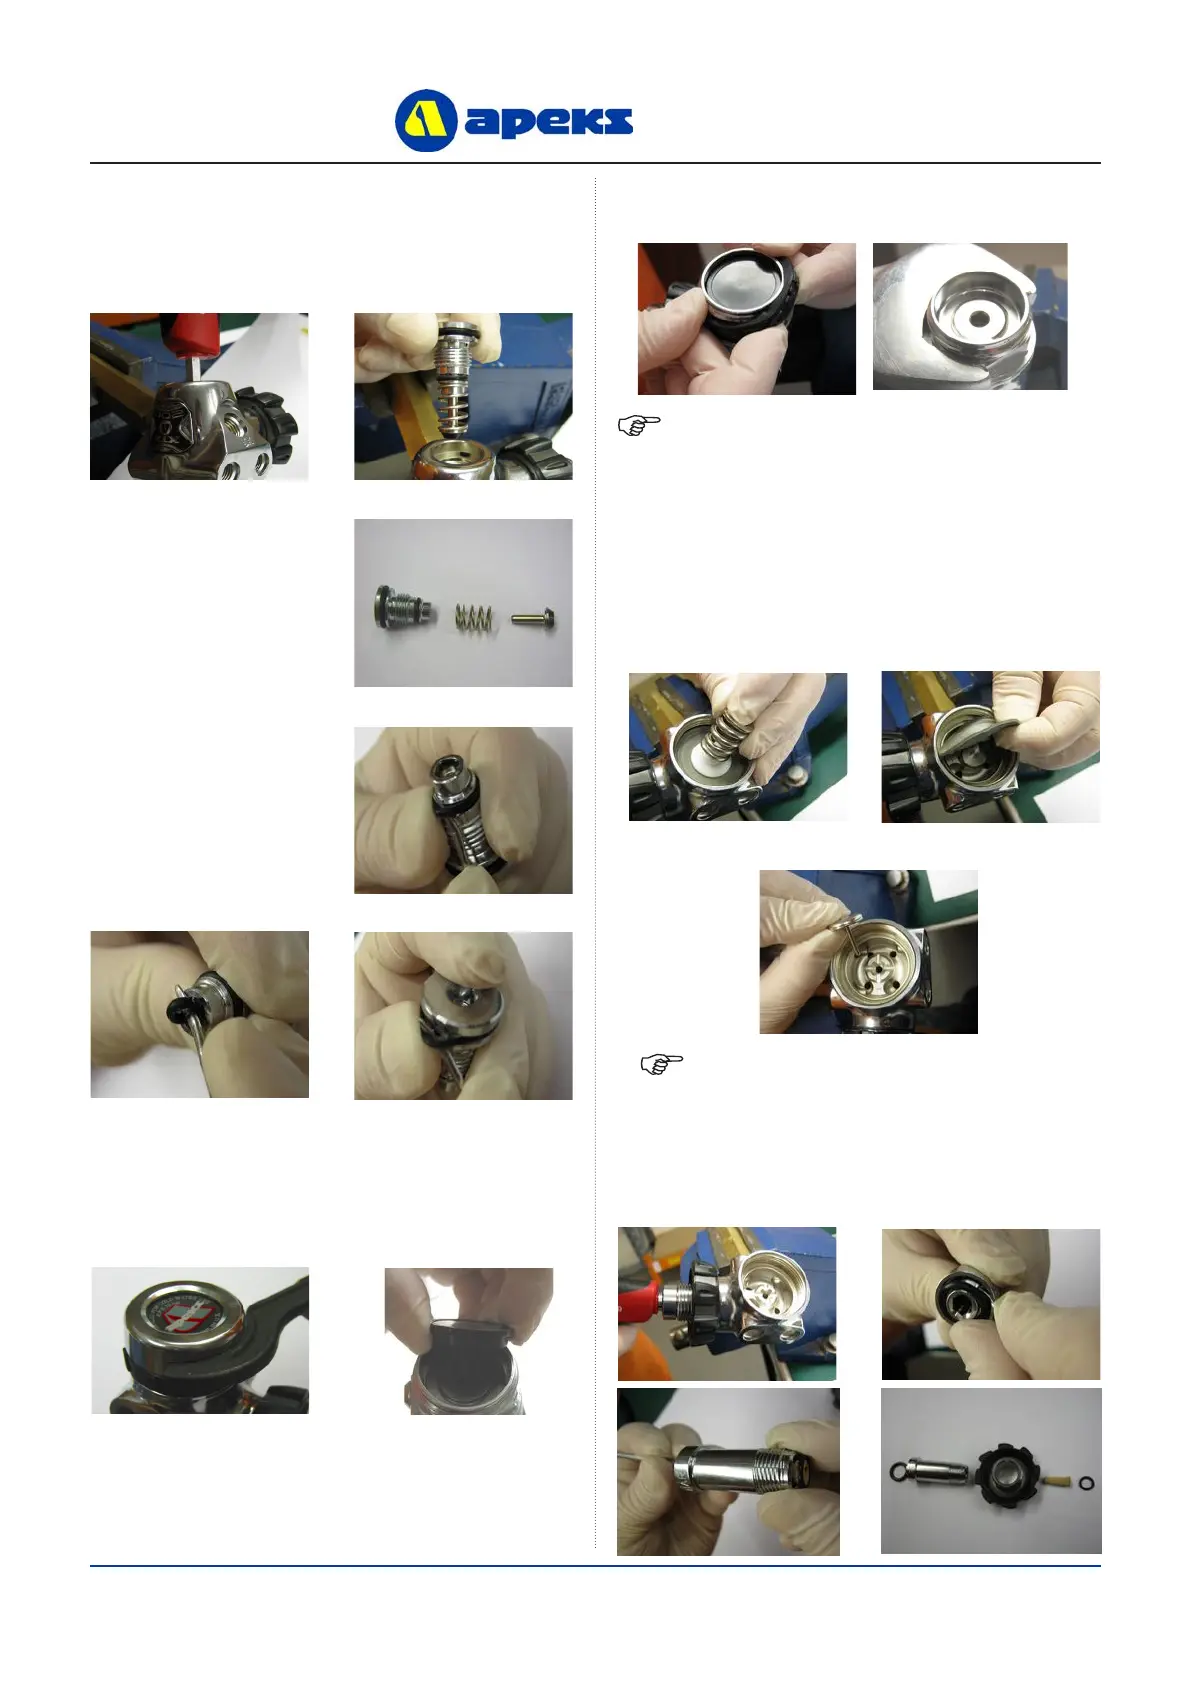
Removal of Balance Plug Assembly
Removal of Dry Sealed Chamber
NOTE: If the First Stage has a DIN Connection, go
to step 13: if it has a Yoke Connection follow step 14.
Removal of Din Connection
NOTE: The thickness of the spanner must not
exceed 11mm or it will not t between the thread and
the ange. The correct spanner can be purchased
from Apeks (PN AT47)
6. Using a 6mm Allen key unscrew the Balance Plug (18)
and withdraw the Balance Plug assembly.
7. Separate the Balance
Plug assembly by
pulling on each end.
8. Remove ‘O’ Rings
(16,12,17) from the
Balance Plug (18),
taking care not to
scratch the ‘O’ Ring
grooves.
9. Using a C Spanner (PN AT30) unscrew the
Environmental End Cap (1). Remove the Load
Transmitter (3) from inside the Diaphragm Clamp (6).
10. Remove the Moulded Ring (5) and using a 34mm
open ended spanner unscrew the Diaphragm Clamp (6).
11. Remove the Spring (7) & Spring Carrier (8). Replace
three of the MP blanking plugs (no ‘O’ Rings required)
and screw them in nger tight. Put the nozzle of a
compressed air blow gun in the remaining MP port and
blow a sharp blast of air to remove the diaphragm (9).
Remove the MP blanking plugs.
12. Remove the Valve Lifter (10) from the Valve Body (11).
13. Using a 6mm Allen key, unscrew the DIN Connection
Assembly and separate into four pieces. Remove the ‘O’ Ring
(23) from the end of the Handwheel connector (30).

 Loading...