7
XTX FSR & FST First Stage Regulator Maintenance Manual
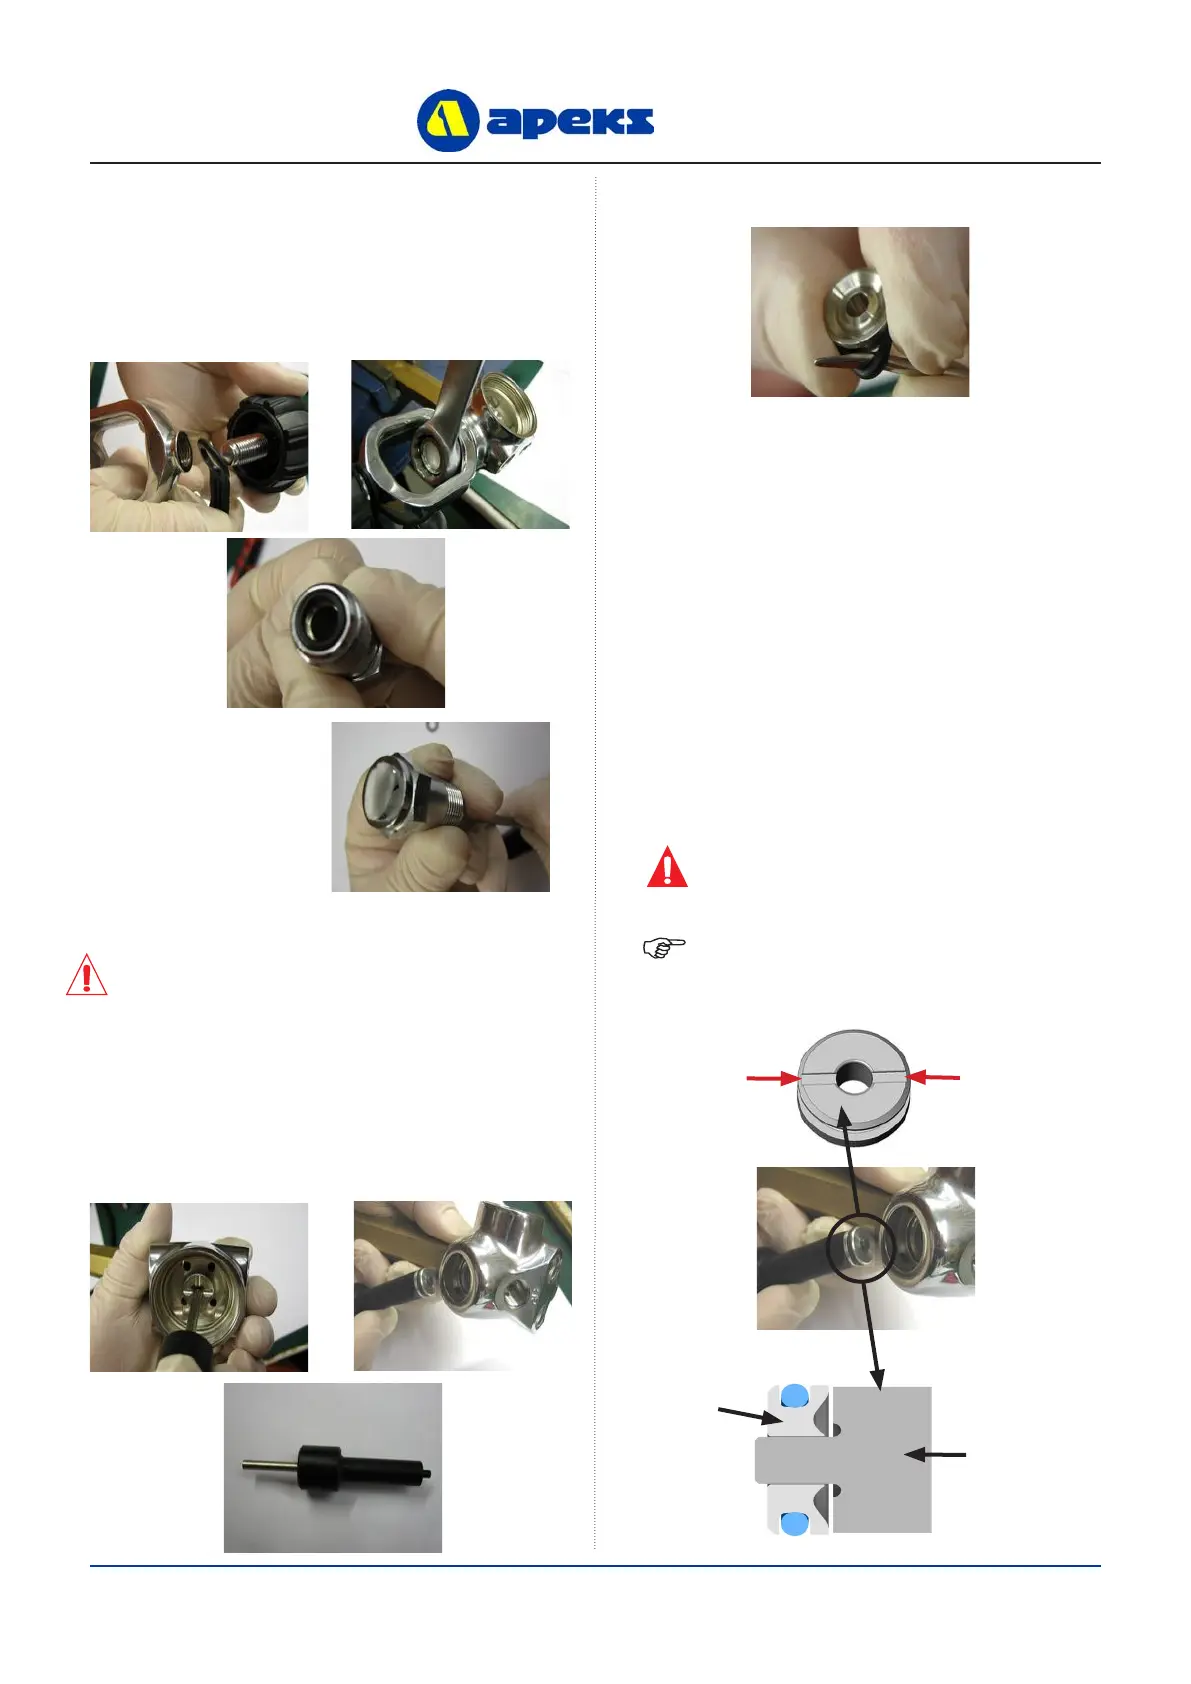
Removal of Yoke Connection
Removable
HP Valve Seat
XTX200 HP
Seat Tool
(PN AT53)
14. Unscrew the Yoke Clamp Screw (24) and remove the
Protective Cap (22) from the Yoke Clamp (19). Using a
3/4” A/F spanner, loosen the Yoke Clamp Connector
(20). Unscrew the Yoke Connector and Yoke Clamp.
Remove the ‘O’ Ring from the Yoke Clamp Connector
(20).
15. Insert a dowel
through the open end
of the Yoke Clamp
Connector (20) and
push out the Disc
Filter (21).
Removal of Removable HP Valve Seat (FSR Only)
CAUTION: Before proceeding, make sure
you are working over a padded work
surface: otherwise, the Removable HP Valve
Seat (13) may be damaged during removal.
16. To remove the HP Valve Seat (13) from the FSR Valve
Body (11) locate the end of the HP Seat Tool (PN
AT53) inside the small hole. Gently slide the tool into
the hole, this will push the HP Valve Seat out of the
bottom of the Valve Body (11).
17. Remove the ‘O’ Ring (12) from the HP Valve Seat (13).
This Ends Disassembly
Before starting reassembly, perform parts cleaning
and lubrication according to the procedures
outlined in ‘Cleaning & Lubrication’ on page 15.
REASSEMBLY PROCEDURES
Fitting of Removable HP Valve Seat (FSR Only)
1. Install a new lubricated ‘O’ Ring (12) onto the
Removable HP Valve Seat (13). Locate the Removable
HP Valve Seat onto the end of the HP Seat Tool (PN
AT53). Ensure that the seating face of the Valve Seat
is against the Seat Tool. Firmly push the Seat Tool
into the Valve Body (11) until the Removable HP Valve
Seat is located at the bottom of the bore.
WARNING: The regulator will not operate if the
Removable HP Valve Seat is inserted into the Valve
Body incorrectly.
NOTE: A slot on the at face of the HP valve seat has
been added to identify the way of assembly

 Loading...