7
XTX Second Stage Regulator Maintenance Manual
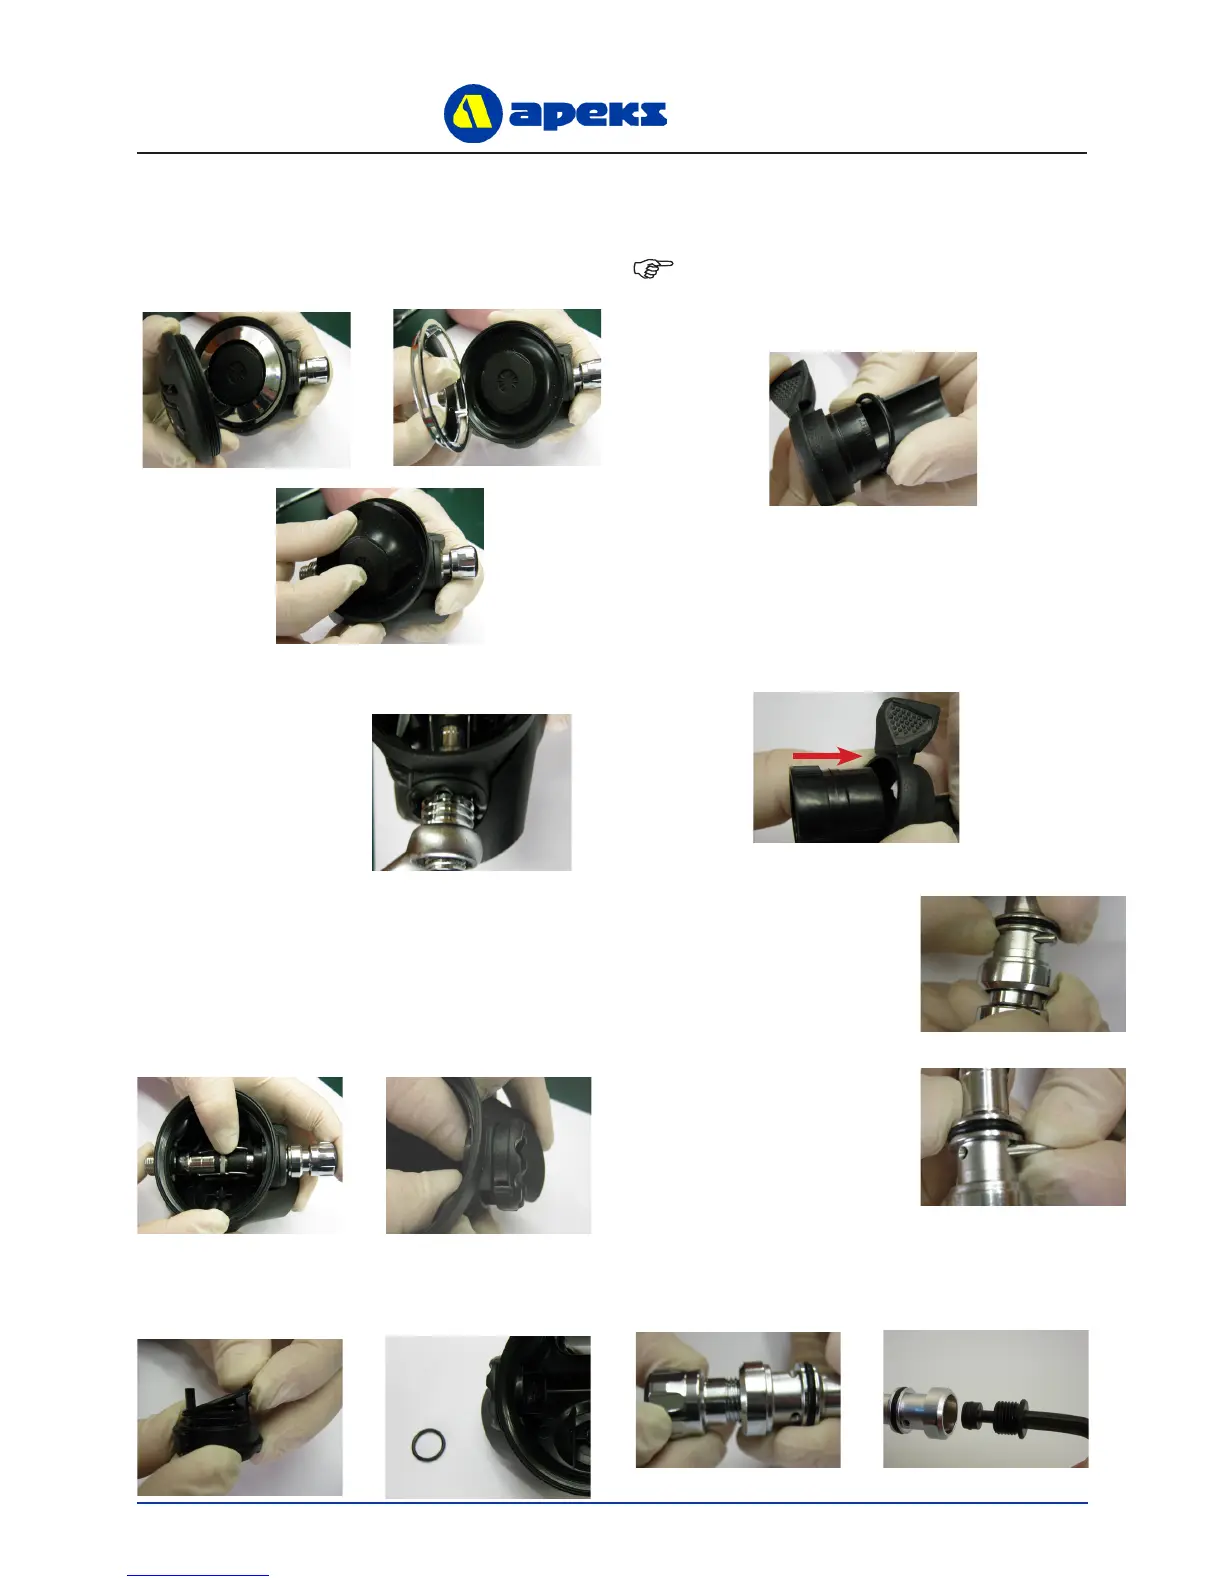
Removal of valve assembly
NOTE: The Venturi Lever may have come out
with the valve Spindle in step 6. If this is the case,
depress the Lever and slide the Venturi Lever off
from right to left.
4. Lift out the Diaphragm Cover (3) and Diaphragm (4).
Inspect the Diaphragm. It should be supple and be
free from damage. If it looks good, there is no need to
replace it and it may be reused. If there is any sign of
deterioration, it should be replaced.
5. Using an 11/16”
spanner, remove the
Heat Exchanger (6).
6. Turn the Adjusting Screw (30) anti-clockwise until it
stops. For the XTX40 and XTX20 models use an Allen
key to turn the Adjusting Screw (37). Press the Lever
(20) against the Valve Spindle (18). While keeping the
Lever depressed, grasp the Knob and pull the Valve
Spindle assembly out of the Case (24). Remove the
Blanking Piece (8) from the opposite side of the case.
7. Remove the two ‘O’ Rings (7) & (9) from the
Blanking Piece (8).
8. Grasp the Venturi Lever (13 + 14) and pull it out of the
Case (24). Remove the ‘O’ Ring (9) from the Venturi
Lever.
9. It is NOT necessary to separate the Venturi Lever
into its two separate parts unless the regulator is
being converted to a different hand conguration. To
separate them grasp the Venturi Lever (13 + 14) as
shown below and push the Venturi Ring (13) off the
Venturi Lever Body (14).
10. Turn the Adjusting
Screw (30) or
(37) for XTX40/20
clockwise (inward)
one turn. The Spring
Pin (19) should
drop out. If the Pin
remains in the Valve
Spindle, use a 1/16”
dowel or punch to
push it partially out,
then use needle nose
pliers to completely
remove it from the
valve body.
11. Unscrew the Adjusting Screw (30) or (37) for XTX40/20
and completely remove it from the Valve Spindle (18).
 Loading...