8
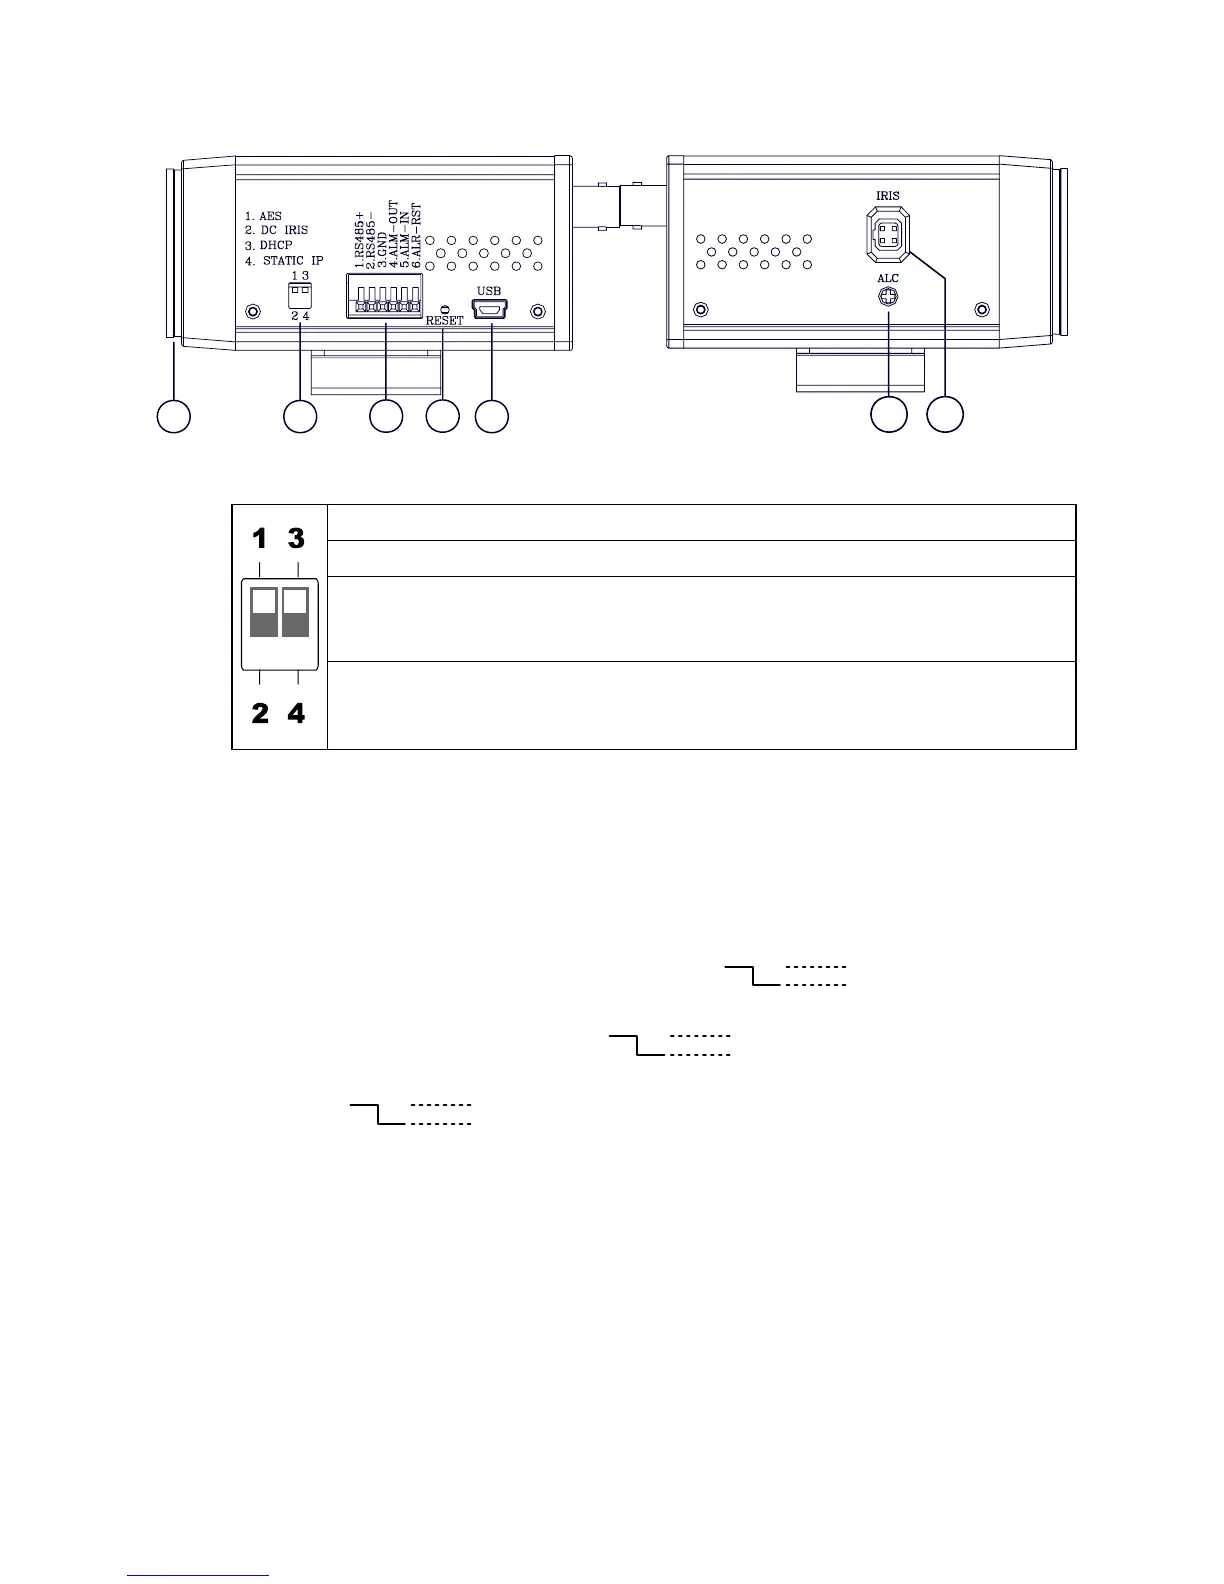
2.2 Flank Panel
-- Left Flank Panel -- -- Right Flank Panel --
123
4
5
6 7
1. Lens Mount: This IP camera is used with either a C or a CS mount lens.
2. DIP Switch:
1. AES: Auto electric shutter.
2. DC IRIS: Use an auto iris (DC drive)
3. DHCP: Turn On / Turn Off to use the DHCP protocol. If the switch points
upwards, the device can change the setup of network function
(enable/disable) via the network.
4. STATIC IP: If the switch points down, the device can’t obtain an IP address
from the DHCP server. This option is needed to configure the
network communication settings.
3. ALARM I/O: This is a 6-PIN connector including the ALARM IN/OUT, ALARM RESET
and GROUND items for connecting with external devices.
RS485 pin: D+
RS485 pin: D-
GND: Ground Contact.
ALARM IN (INPUT): This is an alarm input which can be programmed in the menu
system to Normally Open or Normally Closed. ( )
ALARM OUT (OUTPUT): This is an alarm-output trigger. Connect this to external
devices such as buzzers or lights. ( )
ALARM RST (RESET): This pin connects to an alarm-clear device for clearing an
alarm. ( )
4. RESET: Recover to factory default.
5. 5pin MINI USB Port: The user can use a USB device cable to connect the IP camera to
the USB port on the PC.
6. ALC VR: Iris control VR.
When an auto iris (DC Drive) lens is used, this VR is used to adjust the iris for different
lighting environments. Adjust the VR clock-wise to open the iris and counter-clockwise
to close the iris of the camera.
7. IRIS: Auto iris connector.
This camera works with a DC drive auto iris lens. Please refer to the pin assignment
marked on the camera when connecting the auto iris lens.
5V
0V(Active)
5V
0V(Active)
5V
0V(Active)