Do you have a question about the APRILIA RSV4 1100 Factory and is the answer not in the manual?
| Front Tire | 120/70 ZR 17 |
|---|---|
| Rear Tire | 200/55 ZR 17 |
| Engine Type | V4, 4-stroke |
| Displacement | 1078 cc |
| Max Power | 217 hp (159.5 kW) @ 13, 000 rpm |
| Max Torque | 122 Nm @ 11, 000 rpm |
| Transmission | 6-speed |
| Fuel System | Electronic fuel injection |
| Front Suspension | Öhlins NIX 43 mm fork, fully adjustable |
| Rear Suspension | Öhlins TTX, fully adjustable monoshock |
| Front Brake | Dual 330 mm discs, Brembo Stylema calipers |
| Rear Brake | 220 mm disc, Brembo caliper |
| Dry Weight | 199 kg |
| Fuel Tank Capacity | 18.5 liters |
| Frame | Aluminum dual beam chassis |
| Seat Height | 851 mm |
| Electronics | APRC (Aprilia Performance Ride Control) including traction control, wheelie control, launch control, quick shift |
Safety rules for handling fuel, coolant, and oils, plus general maintenance precautions.
Details serial number, chassis, and engine number locations and formats.
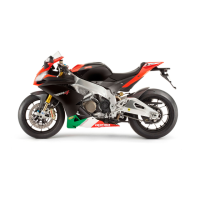
Provides technical specifications for vehicle dimensions, weight, engine, and transmission.
Lists fuel tank, engine oil, and coolant capacities.
Details spark plugs, battery, coils, fuses, bulbs, and indicator lamps.
Covers chassis type, steering rake, front fork, rear shock absorber, and steering damper.
Details specifications for front and rear brake systems, including discs and calipers.
Specifies wheel rims, tyre sizes, and inflation pressures.
Details fuel specifications and the fuel supply system.
Tool for supporting the engine during maintenance operations.
Tool used to remove the flywheel.
Tool used for aligning camshaft timing.
Tool used to compress valve springs for removal/installation.
Tool for extracting bearings.
Tool used for vehicle diagnostics and error reporting.
Table outlining maintenance intervals and operations for various vehicle components.
Procedures for checking and replacing engine oil.
Instructions for replacing the engine oil filter.
Procedure for removing and checking the air filter.
Steps for checking valve clearance on front and rear cylinder heads.
Diagram showing the location of electrical components on the motorcycle.
Defines cable harness routing and lists necessary materials and parts.
Highlights critical connector checks for proper engine and vehicle operation.
General guidance for troubleshooting electrical faults, including connector, continuity, and ground checks.
Details immobiliser system components, function, electrical specifications, and error codes.
Lists gearbox components, quantities, and torque specifications for assembly.
Procedure for removing camshafts, including crankshaft rotation and timing pin usage.
Instructions for installing the primary drive gear and crankshaft, including timing pin usage.
Details piston ring fitting and connecting rod coupling according to balancing class.
Steps for assembling the crankcase, including inserting dowels, oil seals, and pre-tightening nuts.
Details handlebar and controls, including screws, switches, and throttle controls.
Details front fork specifications and adjustment procedures for preload and damping.
Adjusting the steering damper for rigidity or softness.
Details steering bearing components, torque specifications, and adjustment procedures.
Details rear shock absorber components and torque specifications for mounting.
Procedures for adjusting rear shock absorber rebound, compression, and spring pre-load.
Lists chassis components, types, quantities, and torque specifications for screws and nuts.
Details front wheel components, removal, and bearing checks, including eccentricity.
Specifies rear wheel components, removal, and sprocket support procedures.
Details rear swingarm components, specifications, and installation procedures.
Instructions for checking chain wear, cleaning, lubrication, and slider replacement.
Procedure for adjusting chain tension and checking wear of chain, pinion, and sprocket.
Details ABS control unit, operating diagram, general specifications, and stages in ABS cycle.
Provides a step-by-step guide for ABS fault diagnosis using a diagnostic tool.
Procedures for checking and replacing tone wheels and sensors.
Details rear brake calliper components, torque specifications, and removal/installation.
Steps for removing and installing front brake pads, including piston separation.
Procedures for bleeding front and rear brake hydraulic circuits.
Diagram of the self-bleeding cooling circuit with key components identified.
Details specifications and removal/installation of the water pump.
Instructions for removing the front underfairings and disconnecting the cooling fan connector.
Procedure for draining, refilling, and checking coolant levels.
Details headlamp components, screws, and torque specifications.
Details instrument panel components, screws, and torque specifications.
Lists front mudguard components, types, quantities, and torque specifications for screws.
Details fuel tank components, screws, and torque specifications.
Details various fairing mounting screws, clips, and brackets with torque specifications.
Steps for removing and fitting the instrument panel and its support.
Steps to remove headlights, fairings, and associated screws.
Checks related to paintwork, plastic parts fitting, scratches, and dirt.
Inspection of safety fasteners, suspension units, brake calipers, and engine mounts.
Checks for main switch, headlamps, rear brake light, turn indicators, and instrument panel.
Procedures for recharging the battery, including normal and quick charge modes.
Checks for hydraulic braking system fluid, clutch system fluid, engine coolant, and engine oil levels.
Procedures for conducting a road test, checking controls, and braking performance.
Operations like removing screws, plastic covers, and fitting rear pedal.