Visage™ Digital Installation Guide 9
3
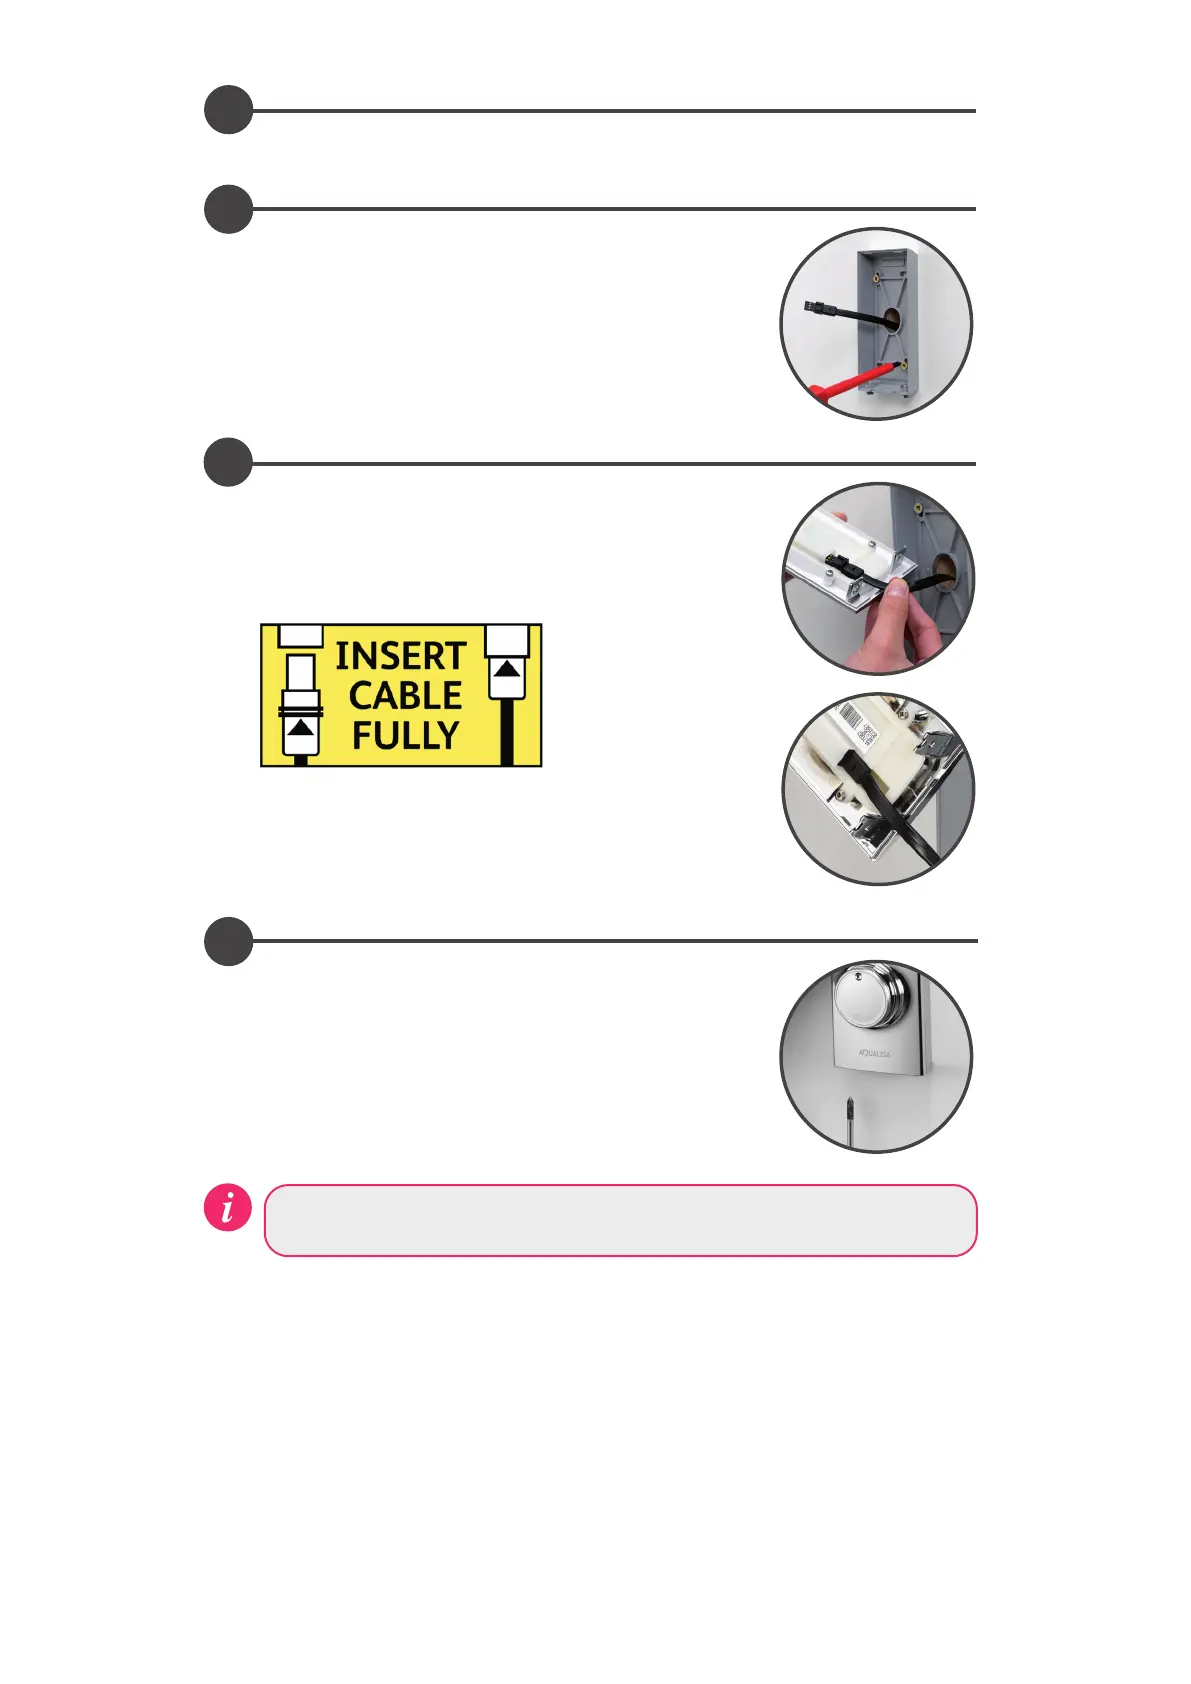
Drill and prepare the four wall fixings for the controller using the fixings provided, (if suitable).
4
Run a thin bead of mastic within the mastic groove at the rear of
the back plate. Feed the data cable through the back plate leaving
a working end of at least 100mm. Secure the back plate to the
wall using the screws provided, (if suitable).
5
Lining up the key way, push the data cable plug into the back
of the controller, ensuring both rubber skirts are recessed into
the connection (see diagram below), using a blunt flat bladed
screwdriver or similar tool if required. To make a water tight
fitting, ensure the rubber seal is no longer visible.
6
Locate the fixing lugs on the top of the controller into position at
the top of the back plate and push the bottom of the controller
into place. Hold the controller in position and secure to the back
plate using the fixing screws at the base of the controller.
Proceed to section Quartz Smart Valve™ Set-up, followed by Controller
Commissioning Instructions.
 Loading...