14
(3) Perform cooling operation or forced cooling
operation.
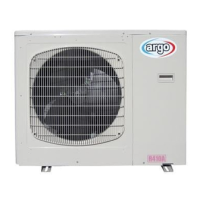
When the pressure at the low-pressure side is
0.15 – 0.2 MPa (0.5 – 1 kg/cm
2
G), fully close the
spindles at the valves on the wide tube side of
tubes A, B, C, and D, and immediately stop oper-
ation. (Refer to Fig. 24.)
In the winter, the outdoor unit may stop after 5 -
10 minutes of operation. This is in order to protect
the indoor unit heat exchanger from freezing and
does not indicate a problem.
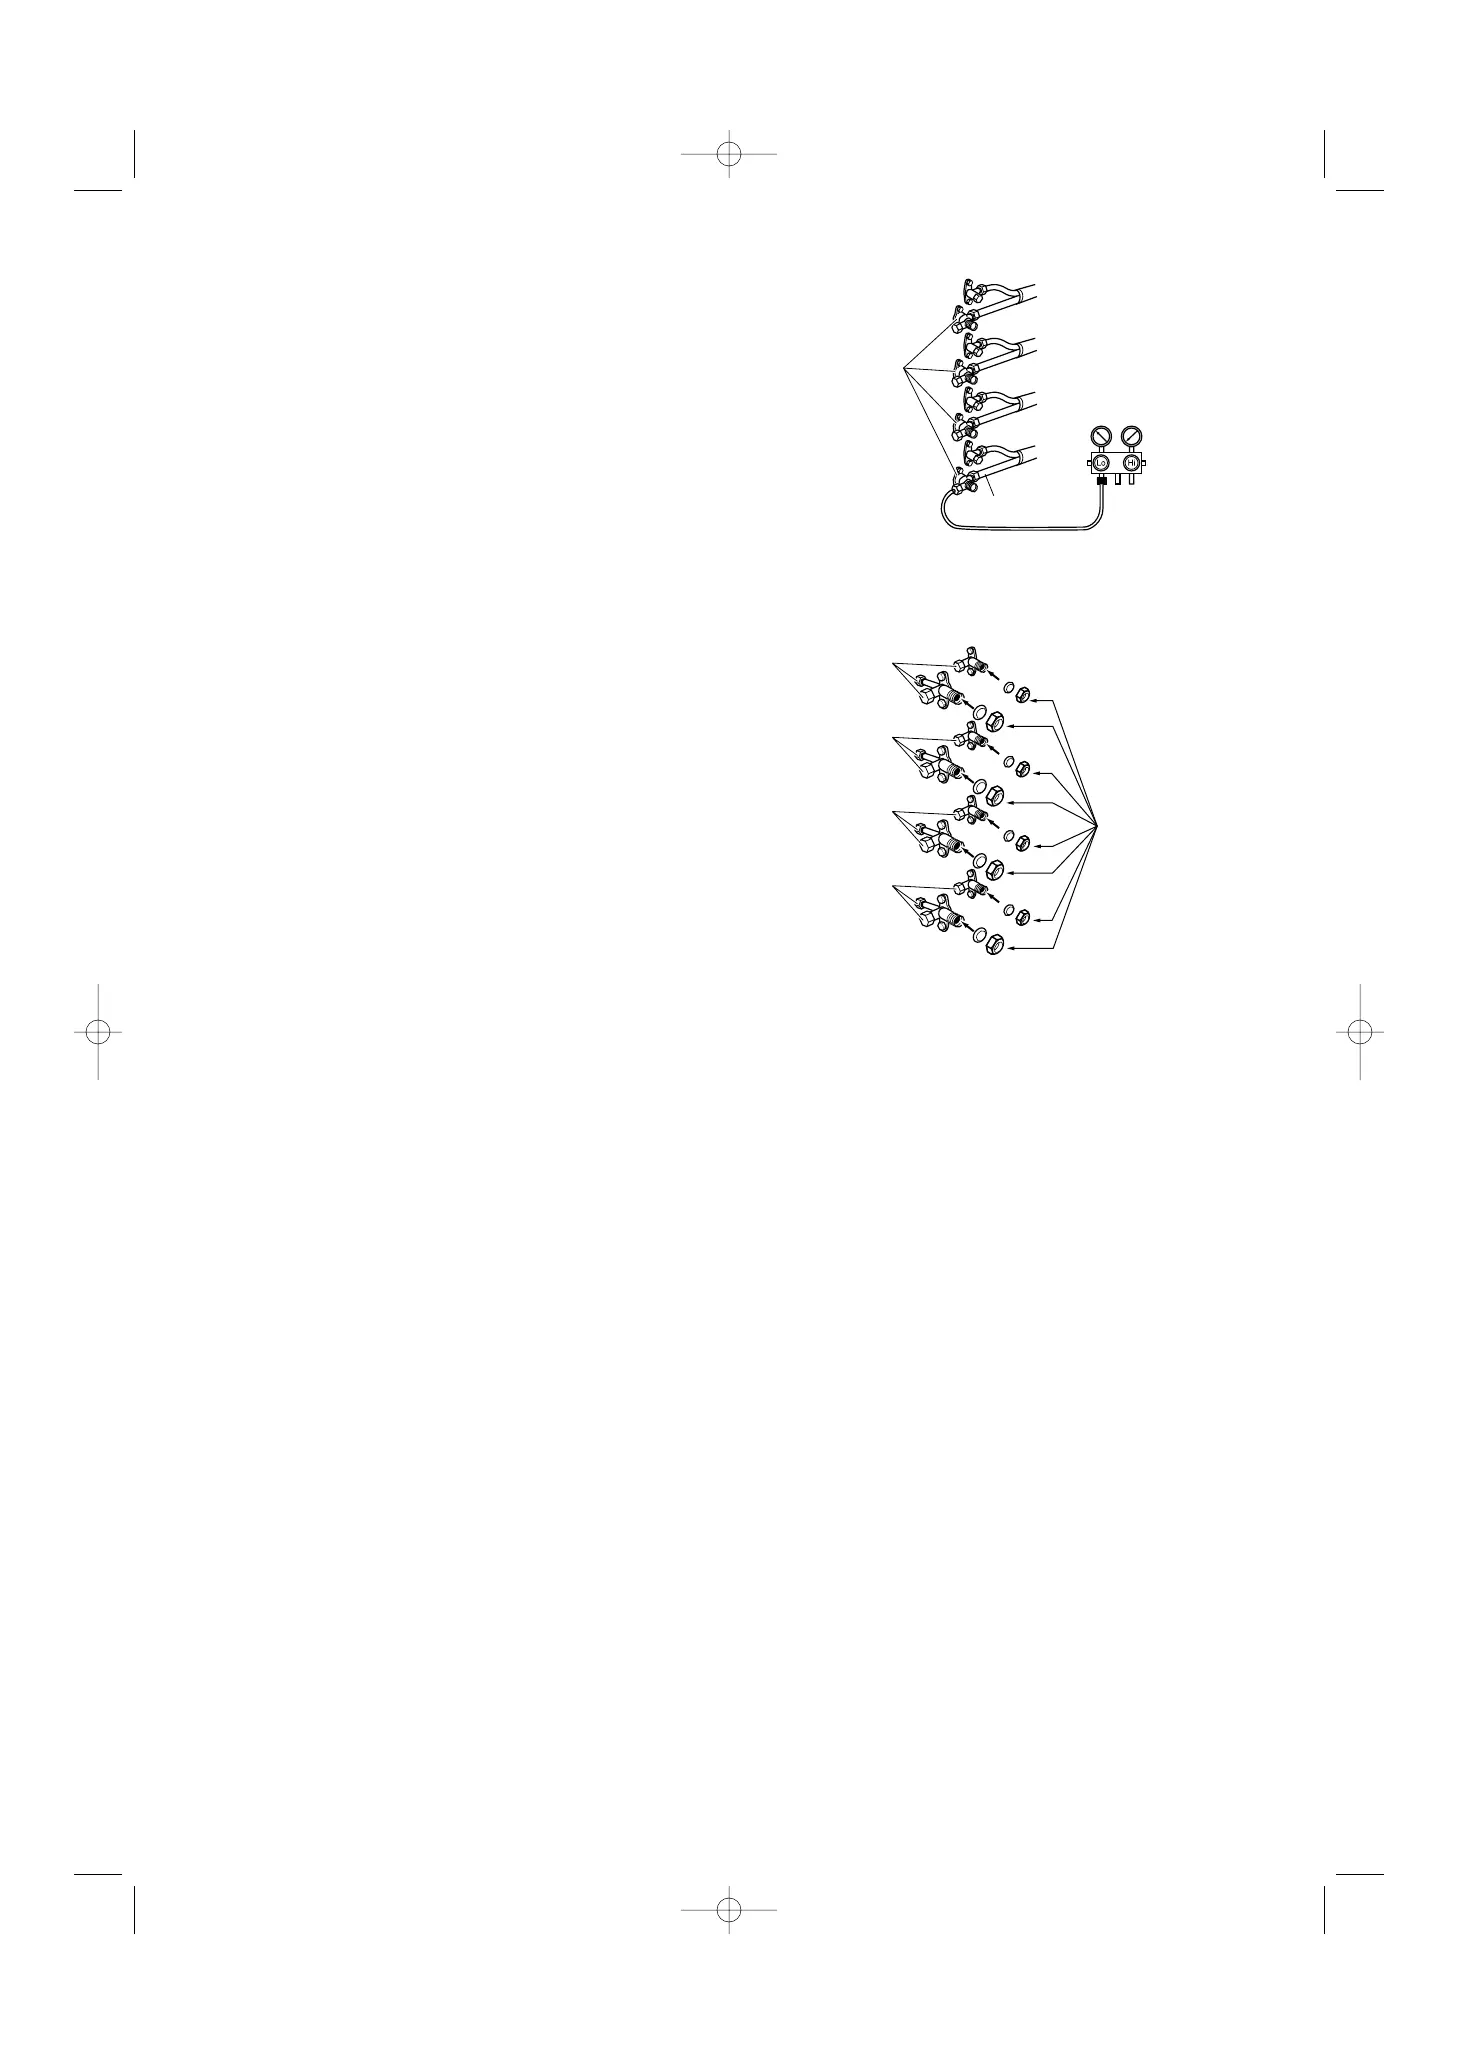
(4) Disconnect the manifold gauge and the inter-unit
tubes, and attach the caps and flare nuts. At this
point, pump-down is completed. (If the caps and
flare nuts are not reattached, there is the danger
of gas leakage.) (Refer to Fig. 25.)
If pump-down is not possible
If the A/C cannot be operated because of a malfunc-
tion or other cause, use a refrigerant recovery device
to recover the refrigerant.
5. Wiring Instructions
5-1. General Precautions on Wiring
(1) Before wiring, confirm the rated voltage of the unit
as shown on its nameplate, then carry out the
wiring closely following the wiring diagram.
(2) Provide a power outlet to be used exclusively for
each unit, with a power supply disconnect and cir-
cuit breaker for overcurrent protection provided in
the exclusive line.
(3) To prevent possible hazard due to insulation fail-
ure, the unit must be grounded.
(4) Each wiring connection must be done tightly and in
accordance with the wiring system diagram. Wrong
wiring may cause the unit to misoperate or become
damaged.
(5) Do not allow wiring to touch the refrigerant tubing,
compressor, or any moving parts of the fan.
(6) Unauthorized changes in the internal wiring can
be very dangerous. The manufacturer will accept
no responsibility for any damage or misoperation
that occurs as a result of such unauthorized
changes.
with flare bonnets.
 Loading...