5
2-2. Outdoor Unit
AVOID:
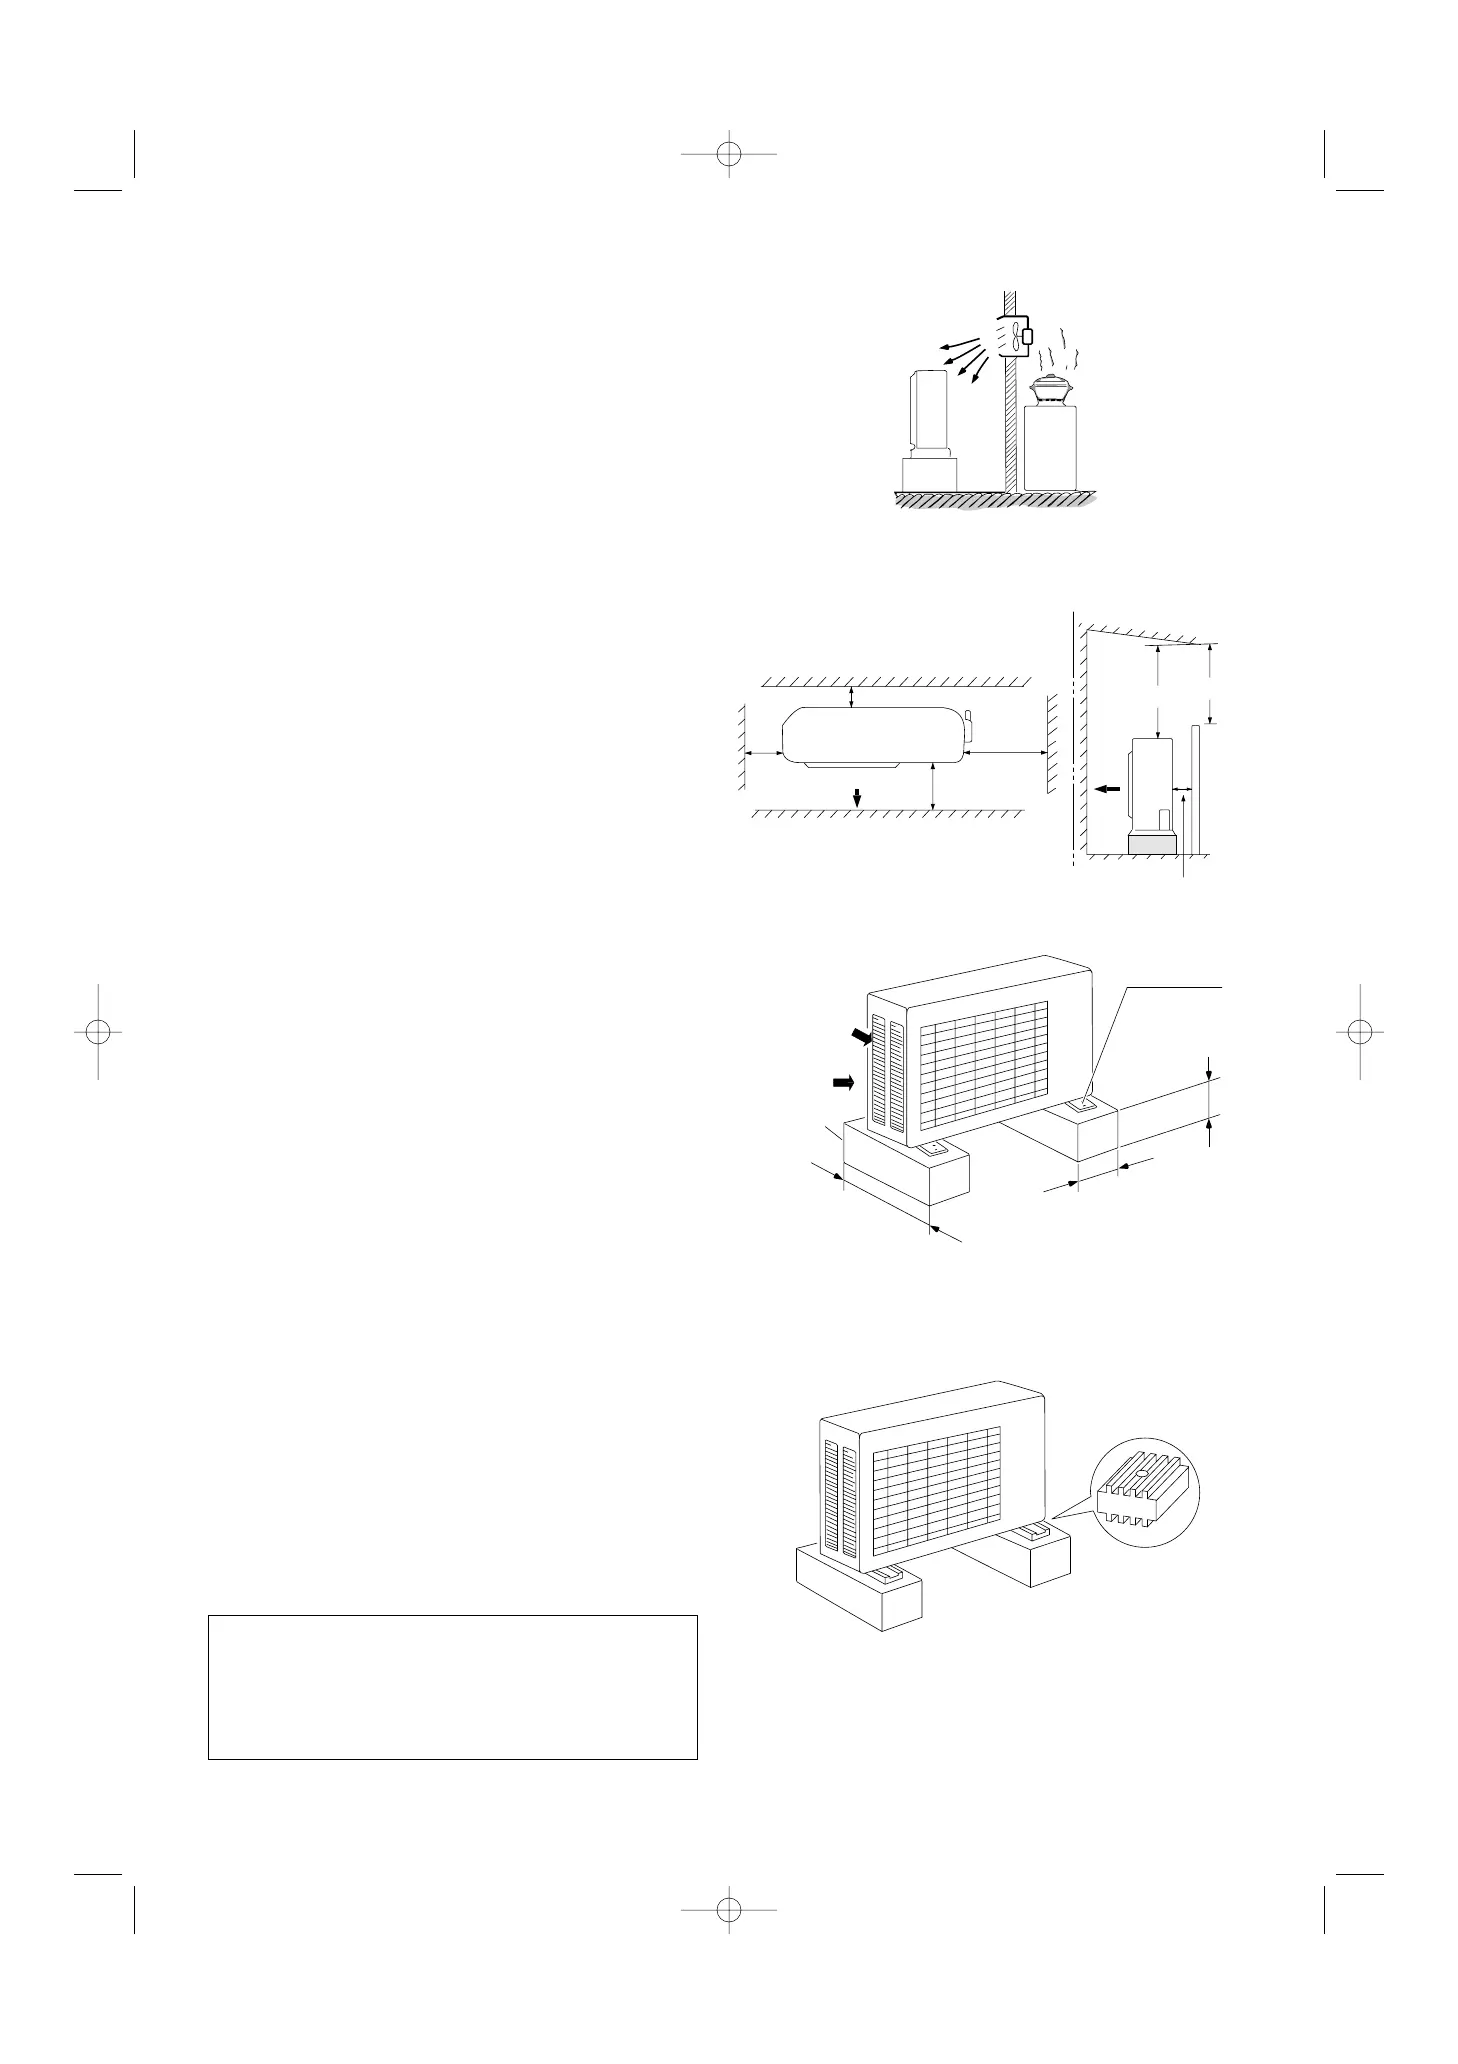
● heat sources, exhaust fans, etc. (Fig. 3)
● damp, humid or uneven locations.
DO:
● choose a place as cool as possible.
● choose a place that is well ventilated.
● allow enough room around the unit for air intake/
exhaust and possible maintenance. (Fig. 4a)
● provide a solid base (level concrete pad, concrete
block, 15 × 40 cm beams or equal), a minimum of
15 cm above ground level to reduce humidity and
protect the unit against possible water damage and
decreased service life. (Fig. 4a)
● install cushion rubber (not provided) under unit’s
feet to reduce vibration and noise. (Fig. 4b)
● use lug bolts or equal to bolt down unit, reducing
vibration and noise.
● select a location where the operating noise and air
blowing from the outdoor unit will not disturb neigh-
bors.
● select a location where the clearance indicated by
⇔ in the installation diagram is ensured for the
front, rear, left, and right of the main unit.
● install so that the unit is level.
● select a location that can fully support the weight of
the outdoor unit, and that will not magnify operating
noise or vibration.
(Fasten in place with the anchor bolts (M10).)
● provide a base using concrete or similar material,
and ensure proper drainage.
● select a location where there is no danger of
flammable gas leakage.
● in snowy or rainy regions, be sure to construct a
roof to keep off the snow and rain, and inhibit freez-
ing and condensation.
● select a location that is at least 3 meters away from
any antennas used for television, radio transceiver,
or other equipment.
● for purposes of future service and repair, select a
location where the inspection panel can be removed.
● select a location where the drain port will not be
obstructed.
Min.
Min.
Min.
Min. 20 cm
Min. 15 cm
Install the inter-unit cable more than 1 meter away
from any antenna or power lines or connecting wires
used for television, radio, telephone, security system,
or intercom. Electrical noise from any of these
sources may affect operation.
 Loading...