INDOOR UNIT •
UNITÀ INTERNA
• UNITE INTERIEURE •
INNENEINHEIT
• UNIDAD INTERIOR •
UNIDADE INTERIOR
•
EESSWWTTEERRIIKKHH MMOONNAADDAA
A
D
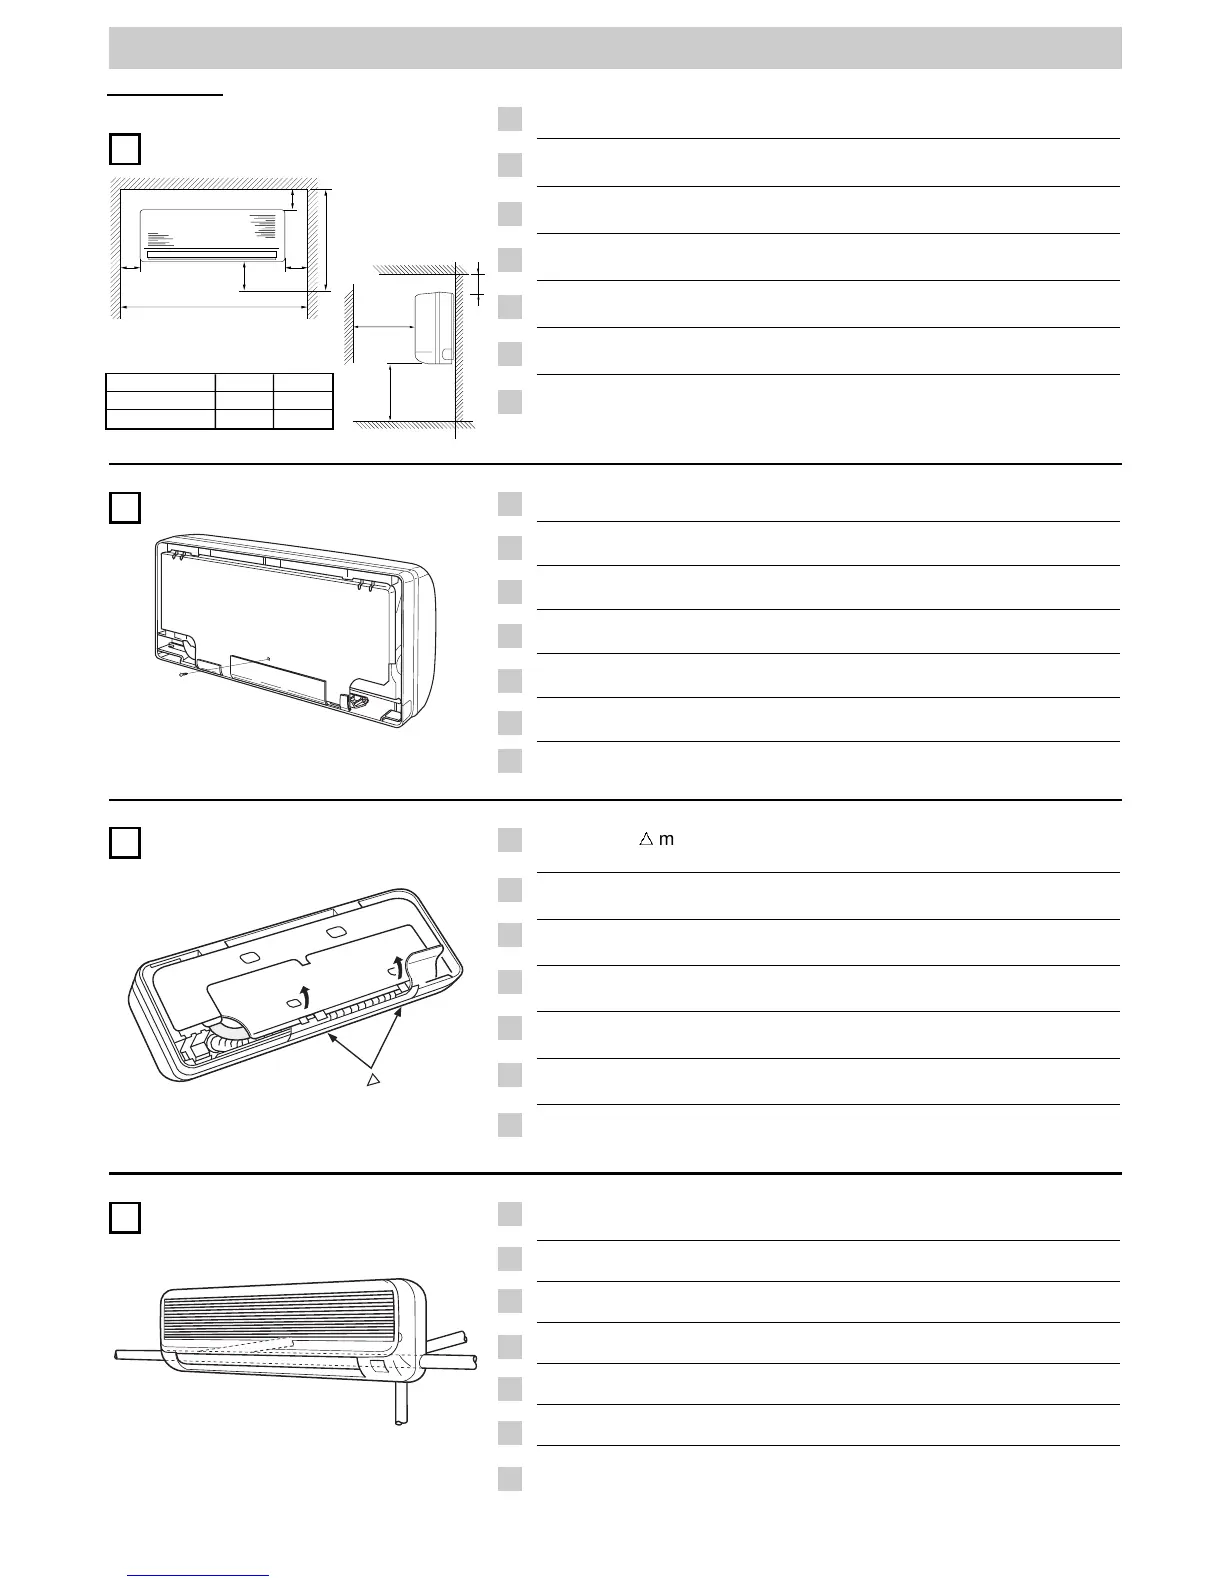
Minimum operation and maintenance area.
Area minima di esercizio e manutenzione.
Surface minimum de fonctionnement et d’entretien.
Raumbedarf des Gerätes
.
Area mínima de funcionamiento y manutención.
Área mínima para o funcionamento e manutenção.
Elavcisto" cwvro" leitourgiva" kai sunthvrhsh".
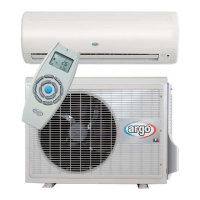
Press the 2
g
marks on the frame cover and disengage the stationary
tabs from the frame.
Premere nei due punti della struttura evidenziati con un triangolo per
sganciare i due fissaggi in plastica del pannello.
Appuyer aux endroits marqués par un triangle pour décrocher les deux
fixations en plastique du panneau.
Auf den zwei durch ein Dreieck gezeigten Stellen drücken, um die
beiden Befestigungen aus Plastik abzuhaken.
Apretar en los dos puntos marcados con un triángulo para desenganchar
las dos sujeciones de plástico del panel.
Pressione nos dois pontos indicados com o triângulo a fim de liberar os
dois suportes de plástico.
Pathvste sta duvo shmeiva pou shmadeuvontai me evna trivgwno kai
xegantzwvsete ta duvo plastikav tou kapakiouv.
The unit can be connected to five directions: right rear - left rear - right
side - left side and right downward.
L'unità può essere collegata in cinque direzioni: laterale posteriore (destro
e sinistro) - lato destro - lato sinistro - verso il basso lato destro.
L'unité peut être connectée vers cinq directions: latérale arrière (gauche
et droite) - côté droit-côté gauche -en bas côté droit.
Die Röhre können in fünf Richtungen verlaufen: seitlich hinten (recht
und links), rechtsseitlich, linksseitlich, rechtsseitlich unten.
Esta unidad se puede conectar por cinco partes: posterior derecha e
izquierda - lado derecho - lado izquierdo - inferior derecho.
A unidade pode ser direcionada em 5 direções: posterior direita, posterior
esquerda, lateral direita, lateral esquerda, ou para baixo a direita.
H monavda mporeiv na sundeqeiv se pevnte kateuquvnsei": pleurikhv -
pivsw - dexiav pleurav - aristerhv pleurav - pro" ta kavtw dexiav
pleurav.
I
EG
F
D
E
P
GR
I
EG
F
D
E
P
GR
I
EG
F
D
E
P
GR
I
EG
F
D
E
P
GR
B
C
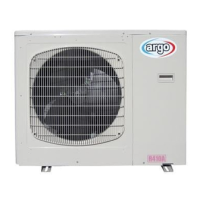
Remove and discard the set screw on the rear panel.
Rimuovere la vite di fissaggio del pannello posteriore dall’unità.
Enlever la vis de fixation du panneau arrière.
Die Befestigungsschraube auf der Rückwande der Einheit entfernen.
Quitar los tornillos de sujeción del panel posterior de la unidad.
Remova o parafuso de fixação do painel posterior.
Bgavlte ti" bivde" staqeropoivhsh" apov to pivsw kapavki th" monavda".