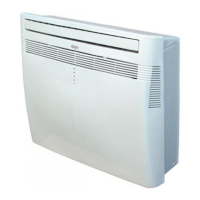
This document describes the Argo Dados 9/13 Portable Air Conditioner, designed for domestic use. It functions as a portable unit capable of cooling, dehumidifying, and fanning.
Function Description
The appliance offers three primary operating modes:
- Cooling Mode: The default mode upon first power-on, set to 25°C. The temperature can be adjusted between 17°C and 30°C. The unit saves the last set temperature when switched off and retains it upon restart. Fan speed, Timer, and Sleep functions are adjustable in this mode.
- Dehumidification Mode: Selected via the FUNCT button. The temperature is electronically controlled and cannot be regulated. The unit saves settings when switched off. Fan speed is fixed to low and cannot be adjusted. For maximum efficiency, the flexible hose should not be connected, allowing direct discharge into the environment. This mode is recommended for autumn and winter. In summer, it's best to keep the flexible hose attached to send hot air outside. Continuous drainage is recommended for optimal dehumidification.
- Fan Mode: Selected via the FUNCT button. The display shows the fan icon. Fan speed is adjustable, but the temperature cannot be regulated.
The appliance is equipped with a system to protect the compressor from overload, meaning it will only start 3.5 minutes after its previous stop. This delay helps prevent compressor damage.
Important Technical Specifications
- Voltage and Frequency: 220-240V/50Hz.
- Start-up Current: Automatic switches and system protection valves must withstand a start-up current of 10A (for less than 1 second).
- Refrigerant: R410A, a fluorinated greenhouse gas covered by the Kyoto protocol, with a global warming potential (GWP) of 1975. It should not be released into the atmosphere.
- Condensate Management: In Cooling mode, the appliance automatically vaporizes condensation. A rubber cap closes the discharge hole at the back. If the internal tank fills due to high air humidity, the blue LED flashes, and the appliance function is blocked. For Dehumidification mode, continuous drainage is recommended.
Usage Features
Appliance Start-Up:
- Positioning: Place the unit vertically on a firm, flat surface, at least 50 cm from walls or obstacles, as close to a window as possible.
- Hose Connection: Connect the flexible hose to the terminal connection (1) and extend it to the outside, then connect it to the back of the air-conditioner.
- Window Installation (Terminal Connection): Connect the flexible hose to the terminal connection (4). Open windows, block one leaf with the handle, rest the terminal connection on the fixed leaf, and close the other leaf.
- Window Installation (Opening Kit): Make a 140 mm diameter hole in the window glass. Insert the window without its closure cap. Remove the hot air terminal connection from the retracting flexible hose. Bring the air-conditioner close to the window and insert the air discharge tube. Avoid tight curves and folds in the flexible hose.
- Power: Connect the power cord to a 230V electrical socket. Ensure the socket has an efficient earth.
- Remote Control: Insert AAA or IEC R03 1.5V batteries, respecting polarities.
Remote Control Operation:
- Signal Transmitter: Point the remote control head towards the receiver on the air-conditioner for optimal function.
- ON/OFF Button (POWER): Switches the unit on or off. When switched on, it operates with the last saved settings.
- Function Selection Button (FUNCT): Cycles through Cooling, Dehumidification, Heating (NOT ACTIVE), and Fan modes.
- Temperature Adjustment Buttons (▲/▼): Adjusts temperature in Cooling and Heating modes. Each press changes the temperature by 1°C; holding the button provides continuous adjustment.
- Sleep Button: Activates sleep mode, changing fan speed to low. In Cooling mode, the set temperature increases by 0.5°C every half hour for 2 hours, then remains stable. Sleep mode is cancelled if power is disconnected or the appliance is switched off.
- Timer Button (TIMER-ON/TIMER-OFF):
- Timer-on (auto-on): When in stand-by, sets the time (1-24 hours) before the unit switches on. Pressing the Power button before the timer expires cancels the setting.
- Timer-off (auto-off): When on, sets the time (1-24 hours) before the unit switches off. Pressing the Power button before the timer expires cancels the setting.
- AUTO Button: Automatically regulates fan speed to Low, Medium, or High.
- HIGH/MED/LOW Buttons: Selects specific fan speeds.
Operation Without Remote Control:
If the remote control is lost or not working, the "POWER" button on the control panel can be used to switch the unit on/off and select Cooling, Heating (NOT ACTIVE), and Dehumidification modes. For Dehumidification mode, the remote control is always required.
General Safety Instructions:
- Use only as described in the manual.
- Do not use multiple adapters or touch the plug with wet hands. Ensure the plug is clean and fully inserted.
- Do not use the plug to start/stop the air-conditioner; use the power button.
- Do not install in rooms subject to water spray.
- Not suitable for persons with reduced physical, sensory, or mental abilities, or lack of experience, unless supervised.
- Unplug before moving or cleaning.
- Do not move while operating; turn off, check, and remove condensation first.
- To turn off, set remote to OFF and remove the plug by pulling on the plug, not the cord.
- Do not use if the cord or plug are damaged; replacement must be done by the manufacturer or qualified person.
- Do not insert objects into the air-conditioner.
- Ensure free air circulation; do not cover grilles with drapes.
- Position at least 50 cm from walls and obstacles on a firm, flat surface.
- Do not expose to direct sunlight.
- Do not use insecticides, oils, detergents, spray paints, or aggressive chemical detergents near the appliance.
- Close all open windows for maximum efficiency.
- In case of anomaly, switch off, unplug, and contact after-sales service. Do not dismantle or repair.
Maintenance Features
WARNING! Unplug from the electric socket before any cleaning or maintenance.
-
Cleaning the Air Filters:
- Check at least once every two weeks. Dirty filters reduce effectiveness.
- To remove, release the two upper sides of the side suction grilles, leaving them inclined. Pull filters delicately upwards.
- Use a vacuum cleaner to remove dust. If needed, wash with warm water and a neutral detergent.
- Rinse with cold water and air dry before replacing.
-
Cleaning the Casing:
- Use a damp, soft cloth.
- Do not use hot water, solvents, petrol, aggressive chemical compounds, talcum powder, or brushes, as they may damage the surface or color.
- For stains, use warm water with a little neutral detergent.
- Do not pour water onto the air-conditioner to clean it, as it may damage internal components or cause a short circuit.
-
Storage:
- If not used for a long time, clean the filters before storing.
- Keep the appliance in a vertical position.
- Do not rest heavy objects on top.
- Protect with a plastic sheet if possible.
-
Transport:
- If possible, transport in a vertical position.
- If not possible, lie it on its right side. Upon reaching the destination, immediately return to a vertical position and wait at least 4 hours before using it to cool.
-
Power Cord: Regularly check the condition of the power cord. If damaged, contact the Service Centre for replacement.
Battery Disposal: Replace batteries when flat. Do not dispose of with unsorted waste. Deliver to appropriate separated waste disposal plants or dealers. Separate disposal prevents negative environmental and health effects and allows materials to be recovered and recycled. The crossed-out dustbin symbol indicates separate disposal. Illegal disposal incurs administrative sanctions.