8
HORIZONTAL (manual)
The horizontal air flow can be adjusted by moving the vertical
vanes to the left or right, as indicated in the following figures for
each model.
ADJUSTING THE AIR FLOW DIRECTION
Set vertical vanes to the front position during COOLING/DRY
operation if humidity is high.
If the vertical vanes are set to the left-most or right-most
position, condensation will form around the air outlet and
drip off.
CAUTION
VERTICAL (manual for AF models)
Hold the end of the flap and move it up and down to adjust the
vertical air flow.
CAUTION
Do not move the flap with your hands when the air conditioner
is running (FC-FCI models).
VERTICAL VANE FLAP
Zone «A»
for cooling and dehumidifyng
Zone «B»
for heating
« B »
« A »
« B »
HOW TO ADJUST THE FLAP DIRECTION
FC-FCI MODELS
« A »
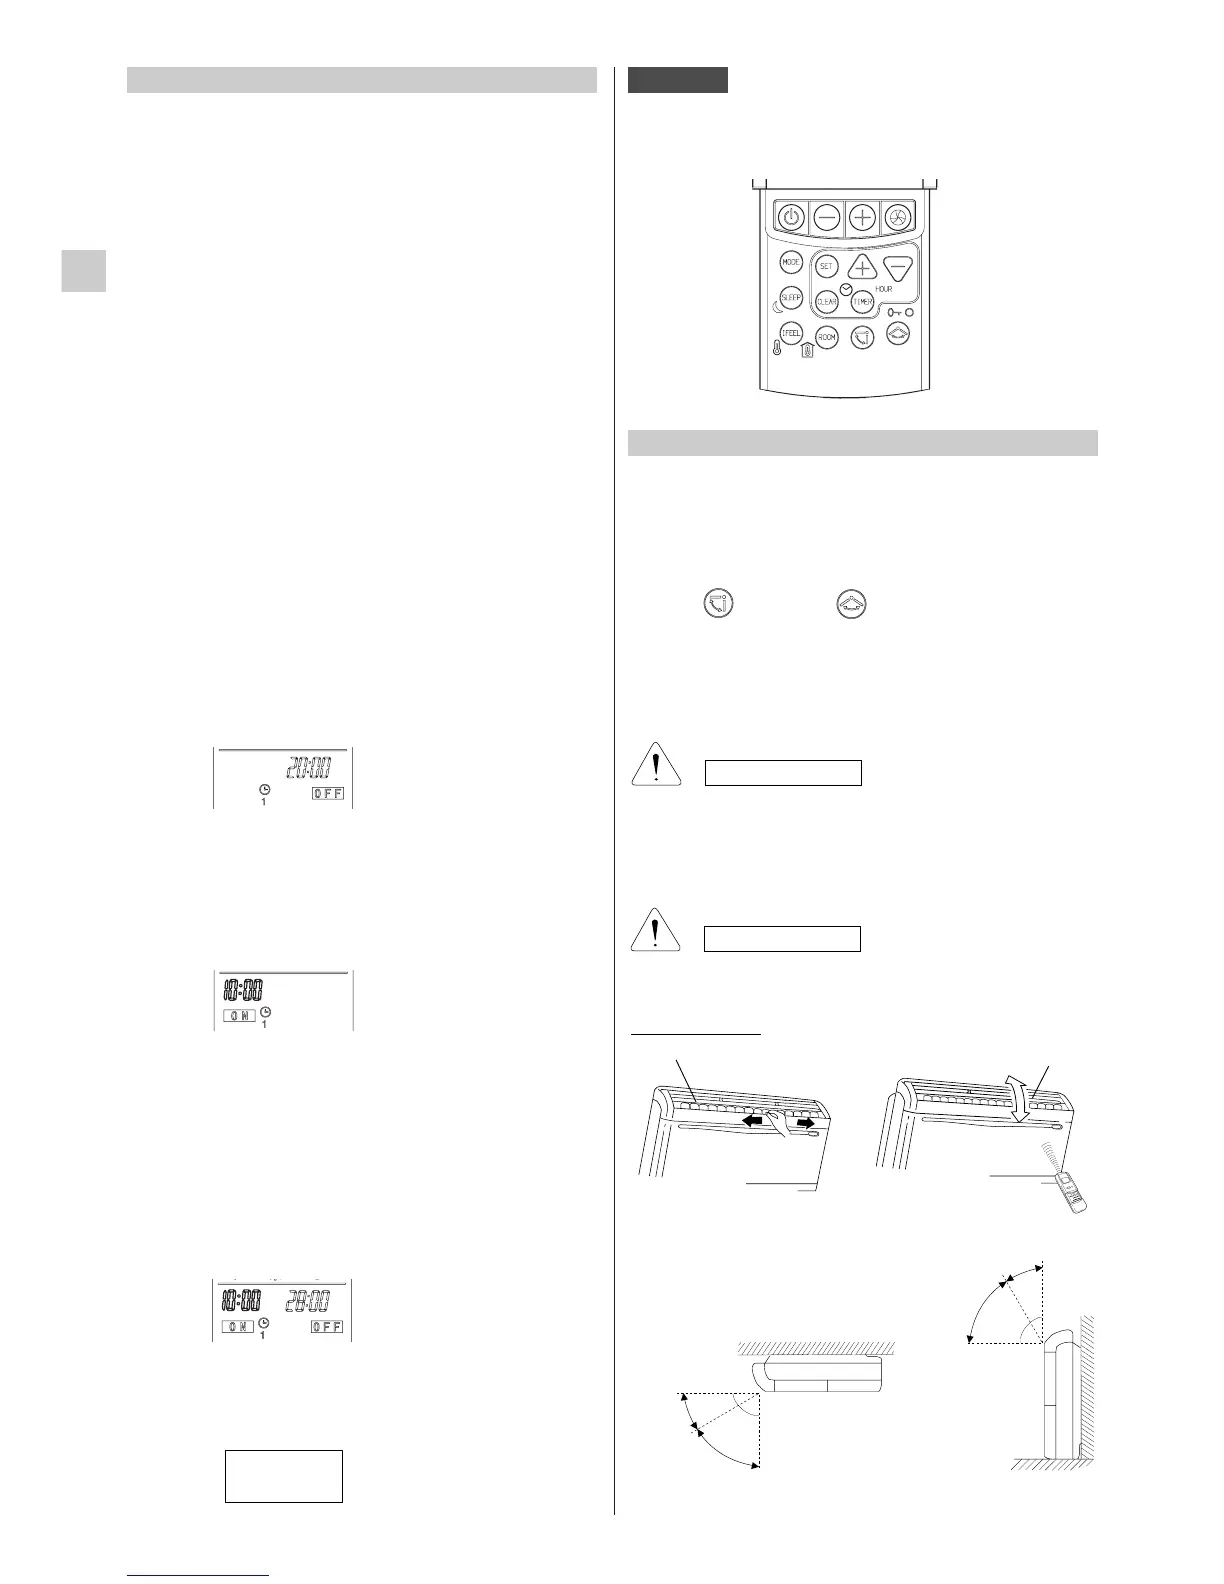
VERTICAL (with remote control unit for FC-FCI models)
Push the (FC models) (FCI model) button to start the
flap sweep. If you push again the flap stops immediately.
EG
SETTING THE TIMER
There are four timers that can be selected on the remote
control.Two daily timers (designated as T1,T2) ,and two
optional weekend timers (designated as WKTI, WKT2).
Each timer can be selected by pressing TIMER button.
The daily timers T1 and T2 can be set for ON and OFF
separately for two different time periods.
Timer setting will not change until new setting is input.
The weekend timers WKT1 and WKT2 can be set for ON
and OFF separately for two different time periods and they
are effective two days only. These timers will be effective
on the day of setting and on the day after only.
At 24:00 on the second day, the WK timer will not be
effective anymore and the daily timer will be effective again.
WKT1 - effective on the setting day
WKT2 - effective one day after the setting day.
NOTE:
1. During the weekend timer operation, the daily timers
will be disabled.
2. The WK timers must be reactivated before every
weekend.
A) HOW TO SET THE OFF TIME
1. Press the TIMER button to select the desired timer.
2. Press the SET and CLEAR buttons till the OFF sign
blinks.
3. Press the + or - (HOUR) button until the desired value
is displayed.
4. Press the SET button to activate the timer.
B) HOW TO SET THE ON TIME
1. Press the TIMER button to select the desired timer.
2. Press the SET button till the ON sign blinks.
3. Press the + or - (HOUR) button until the desired value
is displayed.
4. Press the SET and CLEAR buttons to activate the timer.
C) HOW TO SET A PROGRAM FOR DAILY ON/OFF
OPERATION (OR VICEVERSA)
1. Press the TIMER button to select the desired timer.
2. Press the SET button till the ON sign blinks.
3. Press the + or - (HOUR) button until the desired value
is displayed.
4. Press the SET button again, the OFF sign blinks.
5. Press the + or - (HOUR) button until the desired value
is displayed.
6. Press the SET button to activate the timer.
D) HOW TO CLEAR THE TIMER
1. Press the TIMER button to select the timer.
2. Press the CLEAR button if you want that every timer
operation will be cleared.
NOTE
If the procedure to set the timer is not completed, by pushing
the SET button, within 15 seconds the timer operation will
be cancelled and the last set-up is restored.