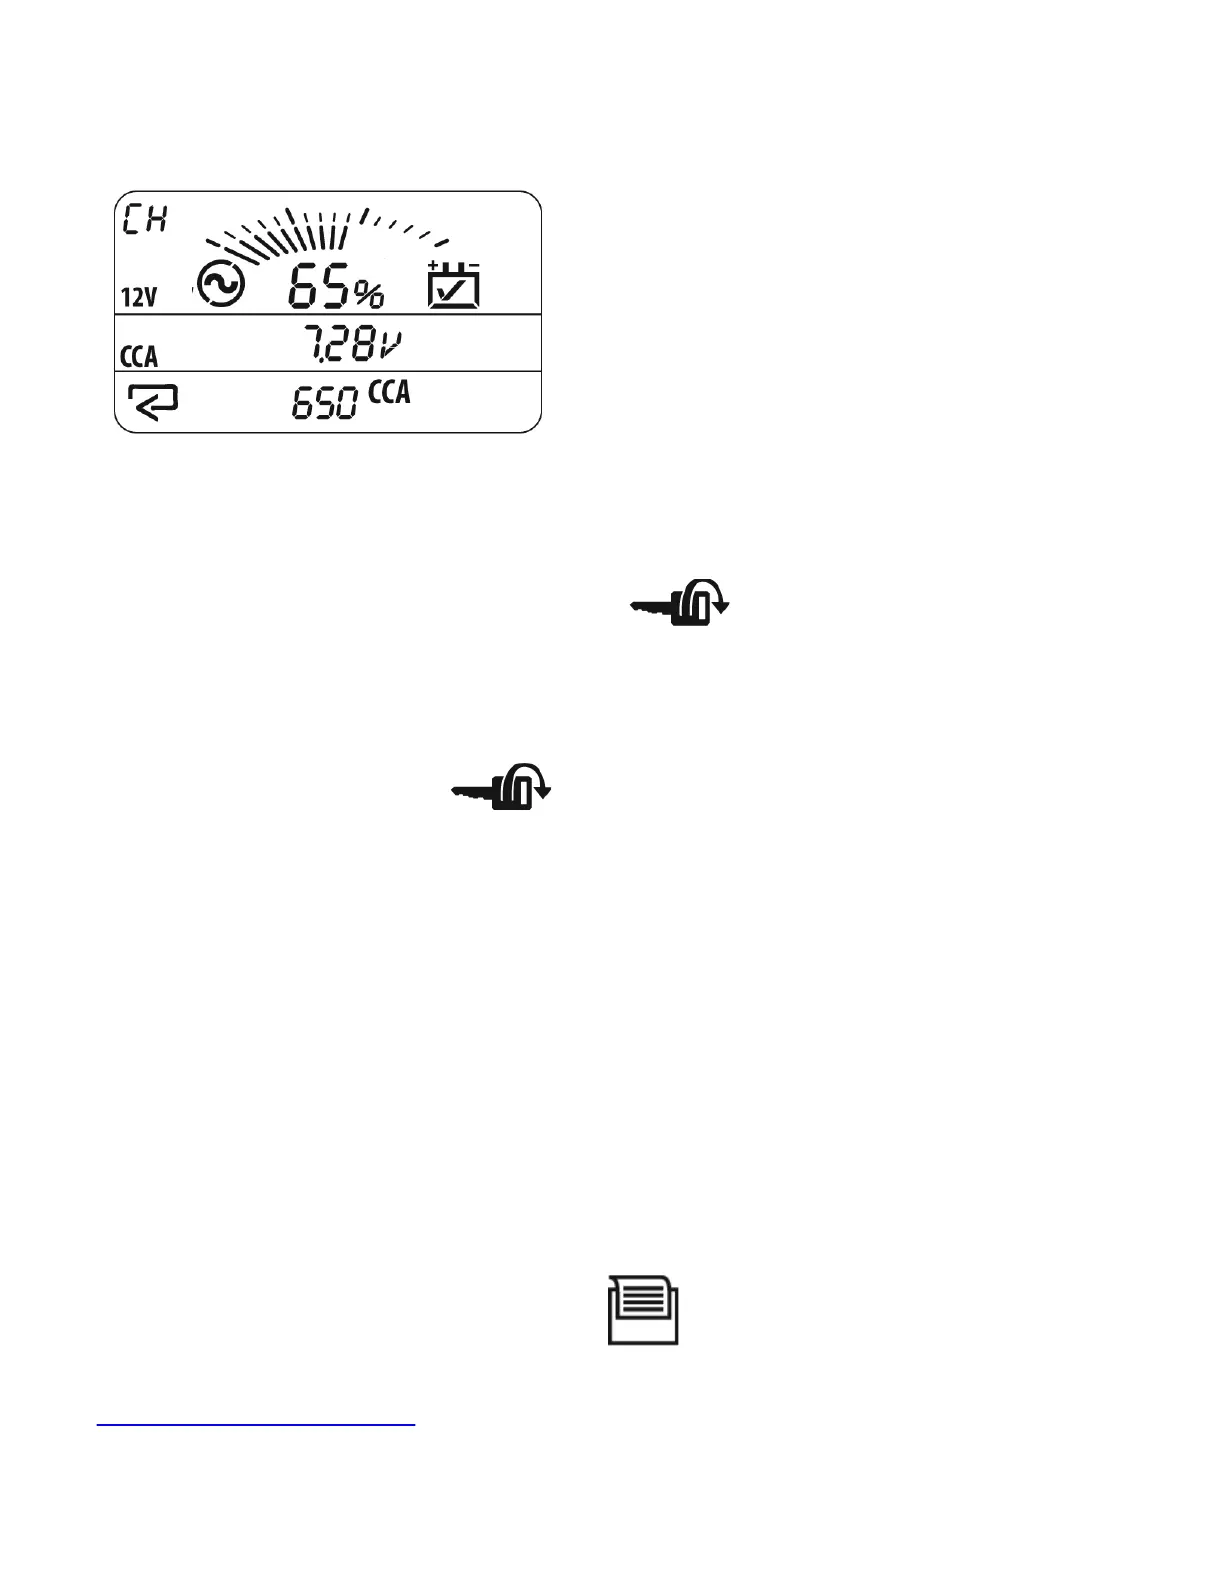
Cranking Health Test: ‘CH’ screen (AA1000)
The Cranking Health screen can be identified by ‘CH’, in the upper left corner of the display.
The tester is ready to perform the Cranking Health Test when
(Start) icon is flashing. The Cranking Health
Test can only be performed on batteries connected to their starting load. If the battery is not connected to a starting load
(starter motor), ignore the Cranking Health Test and rely on the Battery Life Test results for battery performance
information.
1. Turn off all accessory loads before starting the engine (lights, fans, radios, etc.)
2. Crank the engine as prompted by the
(Start) icon flashing on the ‘BL’ display.
The analyzer will automatically detect engine cranking and will capture cranking performance data.
Charging System Test
(AA1000)
After the Cranking Health Test is performed (engine started), the tester monitors the electrical system for indications of
charging system faults. The tester monitors voltage and measures voltage ripple to determine alternator function. Icons
and alarms on the ‘CH’ page will indicate any faults detected.
Step 4: Reviewing and Printing/Saving Results
All test results may be reviewed (or printed/saved) until the analyzer is disconnected from the battery. Press [enter/print]
to move sequentially from one test results screen to another (SoC – BL – CH…) Use [>] or [<] to view different results
within a test screen.
If a printer module (AATPR20) is connected, a printer icon
(Printer) will be visible on the screen. Results can
be printed, or saved in memory, or both at any time by pressing and holding [enter/print] for 2 seconds (until beep).
More: Printing and Storing Test Results
More:
 Loading...