e2v technologies (uk) limited 2013 CR 114528 05 Apr 2013 DAS775571AA Version 1, page 17
4.3 Argus
®
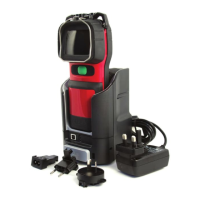
Mi-TIC Charger Station Fixed Installation
The Argus
®
Mi-TIC Charger Station can be mounted on any surface either
horizontal or vertically using the universal mounting plate and mounting
screws supplied. Note: fixings for attaching the mounting plate to the surface
are NOT supplied.
Up to six (6) charger stations can be powered in a “daisychain” configuration.
4.3.1 Horizontal Mounting
• Charger Station
• Universal Mounting Plate
• 3 mm hex key
• M4 x 30 mounting screws (2)
• AWG 18 gauge wire (Red and black) (not supplied)
• Small flat bladed screwdriver (not supplied)
• Large flat bladed screwdriver (not supplied)
1. Using the universal mounting bracket as a template, mark out the drill-
hole positions and drill holes.
2. Using suitable fixings, attach the mounting plate to the chosen horizontal
surface. Up to six (6) charger stations can be powered in a “daisychain”
configuration. The mounting plates are designed so they can be mounted
next to each other as shown below.
3. Remove the front panel of the charger station using a small flat tool e.g.
small flat screwdriver (not supplied).
4. Hook the charger station on to the universal mounting plate.