e2v technologies (uk) limited 2013 CR 114528 05 Apr 2013 DAS775571AA Version 1, page 20
5. CONNECTING THE CAMERA TO A PC
The camera has 4 GB of embedded storage. This is used for:
• Changing the start-up image
• Storing images (optional)
• Storing videos (optional)
• Storing camera diagnostic information
• Updating the camera software
• Storing a copy of the Configuration Tool Software (see section 6)
• Storing a copy of the manual
5.1 Changing the Start-Up Image
A custom start-up image can be loaded into the camera as follows.
1. Generate an image file on a computer in the following format:
Name: Splash.bmp
File format: Bitmap
Dimensions (HxV): 320 x 240 pixels
Bit depth 24 Bit
File size: 230,454 bytes
It is recommended to use MS Paint to create the image file.
2. Turn the camera on.
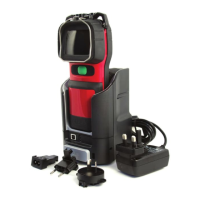
3. Connect the camera to the computer via the Argus® Mi-TIC Charger
Station and the supplied USB lead.
4. The computer should recognise the memory card as a ‘Mass Storage
Device’ and open a file explorer window.
5. Copy the image file from the computer to the top level ‘ARGUS TIC’
directory.
6. Close the window.
7. On computers running MS Windows
®
it is recommended to select ‘Safely
Remove Hardware’ before disconnecting the camera.
8. Remove the camera from the Argus
®
Mi-TIC Charger Station.
9. Turn the camera off and back on. The camera will read the new image
file when it turns on.
10. Wait until the displayed status message clears.
11. Turn the camera off and back on again, the new splash screen image will
appear at start-up.
Keep a copy of the image file on your computer. The camera will rename the
image file on the memory card to XSPLASH.BMP after it has been
successfully loaded into the camera.
In the event that the splash screen fails to load into the camera, the camera
will rename the image to ERRSPLASH.BMP. Providing the settings described
above are adhered to, the custom start-up image can be loaded into the
camera.