EN - 30
SCRAPER BLADE
IMPORTANT: Damage to housing will result if
blade wears down too far.
Scraper blade is adjustable to compensate
for wear.
To adjust scraper blade:
1. Tip unit back onto handlebar, support
housing and loosen nuts retaining blade.
2. Reposition scraper blade and tight
en
loc
k nuts
.
3.
Adjust skid shoes.
IMPORTANT: ALWAYS adjust skid shoes
after adjusting scraper blade to prevent
premature wear to scraper blade or damage
to housing.
SKID SHOES
(Figure 27)
IMPORTANT: Skid shoes should be adjusted
as conditions require. Allow 1/8" (3 mm)
between scraper blade and hard smooth
surfaces. Allow 7/8" (22 mm) between
scraper blade and uneven or gravel surfaces.
1. Position unit on a hard, flat, smooth,
level surface.
2. Adjust skid shoes by inserting a sp
acer
of
desired thickness under center of
scraper blade, loosen skid
shoe
ha
rdware.
3. Slide skid shoe to flat surface.
NOTICE: Be sure to keep housing level by
adjusting skid shoes equally.
4. Tighten skid shoe hardware.
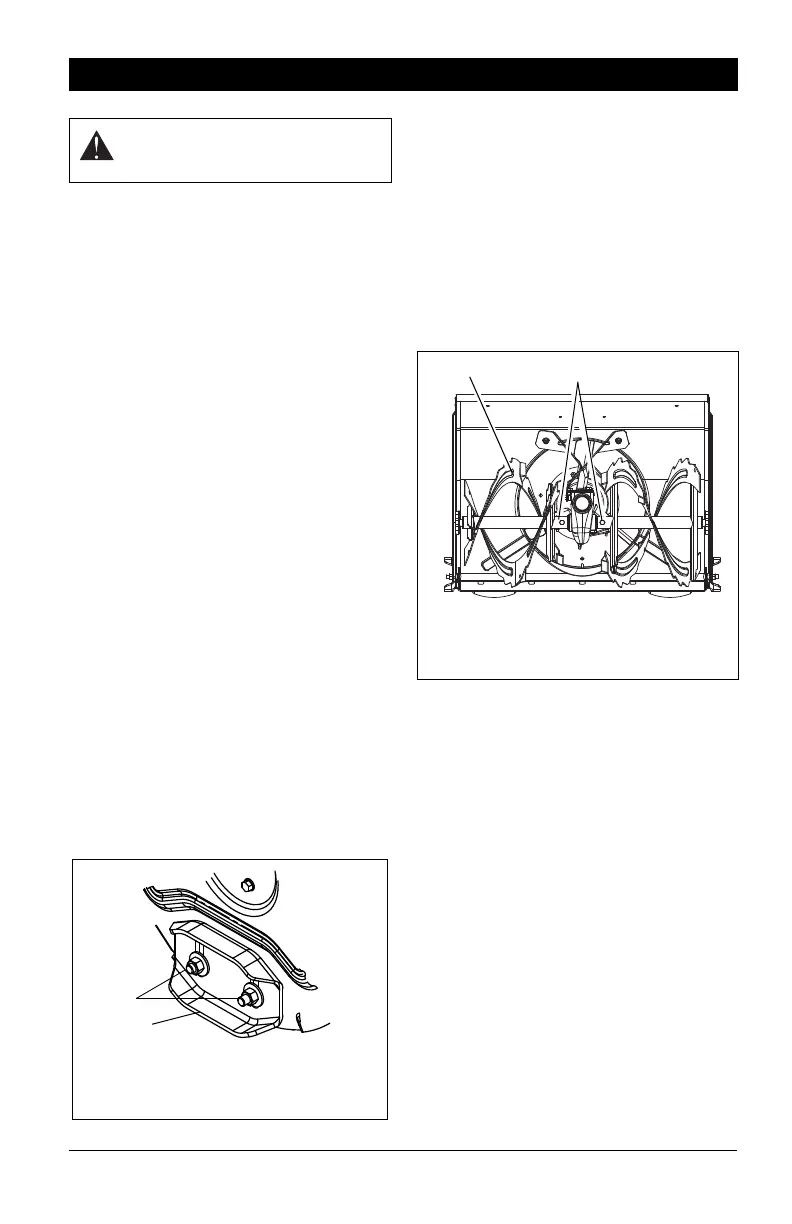
SHEAR BOLTS
(Figure 28)
IMPORTANT: Use only Ariens OEM shear
bolts for replacement. Use of any other type
of shear bolt may result in severe damage to
unit. See SERVICE PARTS on page 40.
Occasionally a foreign object may enter the
auger/impeller housing and jam the auger,
breaking shear bolts which secure the auger
to the shaft. This allows auger to turn freely
on the shaft which may help prevent damage
to gear case.
For Replacement:
1. Align shear bolt holes in auger with
shear
bolt holes in the shaft.
2. Drive shear bolt through hole (if shea
r
bolt
was broken this will drive re
maining
p
art from shaft).
3. Secure shear bolt with nut.
NOTICE: DO NOT overtighten the shear bolt.
Tighten shear bolt to 5.8 – 12.2 lbf-ft
(7.9 – 16.5 N•m).
REMOTE DEFLECTOR
CONTROL ADJUSTMENT
(Figure 29)
Deflector must stay in selected position while
throwing snow.
If deflector does not stay in set position:
1. Tighten nut beneath control panel to
increase pressure on deflector cont
rol
(F
igure 29).
SERVICE AND ADJUSTMENTS
WARNING: AVOID INJURY. Read
and understand the entire Safety
section before proceeding.
Figure 27
2
1
1. Skid Shoe
2. Skid Shoe Hardware
Figure 28
1. Auger
2. Shear Bolts
1
2