Do you have a question about the Ariston CX65SM2 AUS and is the answer not in the manual?
This document provides operating instructions for an Ariston cooker and oven, covering installation, usage, maintenance, and safety precautions.
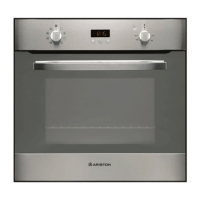
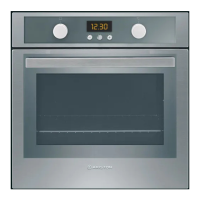
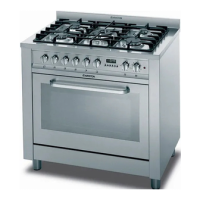
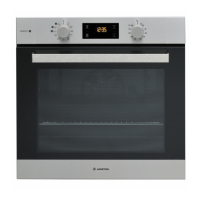
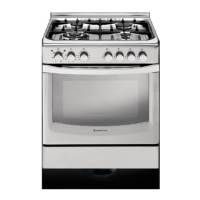
The Ariston appliance is a combined cooker and oven designed for domestic use, facilitating various cooking methods. The hob features multiple gas burners for stovetop cooking, while the oven offers different cooking modes, including traditional baking, grilling, and fan-assisted options, to accommodate a wide range of recipes. The appliance is designed to provide efficient and versatile cooking capabilities for everyday household needs.
The appliance is equipped with a control panel that includes knobs for operating both the hob burners and the oven. For the hob, each burner has a dedicated control knob with markings indicating flame intensity, from maximum to minimum. To light a burner, the knob is pressed and turned anticlockwise to the maximum flame setting, then adjusted to the desired intensity. Models with electronic lighting allow for ignition by pressing and turning the knob. If the appliance has a flame failure safety device, the knob must be held down for a few seconds after lighting to activate it. For optimal efficiency and gas saving, it is recommended to use pans with a lid and a flat base that are suited to the burner size. A reducer grid is provided for the auxiliary burner when using small pans.
The oven offers several cooking modes, selected by turning the SELECTOR knob. The THERMOSTAT knob allows for temperature adjustment, with a range typically between 60°C and Max, depending on the mode. The THERMOSTAT indicator light illuminates when the oven is heating and switches off when the set temperature is reached, indicating temperature maintenance. The OPERATION indicator light also shows when the oven is generating heat. The oven light can be switched on independently by selecting a specific position on the SELECTOR knob.
Available oven cooking modes include:
For TOP OVEN, GRILL, and GRATIN modes, the oven door must remain shut. Specific rack positions are recommended for different modes to optimize cooking results and collect residues. When cooking on multiple shelves, particularly with the MULTILEVEL mode, positions 2 and 4 are suggested, avoiding positions 1 and 5 for temperature-sensitive foods. If cooking foods with different temperature and time requirements, an average temperature should be set, and more delicate food placed on the higher rack, removing items with shorter cooking times first.
The appliance also features a cooking timer. To set the buzzer, the COOKING TIMER knob is turned clockwise almost one full revolution, then anticlockwise to align the desired time with the indicator. A buzzer sounds when the time elapses, and the oven turns off. The timer can also be used as a normal timer when the oven is off. For manual oven use without the timer, the COOKING TIMER knob should be turned to the symbol.
Regular care and maintenance are crucial for the appliance's longevity and performance. Before any cleaning or maintenance, the appliance must be disconnected from the electricity supply.
For external parts, such as stainless steel or enamel-coated surfaces and rubber seals, a sponge soaked in lukewarm water and neutral soap is recommended. Specialized products can be used for stubborn stains. After cleaning, thorough rinsing and drying are necessary. Abrasive powders or corrosive substances should be avoided.
The hob components, including grids, burner caps, flame spreader rings, and burners, can be removed for easier cleaning. They should be washed in hot water with non-abrasive detergent to remove burnt-on residue, then dried thoroughly. The terminal part of the flame failure safety devices should also be cleaned frequently.
The oven interior should ideally be cleaned after each use while still lukewarm. Hot water and detergent, followed by rinsing and drying with a soft cloth, are recommended. Abrasive products should not be used. The glass part of the oven door can be cleaned with a sponge and a non-abrasive cleaning product, then dried thoroughly. Rough abrasive materials or sharp metal scrapers should be avoided to prevent scratching or cracking the glass. Accessories are dishwasher-safe.
The oven door seals should be checked regularly for damage. If damaged, they must be replaced by an Authorised After-sales Service Centre, and the oven should not be used until the seals are repaired.
The oven light bulb can be replaced by disconnecting the oven from the electricity mains, removing the glass lid covering the lamp socket, unscrewing the old bulb, and replacing it with a new one of the specified voltage and wattage.
Gas tap maintenance is also mentioned. If taps become jammed or difficult to turn over time, they must be replaced by a qualified technician authorized by the manufacturer.
For assistance, users are advised to contact an authorized technician and provide details such as the problem encountered, the appliance model (Mod.), and the serial number (S/N), which can be found on the data plate. Unauthorized repairs are discouraged due to potential injury or further appliance malfunction.
The manual also includes tips for respecting and conserving the environment, such as using the oven during off-peak electricity hours, keeping the oven door closed during specific cooking modes to save energy, and regularly checking and cleaning door seals to prevent heat dispersion.
| Oven Type | Electric |
|---|---|
| Energy Rating | A |
| Dimensions (H x W x D) | 900 x 600 x 600 mm |
| Color | Stainless Steel |
| Timer | Yes |
| Type | Freestanding |
| Oven Functions | Defrost, Grill |
| Width | 600 mm |
| Cleaning | Catalytic |