This document describes the Ariston FB 51 GB / FB 51 IX GB Multifunction Oven, a versatile appliance designed for household use.
Function Description
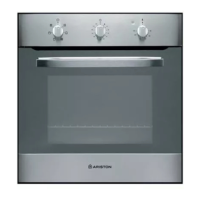
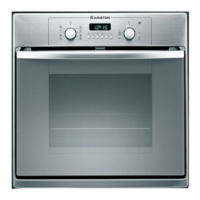
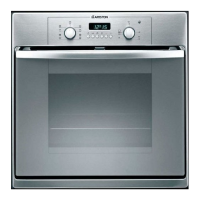
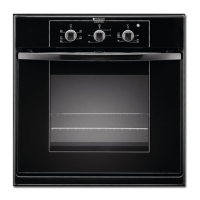
The oven combines the advantages of traditional convection ovens with modern fan-assisted models, offering five different cooking modes. These modes are selected using a selector knob (B) and a thermostat knob (C) on the control panel.
Cooking Modes:
- Convection Mode: This classic mode uses top and bottom heating elements. It's ideal for dishes requiring slow cooking, basting, or liquid addition, such as braised meats, stews, goulash, wild game, and ham. It's also suitable for baking cakes and cooking in covered casserole dishes. For optimal results, only one dripping pan or cooking rack should be used at a time to ensure even heat distribution. Rack heights can be adjusted to control heat from the top.
- Fan Assisted Mode (☑): This mode activates both heating elements and the fan, ensuring constant and uniform heat throughout the oven. This allows for even cooking and browning. It's particularly recommended for dishes requiring a gratin finish or prolonged cooking times, like lasagna, pasta bakes, roast chicken, and potatoes. The excellent heat distribution also allows for lower temperatures when cooking roasts, resulting in more tender meat and less weight loss. It's also ideal for cooking fish with minimal condiments. For desserts, it's perfect for baking leavened cakes. This mode can also be used for quick thawing of white or red meat and bread at 80°C, or more delicate foods at 60°C, or even cold air circulation by setting the thermostat to 0°C.
- "Top" Oven Mode: This mode uses only the top heating element and is set between 60°C and Max. It's used for browning food at the end of cooking.
- Grill Mode (☐): This mode activates the top central heating element at Max temperature. The high, direct heat is excellent for browning the surface of meats and roasts while keeping them tender. It's recommended for beef steaks, veal, rib steak, fillets, and hamburgers. When grilling, the oven door should be ajar, and the food placed under the center of the grill (3rd or 4th rack from the bottom). The dripping pan should be placed on the bottom rack to collect sauces and grease.
- Fan Assisted Grill Mode (☑): This mode activates the top central heating element and the fan, set between 60°C and 200°C. The forced air circulation enhances the thermal radiation, preventing food from burning on the surface while allowing heat to penetrate deeper. This mode is excellent for kebabs (meat and vegetables), sausages, ribs, lamb chops, chicken in spicy sauce, quail, pork chops, and fish steaks (swordfish, tuna, grouper, stuffed cuttlefish). For this mode, the oven door must be shut to achieve excellent results and save energy (approximately 10%). The recommended thermostat setting is 200°C.
Timer (D): Available on certain models, the timer knob is wound clockwise for one full turn, then turned back to the desired time.
Oven Indicator Light (E): Available on certain models, this light indicates when the oven is heating up to the set temperature.
Important Technical Specifications
- Inner dimensions of the oven:
- Width: 43.5 cm
- Depth: 40 cm
- Height: 32 cm
- Inner Volume of the Oven: 56 litres
- Voltage and Frequency of Power Supply: 230-240V ~ 50/60Hz 2250-2400W
- Consumption (non fan assisted models):
- To reach 200°C: 0.40 kWh
- To maintain 200°C for an hour: 0.65 kWh
- Total consumption: 1.05 kWh
- Consumption (fan assisted models):
- To reach 200°C: 0.40 kWh
- To maintain 200°C for an hour: 0.95 kWh
- Total consumption: 1.35 kWh
- Compliance: The appliance conforms with European Economic Community directives:
- 73/23/EEC of 19/02/73 (Low Voltage) and subsequent modifications
- 89/336/EEC of 03/05/89 (Electromagnetic Compatibility) and subsequent modifications
- 93/68/EEC of 22/07/93 and subsequent modifications
Usage Features
Preheating: For leavened foods, the "fan assisted" mode (☑) can be used to quickly reach the desired temperature, saving energy. Once the food is in, the most appropriate cooking mode can be selected.
Cooking on More Than One Rack: Only the "fan assisted" mode (☑) is suitable for cooking on multiple racks simultaneously. The oven has 5 racks. For fan-assisted cooking, use the two central racks (2nd and 4th from the bottom) as the lowest and highest racks receive direct hot air, which can burn delicate foods. Place foods requiring greater heat on the 2nd rack and more delicate foods on the 4th rack. If foods require differing times and temperatures, set an intermediate temperature, place delicate food on the 4th rack, and remove the quicker-cooking food first. When using the grill or fan-assisted grill, the dripping pan should always be on the 1st oven rack from the bottom, and the grid on the upper.
Baking Cakes: Always place cakes in a preheated oven. Wait until the oven is thoroughly preheated (red light "E" turns off). Avoid opening the oven door during baking to prevent the cake from dropping.
- Pastry too dry: Increase temperature by 10°C, reduce cooking time.
- Pastry dropped: Use less liquid, lower temperature by 10°C.
- Pastry too dark on top: Place on a lower rack, lower temperature, increase cooking time.
- Cooked well inside but sticky outside: Use less liquid, lower temperature, increase cooking time.
- Pastry sticks to pan: Grease the pan well and sprinkle with flour or use greaseproof paper.
- Uneven cooking on multiple levels (fan-assisted oven): Use a lower temperature setting. It's not necessary to remove food from all racks at the same time.
Cooking Pizza: For best results, use the "fan assisted" mode (☑). Preheat the oven for at least 10 minutes. Use a light aluminum pizza pan on the grid; a dripping pan will extend cooking time and prevent a crispy crust. Avoid opening the oven door frequently. For pizzas with many toppings, add mozzarella cheese halfway through cooking. When cooking two pizzas, use the 2nd and 4th racks at 220°C, placing them after 10 minutes of preheating.
Cooking Fish and Meat: For white meat, fowl, and fish, use temperatures from 180°C to 200°C. For red meat that should be well done outside and tender/juicy inside, start with a high temperature (200°C-220°C) for a short time, then lower the oven temperature. Larger roasts require lower temperatures. Place meat on the center of the grid with the dripping pan beneath to catch fat. For more heat from below, use lower rack heights. For savory roasts (duck, wild game), dress meat with lard or bacon.
First Use Notice: Set the thermostat to the highest setting and run the oven for about half an hour with the door shut. Then open the door to air out the room. Any initial odor is due to the evaporation of protective substances.
Dripping Pan Placement Notice: Place the dripping pan on the bottom shelf only when grilling or using the rotisserie to prevent sauce/grease from dripping onto the oven bottom. For other cooking types, never use the bottom shelf or place anything on the bottom of the oven as this can damage the enamel. Always use the provided grid with cookware.
Oven Light: Set knob "B" to the light symbol to turn it on. It remains on when any electrical heating element is active.
Cooling Ventilation: Some models have a cooling fan that activates when selector knob "B" is turned. The fan operates during cooking, and a normal airflow can be heard exiting between the oven door and control panel. The fan remains on until the oven cools sufficiently after cooking.
Maintenance Features
General Cleaning:
- Disconnect from power supply before cleaning.
- Enamelled or stainless steel parts should be washed with lukewarm water and non-abrasive cleaners. Rinse thoroughly and dry. For difficult stains on stainless steel, use special market products.
- Clean the oven interior immediately after use, while still warm, with hot water and soap. Rinse and dry thoroughly. Avoid abrasive detergents, sponges, or acids, as they can damage the enamel. For tough grease/dirt, use a special oven cleaning product following its instructions.
- If condensation forms after extended use, dry with a soft cloth.
- Regularly check the rubber seal around the oven opening. Clean it without abrasive products. If damaged, contact After-sales Service Centre and avoid using the oven until repaired.
- Never line the oven bottom with aluminum foil, as heat accumulation can compromise cooking and damage the enamel.
- Clean the glass door with non-abrasive products or sponges and dry with a soft cloth.
Removing the Oven Door: For thorough cleaning:
- Open the door fully.
- Lift and turn the small levers on the two hinges.
- Grip the door on the two external sides, shut it slowly but not completely.
- Pull the door towards you, pulling it out of its seat.
Reassemble by following the steps in reverse.
Replacing the Oven Lamp:
- Disconnect the oven from the power supply (omnipolar switch or unplug).
- Remove the glass cover of the lamp-holder.
- Remove the old lamp and replace it with a new one resistant to high temperatures (300°C) with the following characteristics:
- Voltage: 230/240 V
- Wattage: 25W
- Type: E14
- Replace the glass cover and reconnect the oven to the mains.
Installation
The appliance must be installed by a qualified person according to instructions. The manufacturer is not responsible for improper installation. Power supply must be cut off before any adjustments or maintenance.
Built-in Ovens:
- The cabinet must be appropriate for proper functioning. The manual provides dimensions for cut-out installation under the counter or in a wall cabinet unit.
- Adjacent cabinet panels must be heat-resistant (up to 100°C).
- Electrical parts must be inaccessible once installed.
- All parts ensuring safe operation must be removable only with a tool.
- For correct centering, position the 4 tabs on the oven sides with the 4 holes on the frame perimeter.
- 20 mm thick cabinet side panel: remove part of the tab (Fig. A).
- 18 mm thick cabinet side panel: use the first groove (factory-set) (Fig. B).
- 16 mm thick cabinet side panel: use the second groove (Fig. C).
- To fasten the oven, open the door and insert 4 wooden screws into the 4 holes on the frame perimeter.
- Ensure adequate ventilation by removing the cabinet unit's back panel. Installing the oven on two wood strips is preferable. If on a flat surface, there must be an aperture of at least 45 x 560 mm.
Electrical Connection:
- Ovens use a three-pole power supply cable with a yellow-green earthing conductor.
- Connection n° 1 (with plug): Fit a normalized plug matching the load. If connected directly to mains, an omnipolar circuit-breaker (minimum 3 mm opening) suitable for the load and complying with directives must be installed between the appliance and mains (earthing wire not interrupted). The power supply cable must not exceed 50°C room temperature.
- Check that home circuit breakers/fuses support the appliance load.
- Power supply system has efficient earthing.
- Socket/circuit-breaker is easily accessible after installation.
- Do not use reducers, adapters, or shunts.
- Connection n° 2 (without plug - direct wiring):
- WARNING: THIS APPLIANCE MUST BE EARTHED.
- Before disposing of the plug, make pins unusable.
- Wire colors: Green & Yellow (Earth), Blue (Neutral), Brown (Live).
- If plug colors don't match, connect Green & Yellow to "E" or ÷, Brown to "L" or Red, Blue to "N" or Black.
- A 13 amp plug (BS 1363) needs a 13 amp fuse. A 15 amp plug needs a 15 amp fuse. Consult a qualified electrician if in doubt.
- The plug and socket must be easily accessible.
Disposing of the Appliance: Remove the plug by cutting the mains cable as close as possible to the plug body.
Safety Guidelines
- Only call Service Centres authorized by the manufacturer.
- Always use original spare parts.
- This appliance is for non-professional, household use only.
- Instructions are valid for countries with symbols on the manual and serial number plate.
- The electrical system must be correctly connected to an efficient earthing system.
- Heating elements and parts of the oven door become extremely hot during use. Keep children away.
- Potentially dangerous items (take measures to prevent contact by children/disabled): Controls, packaging (bags, polystyrene, nails), the appliance itself (after use due to heat, or when no longer in use - make dangerous parts safe).
- Avoid: Touching with wet body parts, using barefoot, pulling on appliance/supply cable to unplug, improper operations, obstructing ventilation/heat dissipation slots, power supply cables of small appliances touching hot parts, exposing to atmospheric agents (rain, sunlight), using oven for storage, using flammable liquids near appliance, using adapters/multiple sockets/extension leads, attempting installation/repair without qualified personnel.
- Contact qualified personnel for: Installation, doubts about operating, replacing incompatible electrical sockets.
- Contact authorized Service Centres for: Doubts about appliance soundness after unpacking, damaged/needed replacement power supply cable, appliance breakdown/poor function, original spare parts.
- Good practices: Only use for cooking, check soundness after unpacking, disconnect from mains if not functioning/before cleaning/maintenance, unplug when unused (and turn off gas tap if applicable), use oven gloves for cookware, grip oven door handle in the center (extremities can be hot), ensure knobs are in "•"/"o" position when not in use.
- Cut power supply cable after disconnecting from mains when disposing of the appliance.
- Manufacturer is not responsible for damage due to incorrect installation, improper, incorrect, and irrational use.