This document describes the Ariston Multifunction Oven with Self-Cleaning by Fast Clean, including installation, use, and maintenance instructions.
Function Description
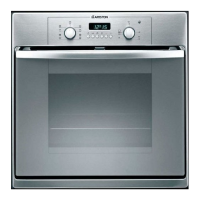
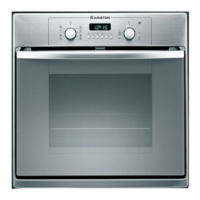
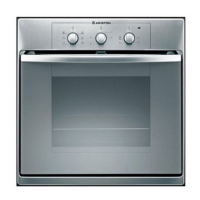
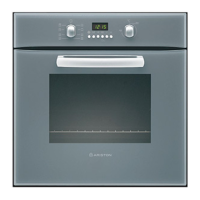
The Ariston oven offers various cooking modes, each designed for specific culinary needs. The control panel features a mode selector, temperature selector, and programmer for easy operation.
Cooking Modes:
- "0": Stop - Turns off the oven.
- Oven Light - Illuminates the oven interior.
- "Traditional" - Utilizes both top and bottom heating elements for uniform heat distribution through natural convection. Ideal for simmering recipes in covered casserole dishes or Bain Marie cooking. Pre-heating is recommended.
- "Pastry" - Uses the circular heating element and fan for delicate heat, perfect for baking cakes and pastries like brioches, chocolate cake, fruitcake, sponge cake, mini cup cakes, and meringues. Pre-heating is recommended.
- "Fast Cooking" - Combines all heating elements with the fan for uniform heat distribution, allowing for fast cooking without pre-heating. Suitable for cooked or frozen dishes.
- "Multicooking" - Engages all heating elements and the fan for uniform heat, enabling cooking of several dishes on multiple racks simultaneously, even if they vary in nature. Pre-heating is recommended.
- "Pizza" - Activates bottom and circular heating elements to quickly heat the oven, ensuring rapid baking of dough for pizzas and tarts. The fan helps brown the surface. Pre-heating is recommended.
- "Grill" - Turns on the top heating element, emitting infrared rays for direct exposure to food. Recommended for use with the oven door closed and starting from cold. Heat intensity is adjustable. A dripping pan should be placed on the first rack to catch fat.
- "Gratin" - Activates the top heating element and the fan for forced air circulation, ensuring uniform heat distribution and perfect cooking of food surfaces. Ideal for roasting red or white meats and poultry. Recommended for use with the oven door closed and starting from cold.
- Fast Clean - A self-cleaning process that heats the oven to 500°C to destroy food and fat residue. The oven door locks automatically at 325°C for safety. The process takes approximately 90 minutes.
Important Technical Specifications
- Inner Dimensions:
- Width: 43.5 cm
- Depth: 40.0 cm
- Height: 32.0 cm
- Inner Volume: 54 litres
- Voltage and Frequency of Power Supply:
- 230V~50Hz: 2800 W
- 240V~50Hz: 3050 W
- Fuse Section (for 230V-1+N~50Hz and 240V-1+N~50Hz): 16 A, 1.5 mm²
- Fuse Section (for 230V-2~50Hz): 16 A, 1.5 mm²
- Oven Lamp:
- Voltage: 230/240 W
- Wattage: 15 W
- Type: E 14
- Built-in Installation: The oven is designed for standard furniture cabinet units. It features reinforced insulation and frontal cooling ventilation. Installation must be performed by a qualified professional. The thickness of the cabinet side panel determines the tab configuration for fastening (20 mm, 18 mm, or 16 mm).
Usage Features
Programmer:
The programmer allows setting the clock, timer, cooking duration, and end-of-cooking/fast-cleaning time.
- Setting the Time: After connecting to power or a power failure, a flashing "0.00" is displayed. Use "+" and "-" keys to set the time.
- Setting the Timer: The timer functions when the oven is off. Press the timer button briefly and use "+" and "-" keys to set the duration. An acoustic signal sounds for 1 minute at the end of the set time.
- Acoustic Signal Volume: The volume can be adjusted by pressing the "-" button when the signal sounds.
- Cooking without the Programmer: Select a cooking mode by turning the mode selector knob. The display shows a recommended temperature, which can be adjusted with the temperature selector knob. For grill mode, power levels 1 to 5 are displayed. Press the start cooking key to begin. The pre-heating phase is indicated by a blinking symbol, which stops blinking after approximately 10 minutes when pre-heating is complete.
- Programmed Cooking with Immediate Start: Set the mode and temperature, then press the start cooking key. A recommended cooking time is associated with each mode and can be adjusted. The pre-heating phase is indicated by a blinking symbol.
- Programmed Cooking with Delayed Start: Set the mode, temperature, cooking time, and end-of-cooking time. The programmer automatically calculates the start time. The oven will begin pre-heating at the calculated time.
Accessories:
The oven comes with a dripping pan, large grid, and rotisserie.
- Dripping Pan: Used as a dish support for single-rack cooking, Bain Marie cooking, or as a support for food items like mini cup cakes. It also serves as a dripping pan to catch juices and fat from food on the large grid. Avoid using it on the 4th and 5th racks.
- Large Grid: Always used with edges upwards and with the dripping pan. When on the 2nd rack, it supports meat, with the dripping pan below to catch juices. For grilled food, it's placed on the top rack, with the dripping pan on the 1st rack.
- Rotisserie: Ideal for roasting meats, ensuring uniform browning. It includes a support, a spit with adjustable forks, and a removable handle. The spit must be firmly fitted into the motor's hollow shaft at the back of the oven. The rotisserie timer ensures the spit continues to turn until the oven cools, preventing burning.
Safety Features:
- The oven door locks automatically during fast clean mode when the temperature reaches 325°C.
- Heating elements are powered off if an anomaly occurs.
- Reinforced insulation and a cooling fan keep external surfaces lukewarm during high-temperature operations.
- Spontaneous combustion of particles during pyrolysis is normal and safe.
- Children should be kept away from the appliance, especially when using grill or oven functions, as parts become very hot.
- Always use oven gloves when placing or removing cookware.
- Never store inflammable material or use flammable liquids near the oven.
Maintenance Features
Cleaning:
- Inside the Oven: Clean after each use, especially after cooking roasts, to prevent food residue from charring and releasing smoke.
- Oven Exterior: Clean enamelled or stainless steel surfaces with a sponge soaked in soapy water, then rinse and dry thoroughly. Avoid abrasive or corrosive products.
- Stainless Steel Parts: Rinse and dry with a soft cloth. Use a specific non-abrasive product for tough stains.
- Aluminium Foil: Do not line the oven bottom with aluminium foil, as it can melt and damage the enamel coating.
- Rotisserie and Accessories: Remove and clean the rotisserie assembly (spit, forks, handle) along with the dripping pan and grid in the sink with a damp sponge and ordinary detergent, or in a dishwasher.
Disassembling the Oven Door:
The oven door can be removed for cleaning the space between the bottom of the door and the front.
- Open the oven door fully.
- Lift and turn the small levers on the two hinges.
- Shut the door partially.
- Grip the door on the two external sides and pull it out.
Re-assemble by reversing these steps.
Replacing the Oven Lamp:
- Unplug the appliance or switch off the main switch.
- Remove the glass cover using a narrow, flat item (e.g., screwdriver).
- Unscrew the lamp and replace it with a new one (230/240 W, 15 W, E 14 type).
- Replace the glass cover and ensure the seal is correctly positioned.
Fast Clean Process:
- Remove all accessories from the oven.
- Remove larger food residue with a wet sponge. Avoid detergents.
- Shut the oven door.
- Set the mode selector to the fast clean symbol.
- Programme an immediate or delayed start. The process takes approximately 90 minutes.
- After the process, "P. 0.00" appears. Wait for the oven to cool down to an acceptable level and set the mode selector back to "0" to unlock the door.
- Remove white dust deposits with a damp sponge.
Troubleshooting:
- Excessive Smoke During Cooking:
- Check if the correct cooking mode and temperature are selected for the dish.
- Ensure the right accessories are used and the dish is at the recommended rack height.
- Verify the oven's cleanliness; encrusted food residue can char and create smoke.
- Grease splashes or overflows onto hot surfaces can also cause smoke.
- Malfunctions: If "FnFm" (n and m are numbers) is displayed, contact an authorised after-sales service centre.