Do you have a question about the Ariston microGENUS HE 24 MFFI and is the answer not in the manual?
Read and follow installation and servicing instructions carefully for proper operation and maintenance.
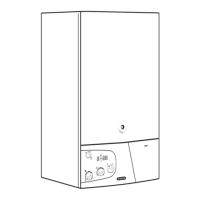
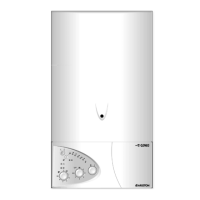
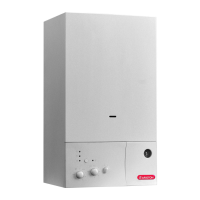
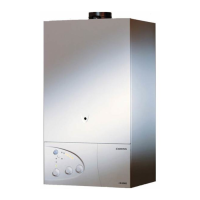
Provides a diagram and legend detailing the boiler's components and their identification.
Lists relevant British Standards and codes of practice applicable to boiler installation.
Guidelines on choosing a safe and suitable location for the boiler, considering ventilation and clearances.
Displays the physical dimensions of the boiler with a component legend for identification.
Specifies minimum clearances required around the boiler for servicing and adequate airflow.
Instructions on how to physically mount the boiler using a template provided.
Details on connecting the boiler to the mains electrical supply, including safety precautions and regulations.
Instructions for connecting the gas supply to the boiler, ensuring an adequate and safe supply.
Guidance on pipework, jointing, and air release for the central heating system installation.
Explains the function of the automatic by-pass valve for protecting the heat exchanger.
States that the boiler is designed exclusively for sealed heating systems.
Requirements for locating and fitting drain cocks for system draining and maintenance.
Recommendations for treating system water to prevent scaling and corrosion, including flushing procedures.
How to safely discharge condensate from the boiler via a tundish and suitable acid-resistant pipe.
Requirements for flue termination, spacing, and terminal guards as per BS 5440-1.
Detailed steps for installing the horizontal coaxial flue, including cutting and securing the components.
Instructions for fitting the 5" flue kit, including horizontal and vertical options and adaptor use.
Steps for installing the vertical coaxial flue kit, including roof flashing and extension pieces.
Instructions for fitting the twin pipe flue system, including adaptor and air intake connection.
Explains the boiler's display during operation and lists fault codes with their causes.
Step-by-step guide on how to remove the boiler's front panel for internal access.
Instructions for connecting external room thermostats and time clocks to the boiler's terminals.
Detailed procedure for installing an optional digital time clock on the boiler.
Guide on setting the time, on/off periods, and operating modes of the mechanical time clock.
Instructions for setting the time, day, and switching programs on the digital time switch.
Provides wiring and system diagrams for understanding the boiler's electrical layout and connections.
Explains the function and settings of the boiler's dip switches for configuration.
Illustrates the internal water circuit of the boiler and its key components.
Steps for preparing the boiler for commissioning, including electrical checks and system filling.
Checks to be performed before initial start-up and the procedure for powering on the boiler.
Details on accessing and adjusting internal components like potentiometers and dip switches.
Procedures for performing combustion analysis and activating flue test mode.
How to monitor flue exhaust/air intake and detect pressure loss using a manometer.
Explains the 'COMFORT' function to pre-warm the secondary exchanger for faster hot water.
Describes the boiler's safety shutdown mechanisms and fault indication displays.
Step-by-step instructions for draining the central heating system water.
Instructions for draining the domestic hot water system for frost protection.
Requirements for completing documentation like the Declaration of Conformity and commissioning checklist.
A list of checks to perform after installation to ensure proper operation of all boiler functions.
Guidance on explaining controls, usage, and servicing to the end user.
Steps for converting the boiler to use different gas types (natural gas, LPG).
Detailed instructions on setting the gas pressures for maximum and minimum boiler power.
Guidance on identifying and replacing individual boiler components based on fault finding.
Procedures for gaining access to internal boiler components for servicing.
Step-by-step guide on removing the boiler's front panel for internal access.
Instructions for removing the sealed chamber cover for access.
Steps for removing the side panels of the boiler to access internal components.
How to remove the cover to access the combustion chamber.
Procedure for removing the burner and its fuel jets.
Steps for safely removing the ignition and detection electrodes.
Detailed steps for removing the main heat exchanger unit.
Instructions for disconnecting and removing the air pressure switch.
Procedure for removing the fan unit from the boiler.
Steps to remove flue and condensate sensors.
Guide on how to remove the recuperator unit.
Instructions for removing the housing around the recuperator.
Procedure for removing the condensate trap.
Steps to remove the spark generator.
Instructions for removing the gas valve, ensuring the gas supply is off.
Procedure for removing the domestic hot water secondary exchanger.
Steps to remove the pump pressure switch.
Instructions for removing the safety valve.
Steps for removing the automatic air vent.
Procedure for removing the circulation pump.
Instructions for removing the pressure gauge.
Steps for removing the expansion vessel.
Procedure for removing the overheat thermostat.
Steps to remove the central heating temperature sensor.
Steps to remove the domestic hot water temperature sensor.
Procedure for removing the diverter valve actuator.
Instructions for removing the domestic hot water flow switch.
Procedure for checking and accessing the boiler's fuses.
Detailed steps for removing the main and display Printed Circuit Boards.
Procedure for removing the boiler's time clock.
Flowcharts to help diagnose and correct common boiler faults.