Do you have a question about the Asko HG1145AD and is the answer not in the manual?
This document outlines the operation, maintenance, and environmental considerations for a gas hob appliance.
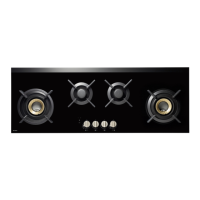
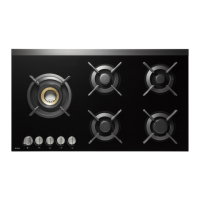
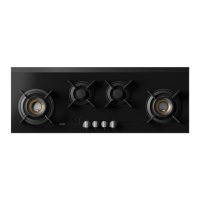
The gas hob features multiple burners for cooking, including rapid burners and a wok burner. Each burner is fully adjustable, offering settings from high to low. The wok burner has additional settings for "Wok setting" and "Roasting setting," allowing for specialized cooking. The appliance also includes a timer function (optional) that can automatically switch off one or more burners after a set time. An emergency stop button is available to switch off all burners simultaneously.
Ignition and Adjustment: To ignite a burner, press the control knob and turn it anticlockwise. For the thermocouple safety pilot to activate, the control knob must be fully depressed for at least 3 seconds between high and low settings. The wok burner offers a "Roasting setting" which can be activated by turning the wok selector ring. In this setting, the inner ring switches off, and the outer ring switches on. The wok burner will automatically switch to the "Wok setting" if its control knob is set to 0. It is possible to switch between "Wok setting" and "Roasting setting" during cooking. It's important to note that the selector ring cannot be changed to the "Roasting setting" if the control knob is in the off (0-setting) position; the knob must always be turned back completely to 0.
Timer (Option): The timer function allows for automatic burner shutdown. To use it, select the desired burner by pressing the timer button (2) repeatedly until "00" (4) flashes above the control knob. Use the + and - buttons (1) to set the cooking time, up to a maximum of 6 hours. A short press increases the time by 1 minute, while a longer press (3 seconds) increases it by 10 minutes. For times of 1 hour or more, the display will show "1h" and then alternate between hours and minutes. In the final minute, the display counts down in seconds. Once the set time expires, a beep will sound, and the burner will switch off. Press the timer button (2) to turn off the beep. The timer does not regulate temperature; this must be done with the control knob.
Kitchen Timer: The kitchen timer can be set similarly to the timer function but for a burner not in use. A beep will sound when the set time expires, which can be turned off by pressing the selection button (2). The burner is not automatically switched off in this mode.
Cooking Time Display: To monitor cooking time, select the burner using the timer button (2) until "00" (4) flashes. Do not set a time; after 5 seconds, the timer will start running to display the elapsed cooking time.
Emergency Stop: Press the emergency stop button (3) to switch off all burners at once.
Switching Off Timers: To switch off a burner's timer function, select the burner with the timer button, then press and hold the timer button for at least 3 seconds. To switch off all active timer functions, depress the timer button for at least 3 seconds.
Switching Off Beep: The sound signals for button presses can be toggled on or off. Press the emergency stop button until a long beep is heard. Within 5 seconds, simultaneously press the timer's + and - buttons. A long beep indicates whether the sound signals have been switched on or off.
Pans: Always ensure that flames remain under the pan to prevent energy loss and overheating of handles. Do not use pans with a base diameter smaller than 12 cm, as they are less stable.
Wok Ring and Small Pan Grid: A wok ring, supplied or available as an accessory, provides extra stability for round-based woks on the wok burner. A small pan grid, also supplied or available as an accessory, allows for the use of very small pans. Do not use the small pan grid on the wok burner, and do not use the wok ring on the wok roasting setting, as this may cause discolouring.
Pan Support: Place pan supports vertically, avoiding sliding them over the drip tray. Use the leads to correctly position them on the drip tray.
Regular maintenance after each use is crucial to prevent spilt food from setting and creating stubborn stains. Use a mild detergent for cleaning. Always clean control knobs, burners, and pan supports first, then the drip tray or glass cover, to avoid re-dirtying cleaned surfaces.
Burner Assembly: Use the leads (1) to correctly assemble burner parts.
Wok Burner Assembly: Correct placement of wok burner parts is essential for proper function.
Cleaning Burner Parts: Do not clean burner parts in a dishwasher, as dishwasher detergent can corrode them.
Persistent Stains on Enamel (Pan Supports, Burner Caps): These stains are best removed with a fluid detergent or a plastic scouring sponge. Avoid scouring powder, scouring pads, sharp objects, or aggressive cleaning products.
Persistent Stains on the Glass Cover: Clean the glass cover with a special cleaning product for ceramic hobs. Water stains or limescale are best cleaned using cleaning vinegar.
Brass Wok Burner Parts: Some wok burner parts are made of brass. It is normal for the brass colour to change due to the high temperatures involved in wok use.
For additional maintenance and cleaning instructions, consult the 'www.asko.com' website.
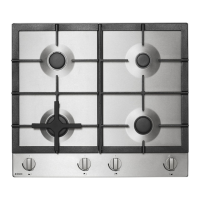
| Type | Gas Hob |
|---|---|
| Width | 60 cm |
| Number of burners | 4 |
| Material | Stainless Steel |
| Ignition type | Automatic |
| Safety features | Flame Failure Safety Device |