Service manual TD25
9
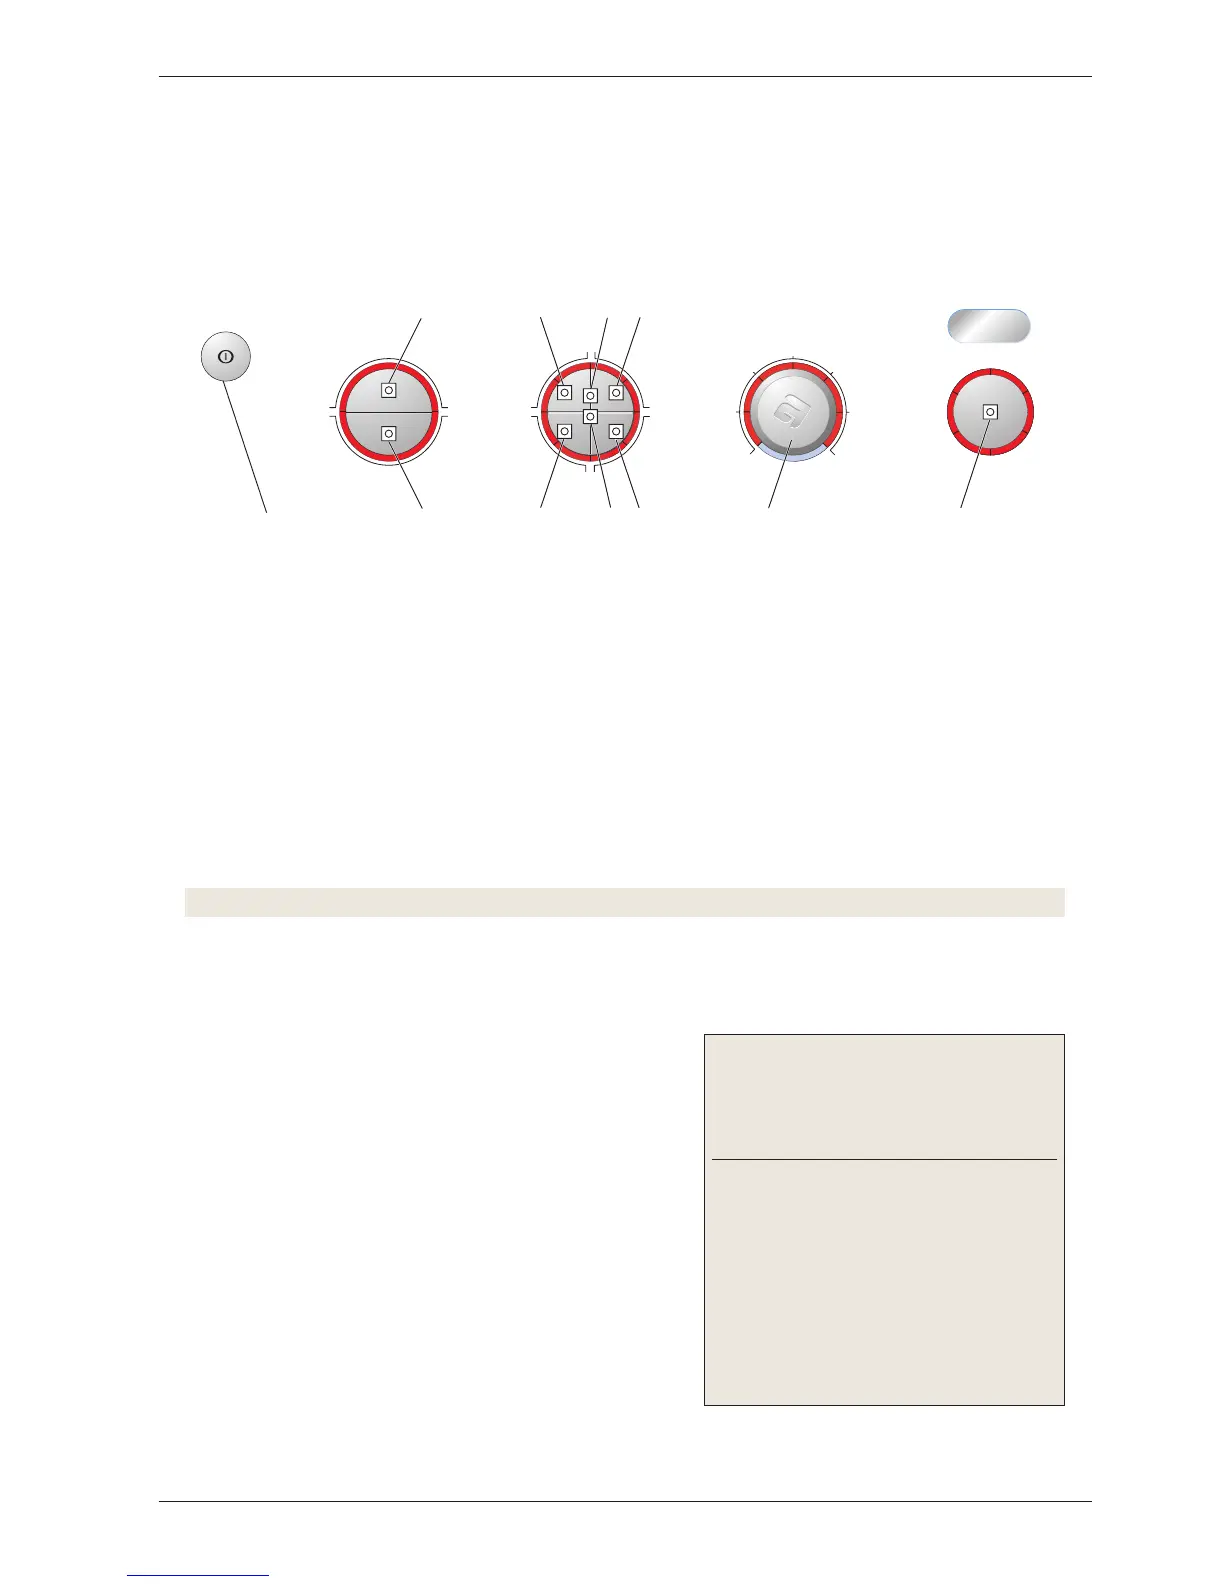
Total reset of programmes
To access the test programme, total reset of the programme must be carried out as follows:
1. Cancel the current programme and switch off the machine by pressing the main power switch.
2. Hold the start/stop button (S1) in and start the machine by pressing the main power switch.
3. Check that any of the LEDs around the programme knob (L7 – L12) lights. This indicates that total
reset has been carried out.
Starting the test programme
4. Press button S7 (left-hand button on divided options button) and keep it pressed for approximately 20
seconds.
Note! This must be done within 3 seconds after carrying out total reset.
• All LEDs light up continuously. This indicates that the test programme has been activated.
Testing the motor and condensing waterpump
5. Press the start/stop button (S1).
• LED L6 lights up and is lit for the entire test program-
me.
•
Condenser dryer: LED L8 lights up.
• Airing dryer: LED L7 lights up.
• The motor and condensing waterpump starts.
• Water fills the housing for the water tank until the
machine stops (check that the switch for condensation
water works).
6.
Press the start/stop button (S1) to start the motor and
pump out the condensation water.
•
LED L 2 lights up and is lit for the remainder of the test
programme.
Indication of faults:
Fault indication/symp-
tom
Cause
The condensing
waterpump pumps until
S1 is reactivated and
L7 lights up (applies to
airing dryers).
The rear thermistor
does not have any con-
tact or is damaged.
The motor will not start. Motor or cable fault
The condensing water-
pump does not start.
Switch or cable fault
Test programme
The entire test programme is run in a sequence as follows. You can cancel the test programme at any time
during the programme by opening the door or pressing the main power switch.