Do you have a question about the Assa Abloy Sargent 7900 Series and is the answer not in the manual?
This document provides comprehensive installation instructions for the SARGENT 7900 & 8200 Series Mortise Locks, specifically designed for use with Studio Collection Levers. It covers everything from necessary tools and package contents to detailed installation steps for various trim types and lockbody functions, as well as instructions for changing the hand of the lock.
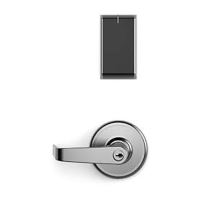
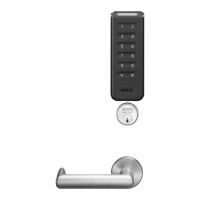
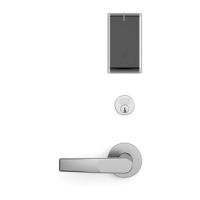
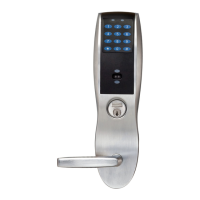
The SARGENT 7900 & 8200 Series Mortise Locks are robust and versatile locking mechanisms suitable for a wide range of door applications. These locks are designed to integrate seamlessly with the elegant Studio Collection Levers, offering both security and aesthetic appeal. The system is engineered for durability and ease of installation, catering to both new installations and replacements.
The core function of these mortise locks is to provide secure access control for doors. Depending on the specific function number, the lock can offer various modes of operation, including keyed entry, passage, privacy, and dummy functions. The lockbody itself houses the intricate mechanism that controls the latch and deadbolt (if applicable), ensuring reliable locking and unlocking.
The system supports both single and double cylinder functions, allowing for keyed access from one or both sides of the door as required. For functions requiring a thumbturn, the 130 KB thumbturn assembly is used with rose trim, while escutcheon trims requiring thumbturns are preassembled at the factory. The #41 cylinder is standard for 1-3/4" thick doors, accommodating common door thicknesses.
The locks are designed with a "multi-function lockbody" feature, particularly for the 8200 Series Mortise Lock options (04, 05, 06, 13, 31, 36, 37, 38). This allows for customization of the lock's behavior by adjusting the "green catch screw" on the lock case. This screw's position dictates the function of the lock, such as whether the lever retracts the latch, if the outside lever is rigid when locked, or if a key is required for entry. For certain functions (04, 06, 13, 31), the hub position must be set at a 45° angle, while for the 15 function, the slot in the hub must be vertical. This adaptability makes the lock suitable for diverse security and operational needs within a building.
The installation process is designed to be straightforward, beginning with door preparation. Users are instructed to check template A7057 for accurate function hole sizing and location, and to verify strike location. Cleaning the door pocket and edge of any debris is crucial for smooth operation.
Handing of the lock is a critical aspect, and the instructions emphasize ensuring that the lock's handing (latch and locking piece) matches the door's handing. The lock body slides into the door, followed by the outside lever and rose/escutcheon assembly. Keeping the door open during installation is recommended for ease of access. For one-sided trim installations, a separate instruction sheet (A7028) is referenced.
For sectional trim, the keyed cylinder is assembled first, threading it into the lock until its face is flush with the collar edge. The SARGENT logo on the cylinder must be horizontal and on the top portion. The cylinder clamp screw is then tightened. The lock is secured in the door with wood or machine screws, though not tightened completely at this stage. The inside spindle is inserted into the mortise lock's square hole, aligning its slot with the set screw hole in the inside adapter. The inside adapter and plate assembly are then secured with Phillips machine screws. The rose posts are aligned with the adapter and plate assembly and pressed on until tight against the door face. Finally, the inside lever is attached and secured with an Allen wrench. Thumbturn/emergency release assemblies are installed according to their specific instructions. Before closing the door, proper lock operation should be verified. The lockbody screws are then fully tightened, and the outside front is attached with flat head screws.
For CE, LE1, and TE Escutcheon Trim, the outside escutcheon is installed first. The inside spindle slides into the lockbody hub, and the inside adapter plate is secured over the spindle with screws. The inside escutcheon is then installed with screws, and the inside lever is secured with a set screw. Through-bolts connect the inside and outside escutcheons. Screw heads should be visible on the inside escutcheon.
The document also addresses the installation of E2, E3, and E4 Square Roses, highlighting the importance of correct orientation for the roses and their mounting plates to prevent crooked installation. The plastic rose-mounting inserts and the slot in the trim must face toward the hinge side of the door.
A key usage feature is the ability to change the hand of the lock for 8200 Series models. This involves positioning the lockbody with the red surface of the locking piece visible, inserting a blade-type screwdriver into the locking piece slot to rotate it, and then pushing the locking piece toward the back of the lock body and rotating it 180° until the red surface shows on the opposite side. For specific functions (04, 06, 13, 31), the green catch screw must be removed, the hub rotated 45 degrees to a vertical position, the locking piece rotated for the required hand (red surface facing the locked side), and then the hub returned to its original 45-degree position before reinstalling the green catch screw. The latch's handing can also be adjusted by rotating it 180° after pushing it out with a screwdriver. The deadlatch is self-adjusting.
While the document primarily focuses on installation, several points touch upon maintenance and long-term usability. The instruction to not fully tighten lockbody screws until final operational verification suggests a design that allows for adjustments during installation, which can also be beneficial during future maintenance or troubleshooting.
The mention of "Removable Core or Interchangeable Core cylinders" indicates a design that facilitates easy cylinder replacement or rekeying without disassembling the entire lock. These cylinders require a control key (stamped with "C") for removal and installation, which is not provided standard but can be requested separately. This feature simplifies security upgrades or changes, reducing the need for extensive lock servicing.
The "green catch screw" mechanism for changing lock functions is also a maintenance-friendly feature. It allows for on-site reconfiguration of the lock's behavior without requiring specialized tools or replacement parts, making it adaptable to changing security requirements over time.
The note that the latch cannot be unscrewed implies a robust, integrated design for the latch mechanism, likely reducing potential points of failure or wear that might require frequent maintenance. The self-adjusting nature of the deadlatch also contributes to reduced maintenance, as it automatically adapts to door conditions.
Overall, the SARGENT 7900 & 8200 Series Mortise Locks with Studio Collection Levers are designed for secure, adaptable, and relatively low-maintenance operation, with features that support both initial installation and long-term use and security management.
| Category | Locks |
|---|---|
| Type | Mortise Lock |
| Security Grade | Grade 1 |
| Function | Entry, Classroom |
| Material | Steel |
| Keying | Keyed |
| Standards | ANSI/BHMA A156.13 |
| Backset | 2-3/4" (70mm) |
| Door Thickness | 1-3/4" |
| Handing | Reversible |
| Keyway | Sargent |
| Functions | Passage, Privacy, Office, Storeroom, Classroom, Entry |
| Series | 7900 Series |
| Finish Options | US4 (Satin Chrome), US10D (Satin Bronze), US26 (Polished Brass) |