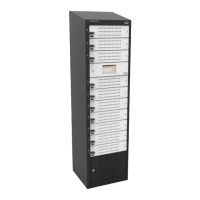
6.9 Measure Latch Height, adjust so that height sticking out of
the tube is
3
/
4
" (Turn clockwise to decrease Latch Height, turn
counter clockwise to increase Latch Height).
6.10 Once latch is at the proper height,
secure latch insert screw with
5
/
64
"
Allen key, apply threadlocker.
6.11 Apply lubrication, provided with the Latch Adaptor, to both the front and back faces of the Latch.
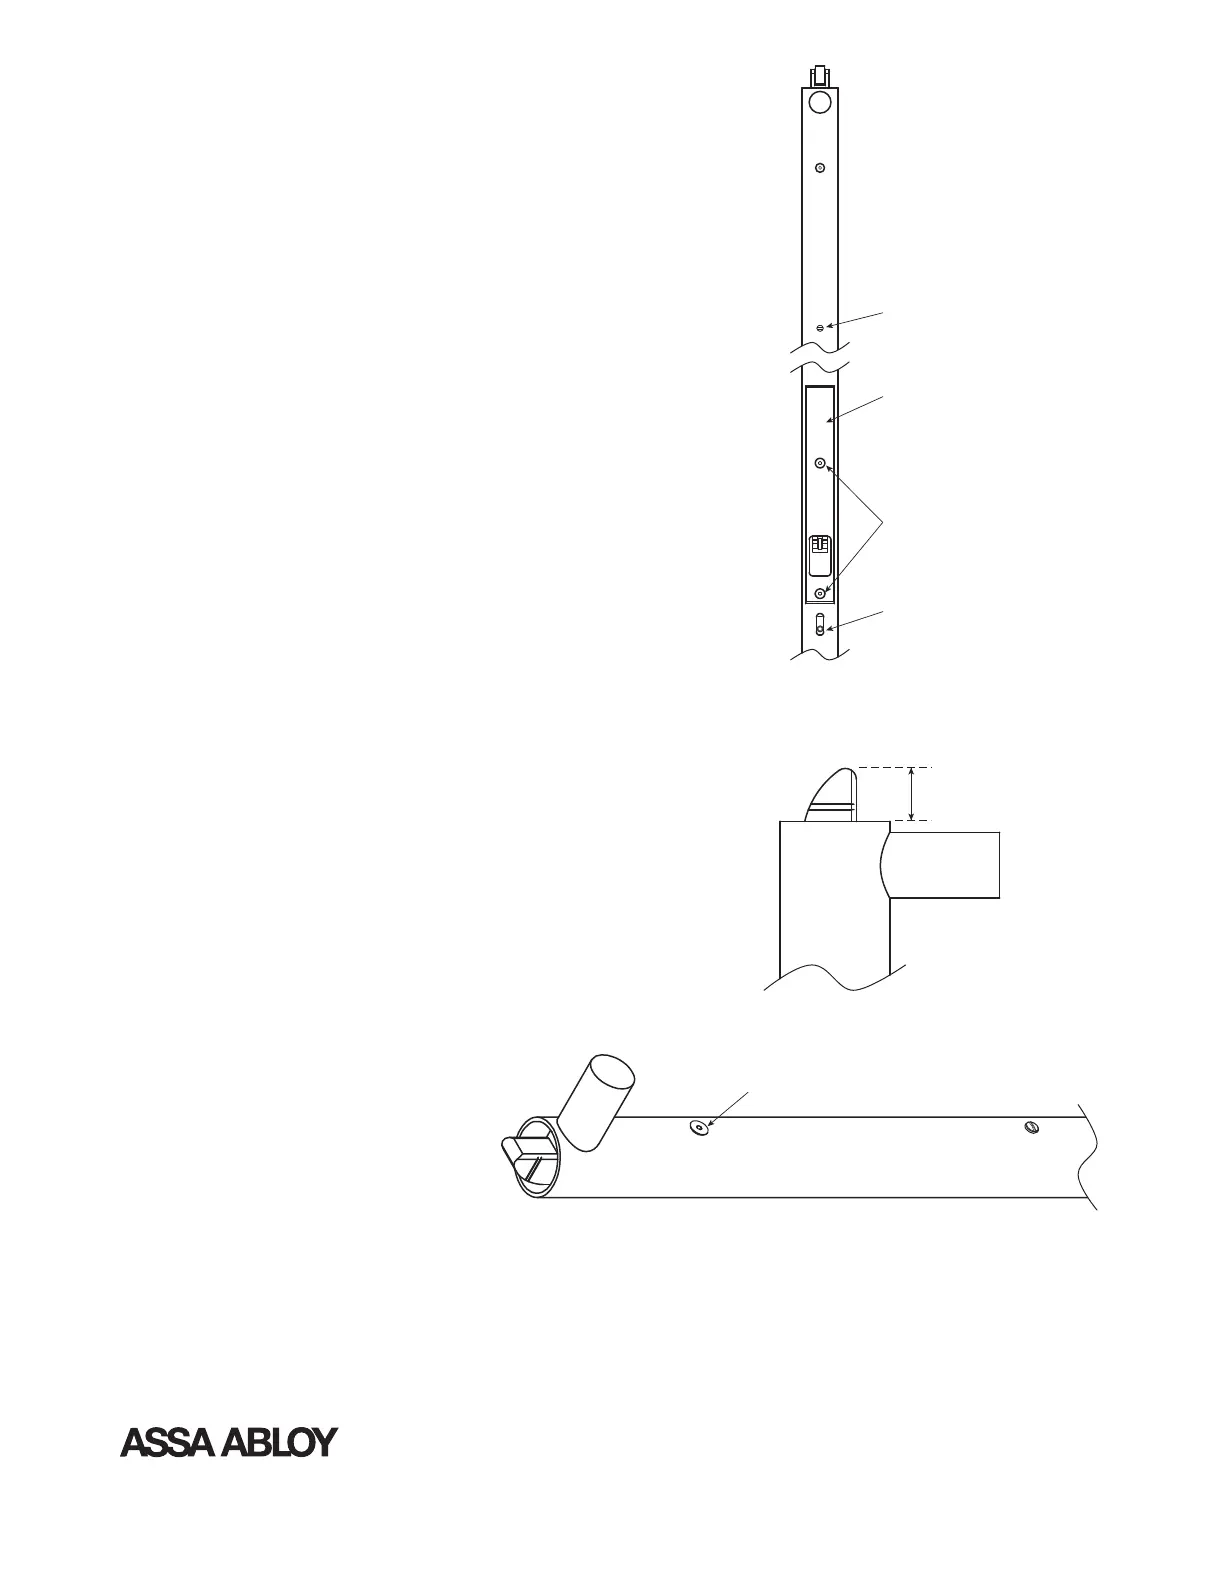
6.6 Replace Dog Button, apply threadlocker (May
have to use non-marring vice grips to tighten).
6.7 Pull Latch out of tube until Dog Button stops it
and replace Latch Bottom Screw with flat head
screw driver, apply threadlocker.
6.8 Replace Trimplate and fasten with Trimplate
Screws using
1
/
8
” Allen key, apply threadlocker.
Latch Bottom
Screw (Step 6.7)
Trimplate
(Step 6.8)
Trimplate
Screws
(Step 6.8)
Dog Button
(Step 6.6)
3
/
4
"
Latch Insert Screw
Copyright
©
2018, ASSA ABLOY Accessories and Door Controls Group, Inc. All rights reserved. Reproduction in whole
or in part without the express written permission of ASSA ABLOY Accessories and Door Controls Group, Inc. is prohibited.
The global leader in
door opening solutions
4