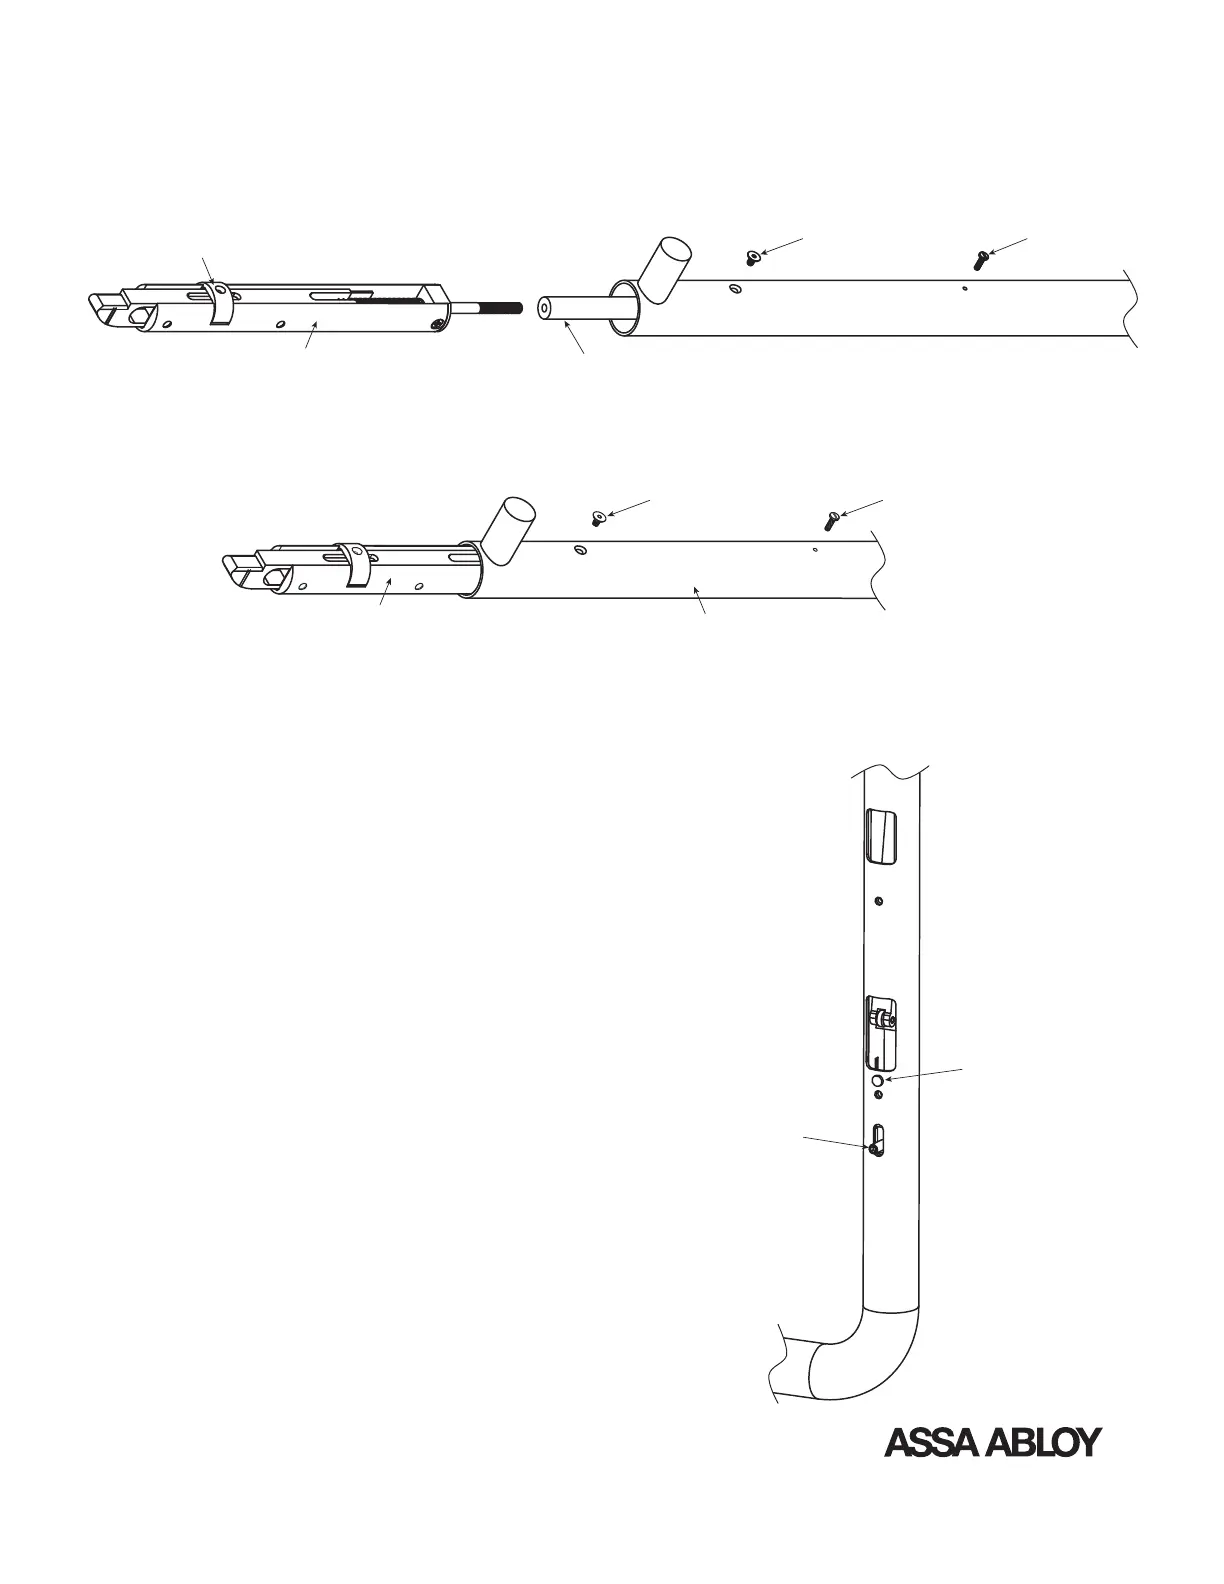
6. Installing SL100 Latch Adaptor
6.1 Attach SL100 Latch Adaptor by threading into Linkage Rod by rotating clockwise until
3
/
4
" of the
adaptors thread is in the Linkage Rod (For engagement depth, the thread can be marked first).
6.2 Slide Internal Assembly with SL100 Latch Adaptor into the tube.
6.3 Once Internal Assembly is far enough in the tube that
the latch insert is starting into the tube, the Latch Adaptor
Assembly must be turned 90 degrees to get passed the
internal mounting of the ball joint.
6.4 Once passed the ball joint, rotate 90 degrees back and
slide into tube until the countersunk thread hole of the
Latch Insert can be seen through the hole in the tube.
6.5 Replace the Rubber Actuator Stop (Make sure the
actuator assembly is aligned as to allow the Rubber
Actuator Stop to be replaced).
Note: Do not forget to place Latch Insert into Latch Adaptor Assembly before completely sliding Internal
Assembly into the tube.
Linkage Rod
SL100 Latch Adaptor
Latch Insert
Screw
Screw
Latch Insert
Screw
Latch Bottom
Screw
SL100 Latch Adaptor
Rubber Actuator Stop
Dog Button
Copyright
©
2018, ASSA ABLOY Accessories and Door Controls Group, Inc. All rights reserved. Reproduction in whole
or in part without the express written permission of ASSA ABLOY Accessories and Door Controls Group, Inc. is prohibited.
The global leader in
door opening solutions
3