9
Wire Stripping with a Knife
If you own a wire stripper, we’re assuming you know how to use
it. If not, and you are new to the world of audio construction, you
can use a hobby knife to do the same job. Simply cut around the
insulation leaving an appropriate length for the lead, be very
careful to cut only the insulator and not the wire itself. Pull the
excess insulation away and you have your lead. If the wire is
made of strands, twist the lead between your fingertips to keep
it from fraying.
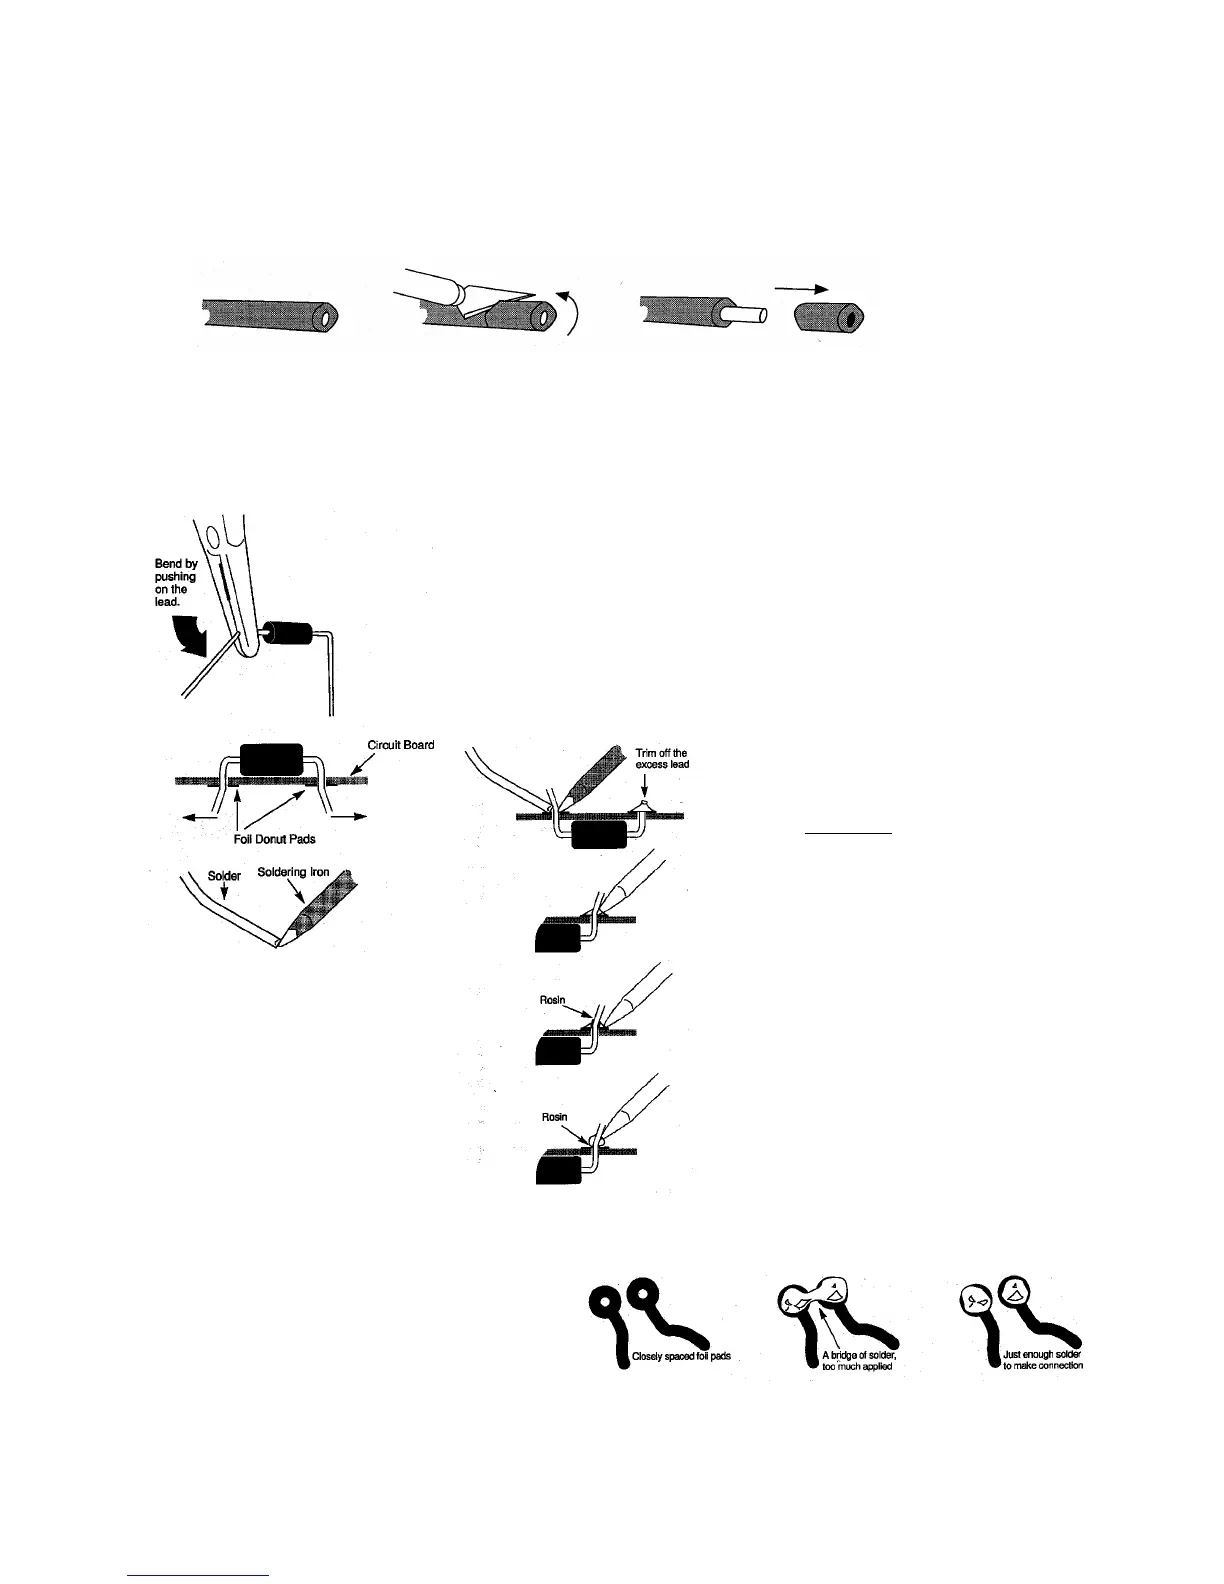
• If a lead bender is not being used, hold the component (resistor,
capacitor, LED,...) with a pair of needle nose pliers and bend the
leads to the appropriate width so it can fit through the donut
pads in its position on the circuit board.
• DO NOT bend the leads by applying pressure to the component,
bend by pushing directly on the lead. Bend only as in the picture,
this will make it easier to remove the parts from the PCB in the
event that you may want to upgrade the part later, without
removing the PCB from the chassis.
• Position the component on the circuit board and hold it in
position as you bend the leads out.
• To help conduct the heat from the soldering iron, “tin” the tip of
iron by applying a touch of solder to the already heated iron tip.
Soldering
• Push the soldering iron tip against the lead and the foil
donut pad on the circuit board and hold for 2 seconds.
• Then apply the solder to the other side of lead, also
touching the donut pad. Let the heated lead and pad melt
the solder,
not the iron tip. The solder should flow aro u n d
the lead.
• Remove the iron and solder and let the connection cool.
Trim off the excess lead.
• NOTE: When done C O R R E C T LY, by heating the lead and
foil donut pad simultaneously, the solder should flow
o u t w a rd, gradually blending from the lead to the foil.
• When done I NC O R R E C T LY, by just heating the foil pad
and not the lead, a hard rosin bead will surround the lead,
insulating it from the connection.
• An I NC O R R E C T solder joint is also done by just heating
the lead and not the foil pad. Here a hard rosin bead form s
on the pad, insulating it from the lead.
• To correct these unacceptable solder joints reheat and if
n e c e s s a ry apply a little more solder.
• H I N T: It is handy to keep a damp sponge nearby to clean
the iro n ’s tip after each joint is completed.
Solder Bridges - solder bridges usually happen when too much
solder is used, or the solder is dragged from one connection to
another when heat is applied. If a bridge develops, turn the
circuit board upside down and reheat the connection, allowing
the solder to flow onto the iron tip. Then resolder the connections
as before, being careful that just enough solder is used to make a
c o n n e c t i o n .
 Loading...