s t e p 1
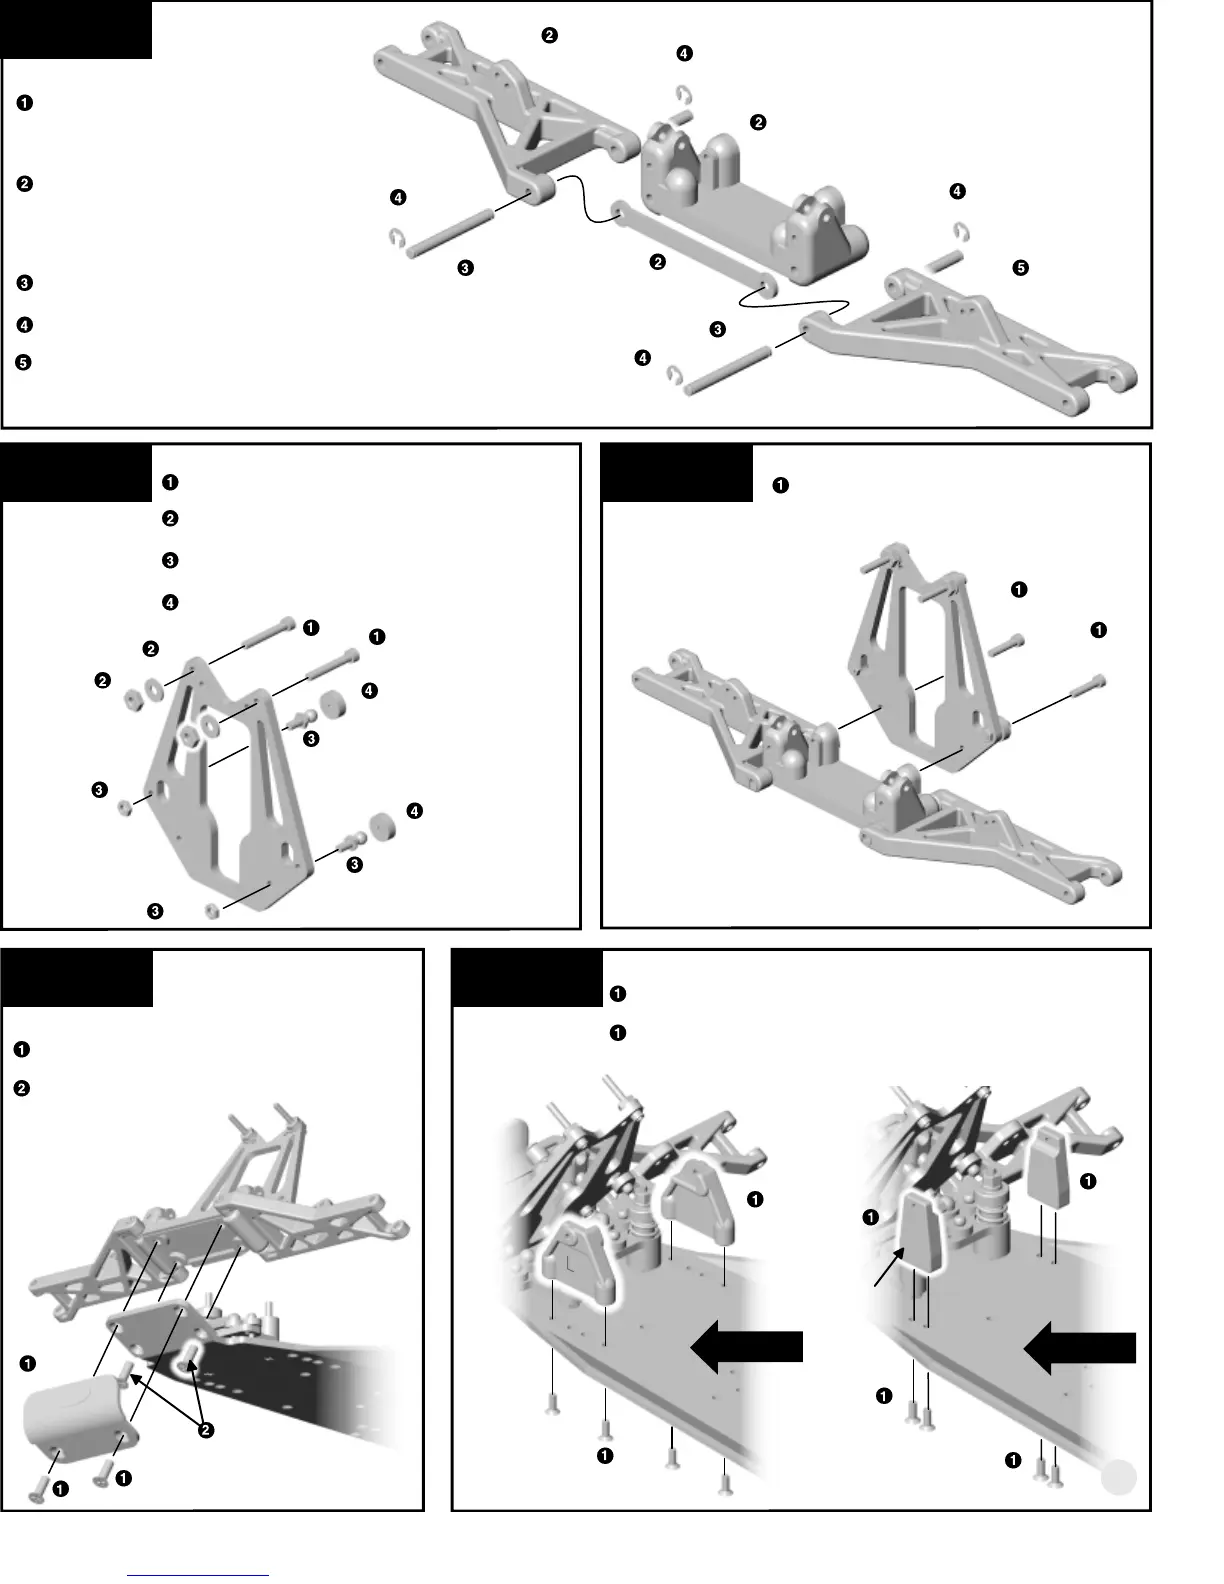
FRONT ARM ASSEMBLY
Twist the #7206 front suspension arms
from the mold runners with your pliers.
Trim away any remaining molding with
your hobby knife.
Align the left #7206 front a-arm with the
#7207 front bulkhead. Now line up the
#7208 aluminum bulkhead support
between the front side of the bulkhead
and the a-arm.
Slide the #7209 hinge pin through the
front a-arm, arm support and bulkhead.
Add the two #6299 E-clips to the #7209
hinge pin.
Repeat steps 2-4 for the right side.
7206
right a-arm
7207
7208
7209
7209
6299
6299
7206
left a-arm
6299
6299
s t e p 2
FRONT SHOCK TOWER
Install the two #6927 screws through the outer
holes on the #7215 (7216*) front shock tower.
Slide two #6936 washers onto the screws.
Then thread on the #6295 large plain nuts.
Attach the #6270 ball end and #7260 small
plain nuts through the hole as shown.
Add #6272 foam dust covers to the ball ends.
s t e p 3
ATTACH FRONT SHOCK TOWER
Attach the #7215 (7216*) front shock
tower assembly to the front bulkhead with
two #6925 (7873*) screws.
s t e p 4
ATTACH FRONT ASSEMBLY
Attach the front end assembly to the chassis
with two #6280 (6942*) screws.
Attach the front bumper with two #
6280
(6942*) screws.
s t e p 5
6927
7215,
7216*
6936
6295
6270
7260
6272
6927
7260
6270
6272
6925,
7873*
6925,
7873*
6280,
6942*
7767
7673
7215,
7216*
7767
5
7673
flat side
facing out
7774
7673
7314
6280,
6942*
chassis
(RTR) 7766,
(GT) 7769
R T R
T E A M / F T
NOSE TUBE MOUNTS
TEAM/FT ONLY:
Attach the #7314 nose tube mounts with four
#7673 screws, the one marked "L" on the left and "R" on the
right.
RTR ONLY:
Attach the #7767 nose tube mounts with four
#7673 screws, flat side of the mount facing out.