Do you have a question about the Asus MB14AHD and is the answer not in the manual?
FCC compliance statement for radio frequency emissions and operational conditions.
Canadian digital apparatus compliance with ICES-003 standards.
Information on the proper disposal of waste electrical and electronic equipment.
Explains symbols (WARNING, CAUTION, IMPORTANT, NOTE) used in the manual.
Directs users to ASUS websites and optional documentation for updates.
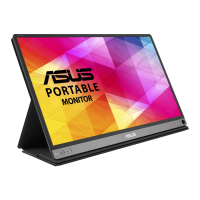
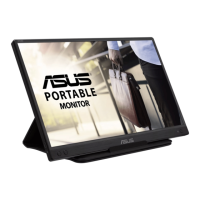
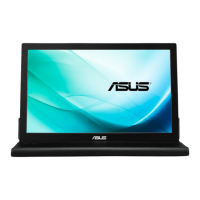
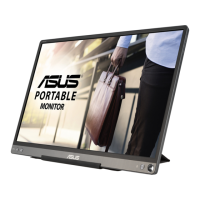
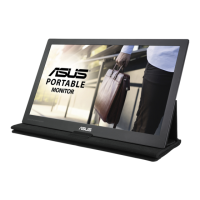
Welcomes the user and highlights the monitor's portability and productivity.
Lists all items included in the product package for verification.
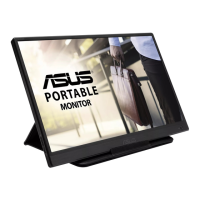
Overview of the monitor's physical features and buttons.
Details the hinge opening and viewing tilt angle adjustments.
Instructions for connecting the monitor to a system via USB or Micro-HDMI.
Guide on how to navigate and reconfigure the OSD menu options.
Step-by-step instructions for navigating and changing OSD settings.
Introduction to various OSD functions like Splendid, Blue Light Filter, Color, etc.
Instructions for downloading and using the DisplayWidget Lite software.
Guidance for configuring touch settings, especially with multiple monitors.
Technical specifications of the MB14AHD monitor.
Common problems and their possible solutions for the monitor.
List of supported resolutions and refresh rates for PC compatibility.
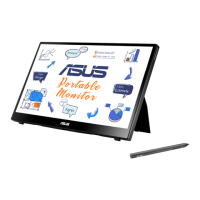
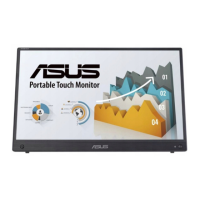
The ASUS MB14AHD is a portable USB touch monitor designed to enhance productivity and viewing experience, offering great portability for daily use. This monitor supports a 10-point touch panel technology, making it compatible with Windows 10 OS or above for intuitive interaction. Users can engage with the screen using either single-finger touch or multi-finger touch, supporting up to a maximum of 10 simultaneous touch points. When a stylus pen is used, finger touch is limited to two fingers. The touch function can also be disabled if not needed.
The monitor features an On-Screen Display (OSD) menu for easy configuration and adjustment of various settings. To activate the OSD menu, users simply press the MENU button. Navigation through the menu options is done using the ▲/▼ buttons, with the currently highlighted option name displayed. Selecting an item is achieved by pressing the ✓ button. Parameters can be adjusted using the ▲/▼ buttons, and changes are confirmed by pressing the ✓ button. To return to a previous menu or accept settings, the ↩ or ✓ buttons are used, respectively.
The OSD menu includes several key functions to customize the display. The "Splendid" function offers eight sub-functions tailored for different viewing preferences, such as Standard Mode for document editing, sRGB Mode for photo and graphics viewing, Scenery Mode for scenery photos, Theater Mode for movies, Game Mode for gaming, Night View Mode for dark scenes, Reading Mode for book reading, and Darkroom Mode for weak ambient light environments. It's important to note that in Standard, sRGB, and Reading Modes, certain functions like Saturation, SkinTone, Sharpness, Contrast, and ASCR may not be user-configurable.
Another significant feature is the "Blue Light Filter," which allows users to adjust the energy level of blue light emitted from the LED backlight. This function helps alleviate eye strain, with settings ranging from Min (no changes) to Max (reduced blue light scattering). When the blue light filter is active, the default settings of Standard Mode are automatically applied. The maximum level is optimized for eye comfort and complies with TUV low blue light certification, though brightness is not user-configurable at this level. The manual advises users to take regular breaks, focus on distant objects, and perform eye exercises to further minimize eye strain.
The "Color" function enables users to select their preferred image color settings. This includes adjusting Brightness, Contrast, and Saturation, each with a range from 0 to 100. "Color Temp." offers three preset modes (Cool, Normal, Warm) and a User Mode, where R (Red), G (Green), and B (Blue) colors can be configured from 0 to 100. "Skin Tone" provides Reddish, Natural, and Yellowish options. "Smart View" offers versatile viewing positions using Smart View Technology.
Under the "Image" function, users can fine-tune picture quality. "Sharpness" adjusts the picture clarity from 0 to 100. "Trace Free" speeds up response time via Over Drive technology, with an adjustment range from 0 to 100. "Aspect Control" allows adjustment of the aspect ratio to "Full" or "4:3," with "4:3" only available when the input source is in 4:3 format. "VividPixel," an ASUS exclusive technology, enhances visuals for crystal-clear and detail-oriented enjoyment, adjustable from 0 to 100. "ASCR" (ASUS Smart Contrast Ratio) can be toggled ON or OFF to enable or disable the dynamic contrast ratio function.
The "Input Select" function allows users to choose the input source from HDMI, Type-C 1, or Type-C 2 signals. The "System Setup" menu provides comprehensive system configuration options. This includes "Splendid Demo Mode" to activate a demo of the Splendid function and "Auto Rotation" to enable/disable automatic image rotation, which works under Windows OS with DisplayWidget Lite software installed.
"GamePlus" is a toolkit designed to improve the gaming environment. It offers functions like "Crosshair" for First Person Shooter (FPS) games, "Timer," and "Display Alignment." Users can activate GamePlus, select their desired function, and confirm their choice through the OSD menu.
Other system settings include "QuickFit" for grid patterns and photo sizes, "ECO Mode" for power saving, and "OSD Setup" to adjust OSD Timeout, DDC/CI, and Transparency. The "Language" option supports multiple languages, including English, French, German, Spanish, Italian, Dutch, Russian, Polish, Czech, Croatian, Hungarian, Romanian, Portuguese, Turkish, Simplified Chinese, Traditional Chinese, Japanese, Korean, Persian, Thai, Indonesian, and Ukrainian. "Key Lock" disables all key functions, while "Power Key Lock" disables/enables the power key. "Information" displays monitor details, and "Power Indicator" controls the power LED. "All Reset" reverts all settings to factory defaults.
The "Shortcut" function allows users to assign frequently used functions like "Blue Light Filter," "Splendid," "Brightness," "Contrast," "Auto Rotation," or "Input Select" to a shortcut key, with "Input Select" as the default. Finally, "MyFavorite" enables users to load and save all their preferred settings on the monitor.
For software integration, the monitor utilizes "DisplayWidget Lite," which can be downloaded from the MB14AHD official website under the "Support" tab. It is recommended to connect the MB14AHD to the input device first, then turn on DisplayWidget Lite, and create a desktop shortcut for easy access.
In terms of maintenance, the manual provides guidelines for care and cleaning. Users should turn off and unplug the monitor before cleaning. The monitor surface can be cleaned with a lint-free, non-abrasive cloth, and stubborn stains can be removed with a cloth dampened with a mild cleaner. It is crucial to avoid cleaners containing alcohol or acetone and to use cleaners specifically designed for LCDs. Spraying cleaner directly on the screen is not recommended as it may cause electric shock. The manual also notes that slight uneven brightness, afterimages from static displays, and screen issues like blackouts or flashes are normal or require professional service, emphasizing that users should not attempt to repair the screen themselves.
The stylus pen, an accessory for the touch monitor, requires the removal of an isolation sheet before first use. It can last up to a year on a new AAAA battery, based on an average daily use of two hours.
Troubleshooting tips are also provided for common issues. If the power LED is not on, users should check if the monitor is in ON mode and if the USB Type-C cable is properly connected. If the power LED is amber and there's no screen image, users should verify monitor and computer power, USB Type-C cable connection, inspect for bent pins, and test with another monitor. For screen images that are too light or dark, adjusting brightness settings is recommended. If the screen image bounces or shows a wave pattern, users should ensure the USB Type-C cable is properly connected and move any electrical devices causing interference. Color defects can be addressed by inspecting the USB Type-C cable for bent pins.
For issues related to insufficient power supply from USB Type-C devices, where the power LED blinks or the ASUS logo repeats, the manual outlines a "safe mode" procedure. This involves pressing the Up button while connecting the USB Type-C cable to enable safe mode, then setting the background color to white or a nearly white image to test the power limit. Users are guided to adjust brightness in safe mode to determine the highest stable brightness value for their specific USB-C source device. After identifying this value, they can set it and then exit safe mode. This detailed guidance ensures users can optimize their monitor's performance even with power limitations.
| Aspect Ratio | 16:9 |
|---|---|
| Panel Type | IPS |
| Refresh Rate | 60Hz |
| Panel Size | 14 inches |
| Resolution | 1920x1080 |
| Brightness | 250 cd/m² |
| Response Time | 5ms (GTG) |
| Viewing Angle | 178° (H) / 178° (V) |
| Connectivity | 1 x USB-C |