50
16 Routine servicing
ATAG Heating Technology advises on an annual inspection with a ue gas analyser. A full strip down
service is required every 4
th
year or where analyser reading are not within correct safety standards.
Required tools:
- Cross head screwdriver
- T-handle key set with 3 bits (hex key 4mm, hex key 5mm and cross head PZ2)
- Open end wrench 8mm
In order to perform maintenance, the following actions have to be taken:
- Switch o the electrical power to the boiler;
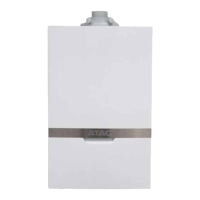
- Remove the screws from the 2 fasteners A and B (see g. 16.a);
- Unlock the fasteners A and B and remove the cover in a forward motion and remove the earth cable from
the cover.
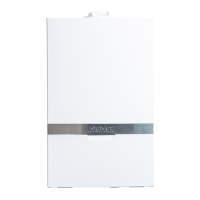
Note that there is an earth cable to disconnect when removing the boiler front panel. Free space for
removing the connector is about 400 mm. Remind to connect this earth cable when placing back the
boiler front panel and take care the wire does not get stuck between front panel and boiler.
Air box/cover
The cover also doubles as air box:
- Clean the air box/cover with a cloth and a non-abrasive cleaner;
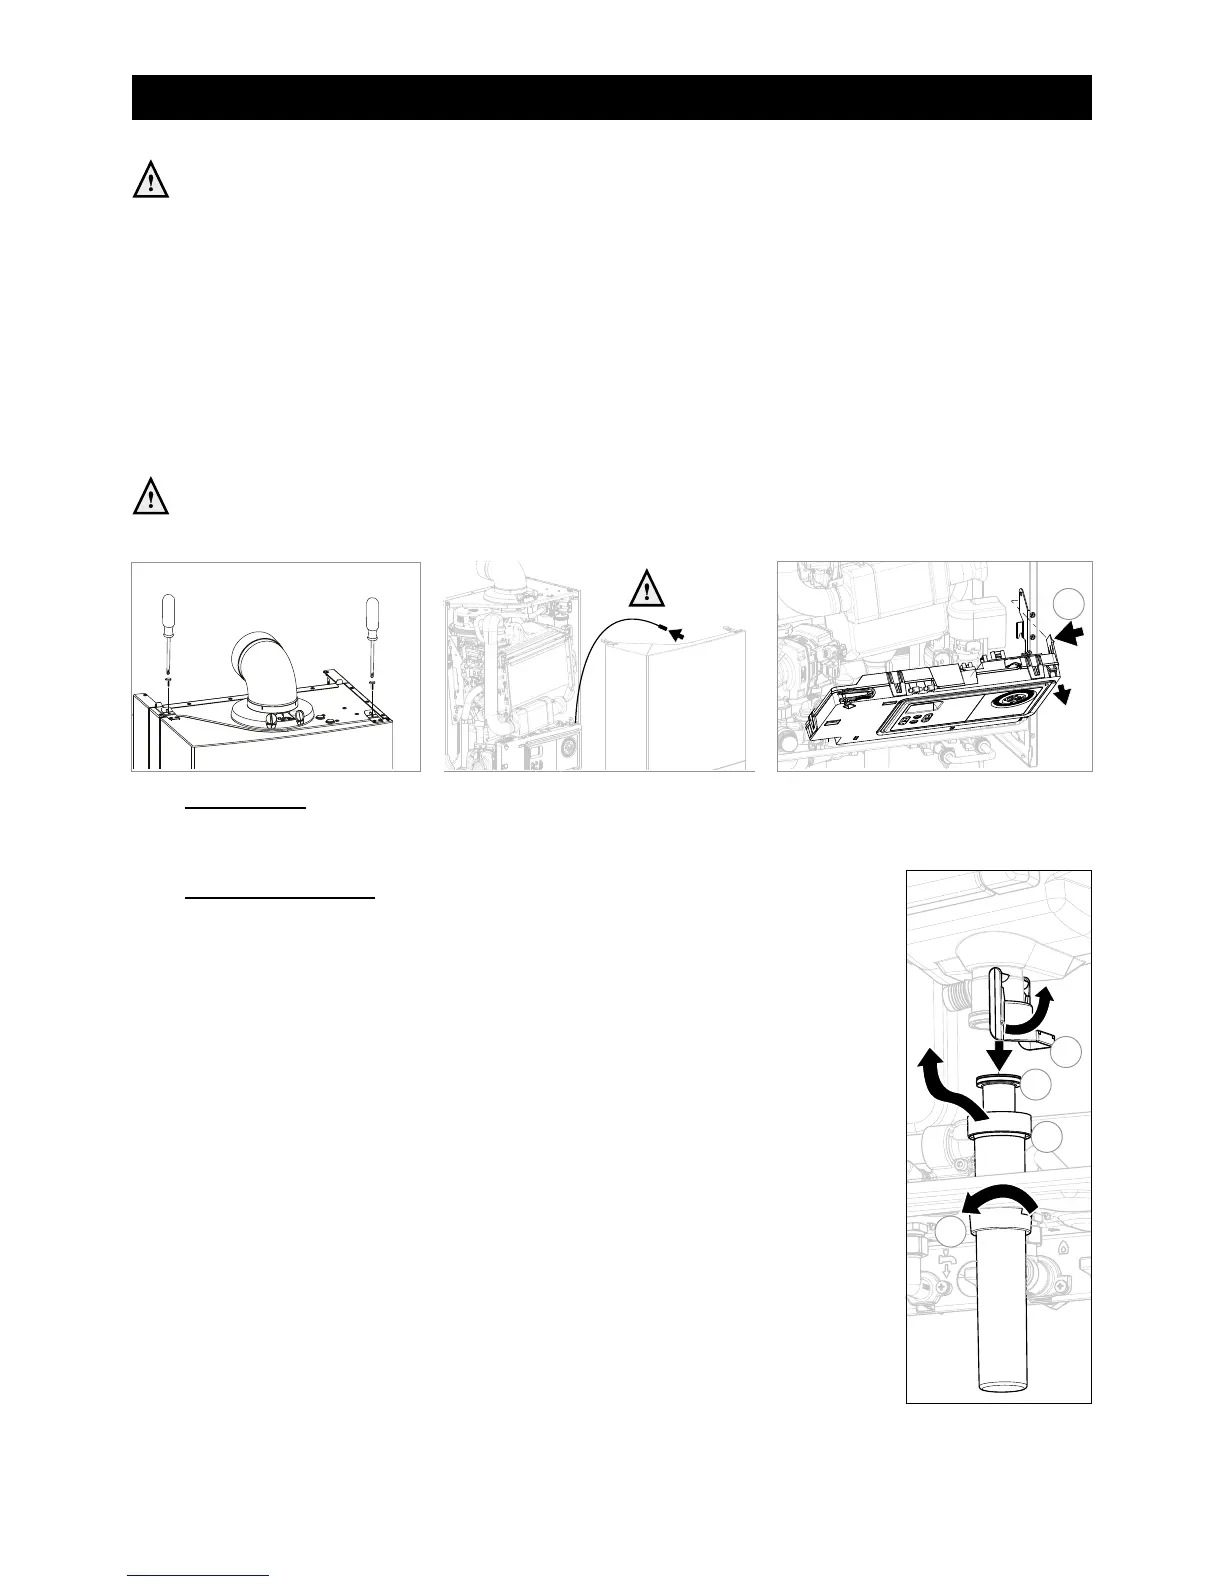
Siphon (see g. 16.b)
The degree of pollution resedue in the siphon is an important indication for the need
of maintenance
- Turn the control unit towards by moving the handle (C) slightly to the left (see
gure 16.a);
- Turn/pull the sealing ring (1) downwards;
- Turn the siphon securing clip (2) anti-clockwise;
- Pull the siphon cup (3) and siphon pipe (4) out of the heat exchanger;
- Take the siphon cup and pipe out of the boiler by moving it downwards or turn it in
forward motion upwards along the heat exchanger;
- Clean the parts by rinsing them with water;
- Check the O-ring of the siphon cup and replace it if necessary;
- Grease the O-ring again with acid-free O-ring grease to simplify the reassembly.
Reassembly takes place in reverse order.
- ll the siphon with 150 ml of water.
- If a leakage has occurred to the siphon, replace the entire siphon.

 Loading...