-36-
(2) Replacement of Desiccant
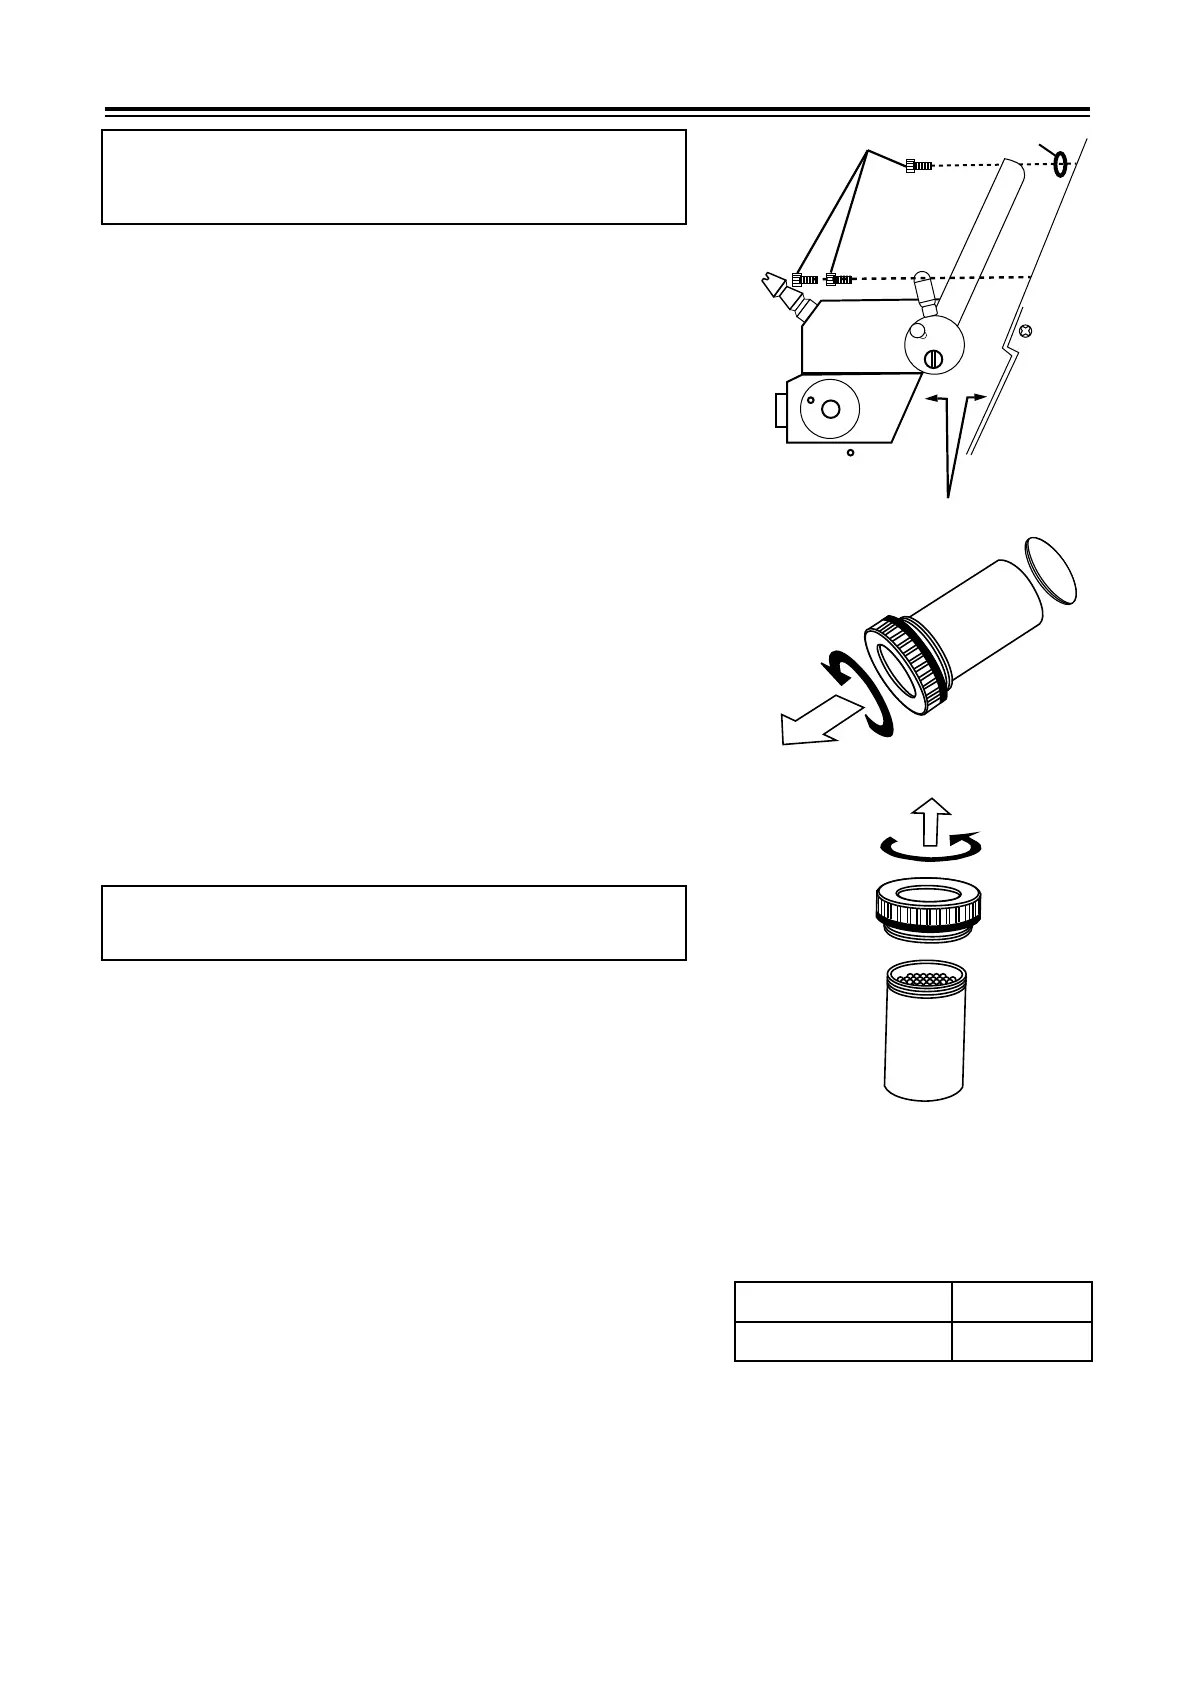
②Put new O-rings on the three tapped holes on the DR-
A1-Plus respectively, and set the prism assembly in
place and fasten it to the DR-A1-Plus with the three
screws while carefully holding it by hand.
③That is all for replacement of the prism assembly.
Before starting measurement with the new prism
assembly, perform calibration without fail (refer to
Page 18).
Note: When removing screws and the prism assembly,
carefully hold the prism assembly by hand
because it is considerably heavy.
The green color of the desiccant gradually fades as it
gets close to saturation.
Check the desiccant regularly through the glass
window on the left side of the main unit.
When it becomes pale green, replace the desiccant
according to the following procedure.
Note: Remove the cap with care to prevent loss of the
packing.
①Unscrew the desiccant case from the main unit
(Figure 12-2).
②Turn the cap of the desiccant case counterclockwise
to remove and empty all particles of the desiccant
from the case (Figure 12-3).
③Insert new desiccant particles in the desiccant case.
(Insert the separately packed green paticles later so
that they can be visible from the window.)
④Cap the desiccant case tightly and set it in the main
unit by turning clockwise.
(3) Discoloration or "Burning" of the Prism
①Stir water into the Prism Polishing Powder to make a smooth paste.
②Using a cotton swab, applying light pressure, rub the paste with an up and down motion
(non-circular) on the prism surface. Check the progress after about 20 to 30 strokes. If
discoloration is still visible, repeat the process with another 20 to 30 strokes to remove
remaining discoloration.
Discoloration or burning may appear on the prism as a result of a chemical reaction or
prolonged exposure to high temperature samples. The discoloration appears as a slightly
blue-purple layer or "rainbow" effect.
This damage may cause a blurry field of vision, making
it difficult to see the boundary line. Light discoloration
may be removed by the Prism Polishing Powder.
Heavily discolored surfaces may not be removed with this method. Please contact your
ATAGO distributor.
Three screws
Fig. 12-1
Fig. 12-2
Fig. 12-3
O-ring
Pert name
RE-99402
Pert No.
Polishing Powder
 Loading...