9
Getting started
Installation options
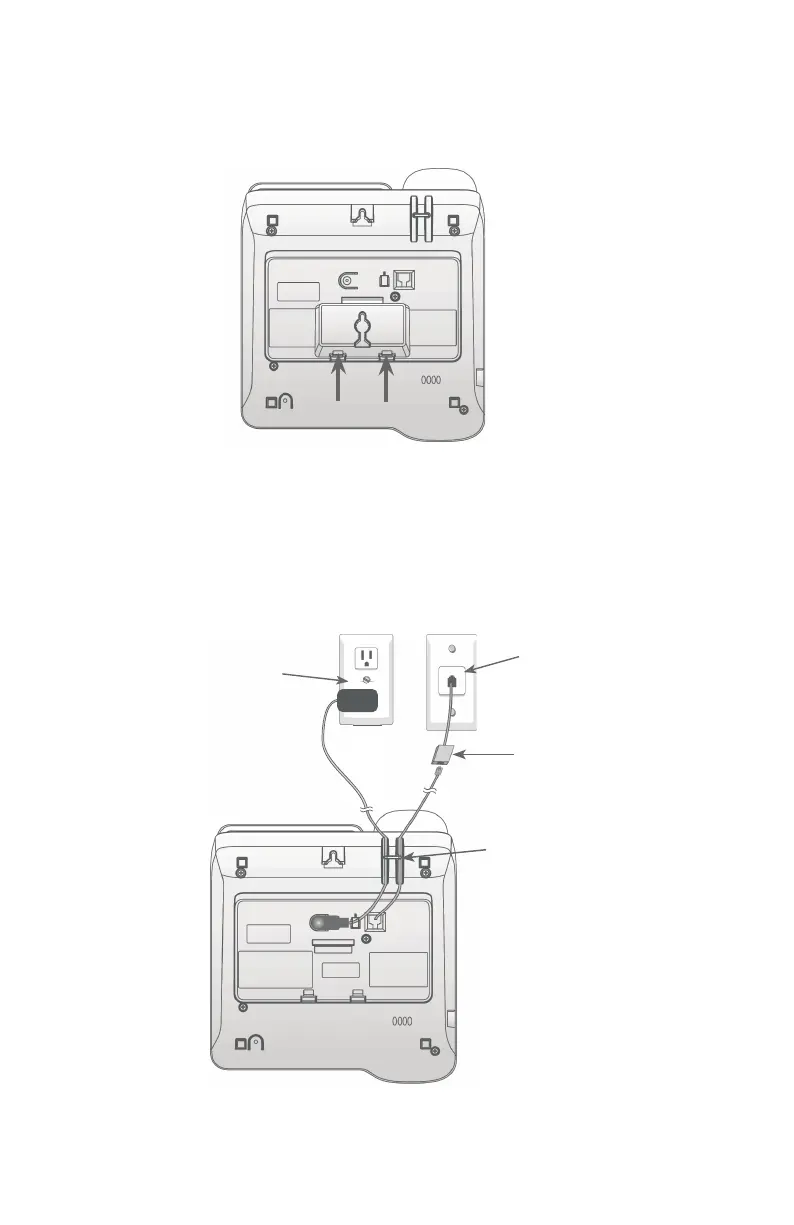
Push the two tabs at the bottom of the wall-mount bracket, as indicated, and
remove the wall-mount bracket from the telephone.
4.
Plug one end of the telephone line cord into the telephone line jack on the
bottom of the telephone base. Plug the other end into a telephone wall jack
or a DSL lter. Plug the small end of the power adapter into the power jack
on the bottom of the telephone base. Plug the large end into an electrical
outlet not controlled by a wall switch. Route both cords through the slots.
5.
Adjust the screen angle for maximum visibility. 6.
DSL lter (not included)
is required if you
have DSL high-speed
Internet service.
Telephone wall jack
Route the power adapter cord
and the telephone line cord
through the slots.
Electrical outlet
not controlled by
a wall switch
 Loading...