AWMS-2-BT75-FS Page 3 of 4
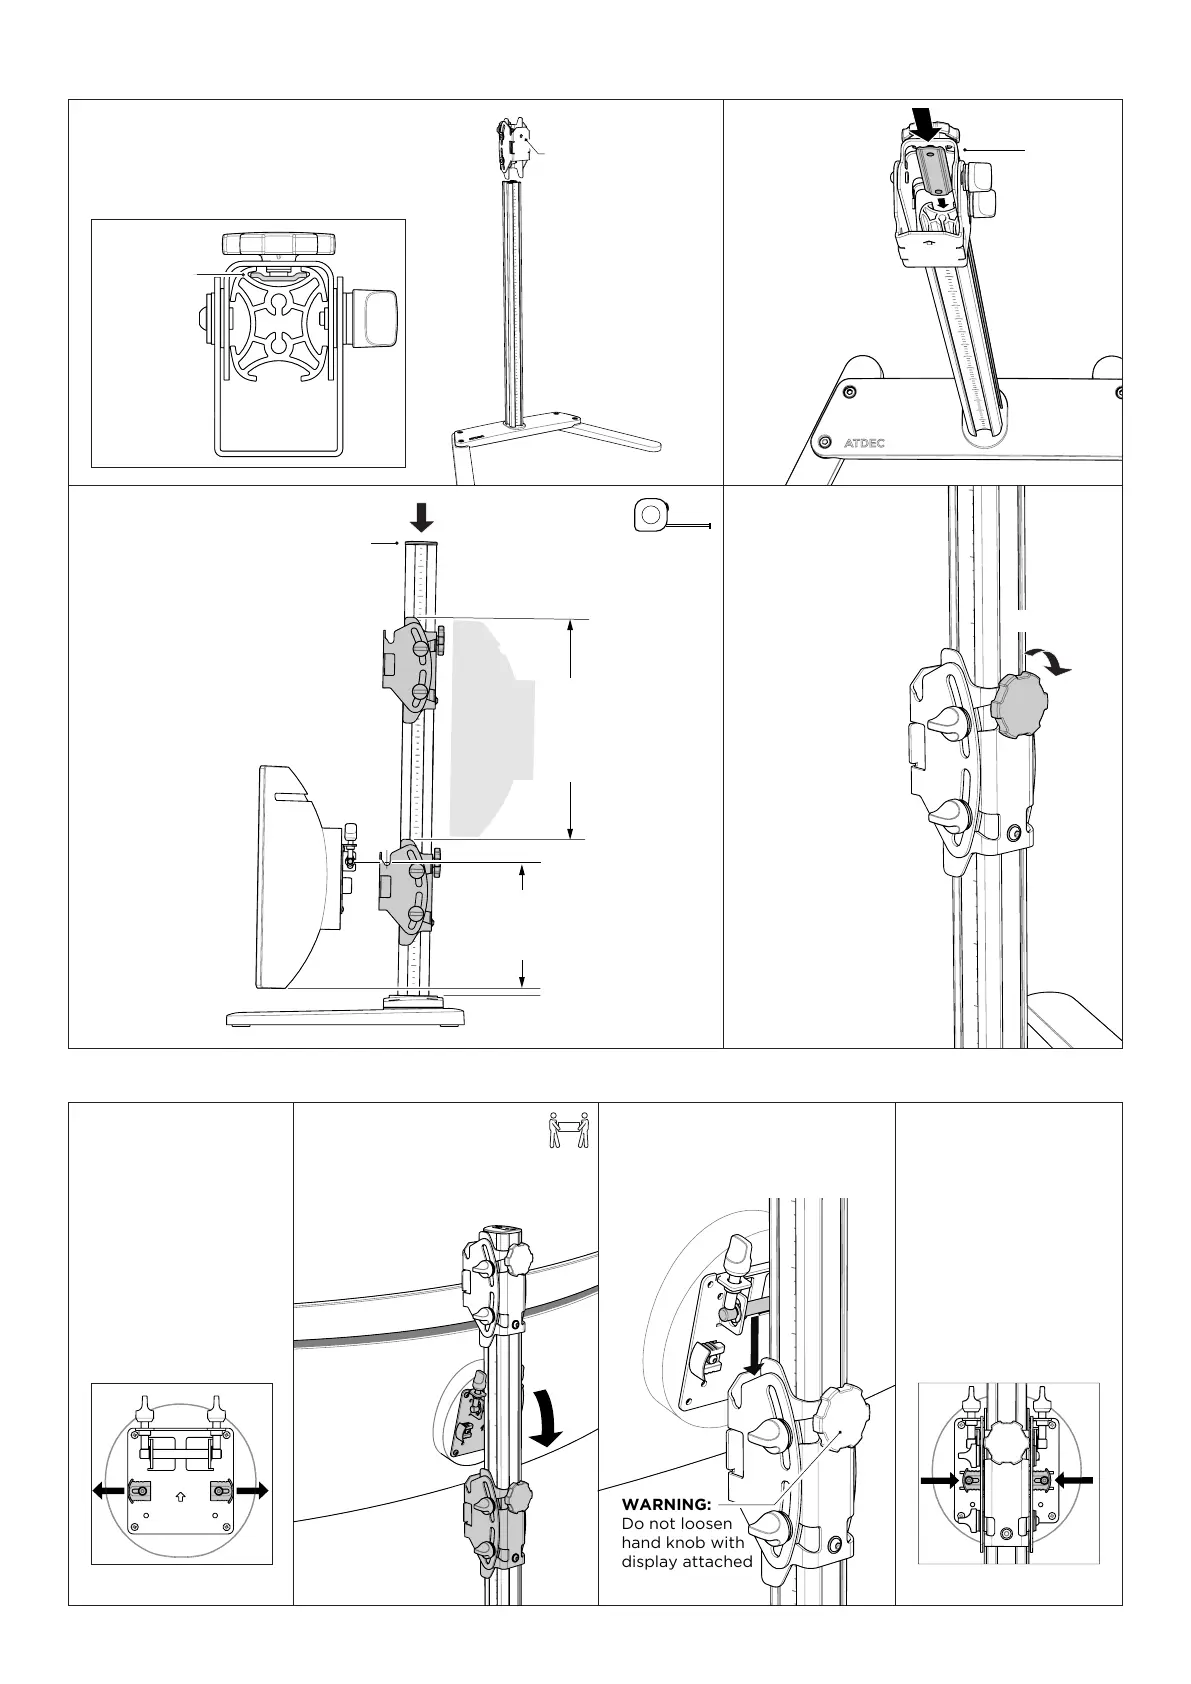
5. Attach bottom display
4. Slide brackets onto post and set height
VIEW FROM ABOVE
WARNING:
Never loosen knob
while display is on
bracket!
OPEN CLOSED
5.1 Set VESA plate
clips to open position.
Bottom display
must be attached to
bracketrst.
WARNING:
Use two people to
install display
5.3 Centre VESA plate close to
post and slowly lower until bar
on VESA plate sits in saddle in
bracket.
5.4 Set VESA plate
clips to closed
position.
5.2 Place mount on the
stable surface where it will
be used.
Lift display until
VESA plate is
above the
bracket.
D
Arrow side
towards user
MEASURE
≥ Display
height
between
brackets
K
MEASURE to
ensure clearance
to base
MEASURE
≥ Display
height
between
brackets
K
MEASURE to
ensure clearance
to base
TIGHTEN
BACK
FRONT
Inner guide
in rear post
channel
WARNING:
Bracket must only
be attached with
display facing the
front of base
4.1 Line up the inner guide
on rear of bracket with rear
channel on post.
4.2 Slide inner
guide into
channel, then
lower bracket.
4.4 Firmly tighten
hand knob at
chosen height.
Repeat with second
bracket and t post
cap.
4.3 Ensure height is
sufcientforscreentoclear
base once in place.
WARNING:
Do not loosen
hand knob with
display attached
NOTE:
Display hangs from
the bracket like a
painting. After clips
are closed, if corners
of the screen are
pushed downwards,
rocking movement is
expected.


 To Next Page