EasyManua.ls Logo

Atdec AWMS-2-BT75-FS - User Manual

Atdec AWMS-2-BT75-FS
4 pages
Print Icon
To Next Page IconTo Next Page
Loading...
AWMS-2-BT75-FS Page 1 of 4
Installation Guide
AWMS-2-BT75-FS
Freestanding Heavy Duty
Dual Vertical Monitor Mount
COMPONENT CHECKLIST
IMPORTANT INFORMATION
! Product should only be assembled and used as per these installation instructions.
! The manufacturer accepts no responsibility for incorrect installation.
! Eachbracketsupportsamaximumweightasperabovecapacityspecication.
! Avoid applying downward load to corners of display.
! Product must only be installed on a solid work surface capable of supporting the weight of all equipment being mounted.
! This product is not suitable for outdoor use.
! Do not use this product for mobile applications.
! Do not move mount with displays attached.
! VESA mounted accessories (such as mini PC brackets and mounts), and offset VESA locations exert additional leverage that
can exceed the capacity of the mount even though the monitor weight may be within the stated range. Please contact Atdec
if you would like further information.
! WARNING! Death or serious injury may occur if a child climbs on or tips product. Anchor product if applicable. Never place
product in an unstable location.
Scan to access
more information
REQUIRED TOOLS
CAPACITY (per monitor)
Flat Monitor
4.5 - 25kg (10 - 55lb)
Curved Monitor
4.5 - 18kg (10 - 40lb)
Display Size
24” - 55”
• Phillips Head Screwdriver
300mm (12”) max
overall display depth
B
Bridge
(x1)
C
Leg
(x2)
A
Post
(x1)
D
Bracket
(x2)
F
4mm/6mm
Hex Key
(x1 each)
E
VESA Plate
(x2)
G
M8x30mm
Cap Screw
(x4)
J
M8x80mm
Cap Screw
(x2)
I
M8 Washer
(x2)
L
M4x10mm
Screw (x8)
K
Post Cap
(x1)
M
M4x20mm
Screw (x8)
N
10mm
Spacer (8x)
H
M8 Nut
(x4)
Question and Answer IconNeed help?

Do you have a question about the Atdec AWMS-2-BT75-FS and is the answer not in the manual?

Summary

Important Information and Warnings

Assemble Base

Attach Post to Base

Insert and Tighten Cap Screws

Insert M8x80 cap screws through M8 washers and base holes, then fasten securely to the post.

Attach VESA Plates to Displays

Slide Brackets onto Post and Set Height

Align Bracket with Post Channel

Line up the inner guide on the bracket's rear with the post's rear channel.

Slide and Lower Bracket

Slide the bracket's inner guide into the post channel, then lower the bracket.

Ensure Clearance and Tighten Knob

Verify screen clearance, measure height, and firmly tighten the hand knob at the chosen height.

Attach Bottom Display

Lift and Center Display

Lift display until VESA plate is above the bracket, center it, and lower until the plate bar sits in the saddle.

Set Tilt Angle and Friction

Adjust Display Tilt

Grip screen edges and roll up or down to desired tilt angle. Ensure clips are closed before tilting.

Attach Top Display

Check Bracket Spacing

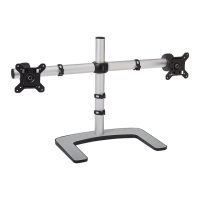
Ensure distance between brackets is equal to or greater than display height. Top monitor must hang freely.

Fine Adjustment

Cable Management

Atdec AWMS-2-BT75-FS Specifications

General IconGeneral
CategoryRacks & Stands
ModelAWMS-2-BT75-FS
Number of Screens Supported2
VESA Compatibility75x75, 100x100
Construction MaterialAluminum, Steel
FinishBlack

Related product manuals