AWMS-2-BT75-H Page 4 of 4
Please Recycle
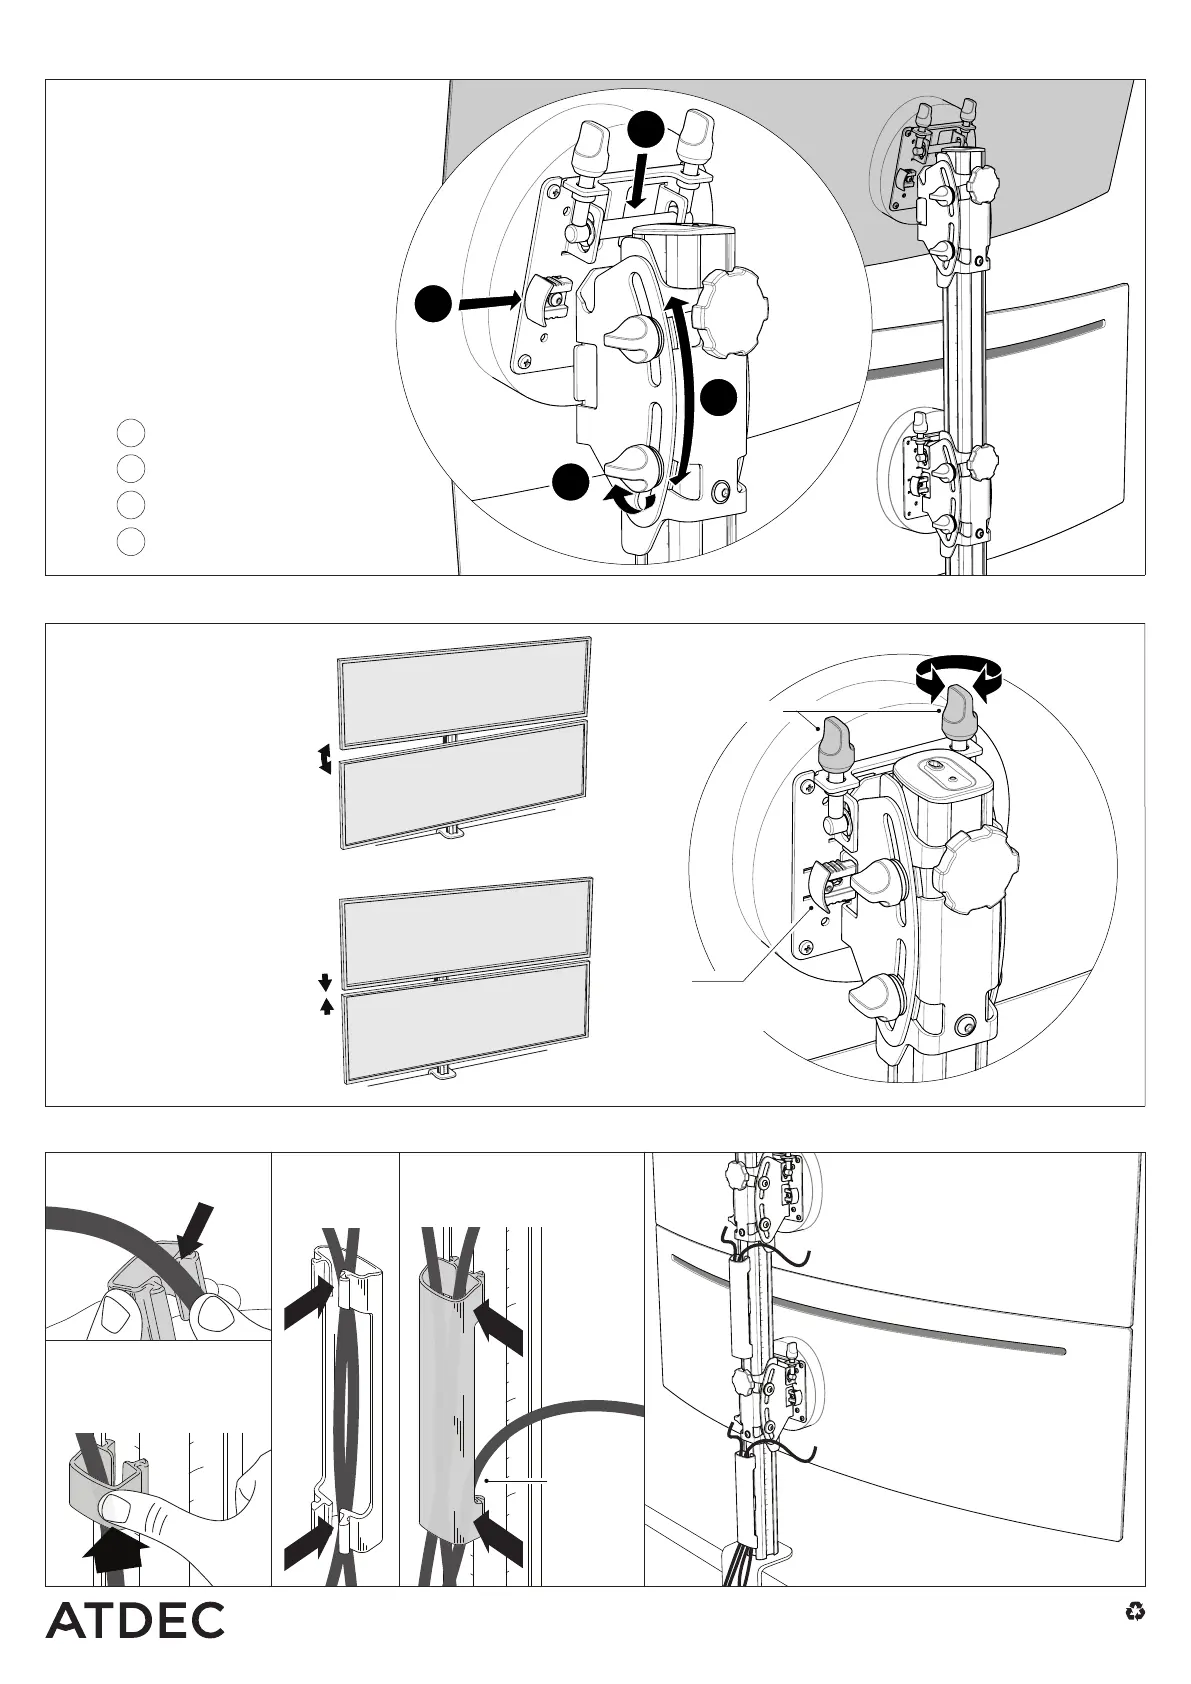
8. Fine adjustment
7. Attach top display
ii
iii
iv
i
LHS &
RHS
TOP &
BOTTOM
No portion of this document or any artwork contained herein should be reproduced in any way without
the express written consent of Atdec Pty Ltd. Due to continuing product development, the manufacturer
reservestherighttoalterspecicationswithoutnotice.©20230120
7.1 Check that distance between brackets
is equal to or greater than the height of
the display. (See image in Step 4.3)
WARNING:
Damage to monitors may occur if
thereisinsufcientspacingbetween
brackets. Top monitor must hang
in bracket - not be held up by the
monitor below it. After both displays
areattached,useneadjustmentto
close gap between them (see Step 8).
7.2 Repeat Step 5 & Step 6 to attach
top display and set tilt angle.
Lower
Close
Adjust angle
Set angle
i
ii
iii
iv
Cables can
exit from
the side of
the cable
cover
PUSH
PUSH
PUSH
9. Cable management
9.1 Load cables into
cable clip.
9.2 Insert one side of the
cable clip into a channel
on the post, then push in
the other side.
Load cables into
cable cover
9.3 Load
cables into
cable cover.
9.4 Clip the cable cover
back onto rear post
channels.
8.1 To correct horizontal angle
of display +/- 3 °:
Turnasinglenetune
adjustment knob to adjust
angle of screen.
Clockwise = Higher
Anti-clockwise = Lower
8.2 To close small gap between
displays +/-6mm (1/4”):
Turnbothnetuneadjustment
knobs - alternating sides a few
rotations at a time.
Clockwise = Higher
Anti-clockwise = Lower
ii
iii
iv
i
LHS &
RHS
TOP &
BOTTOM
FINE ADJUSTMENT
KNOBS
NOTE:
Ensure clips are in
CLOSED position
 Loading...