Repair Instruction No. 175.8/95
PHE 3, PHE 3X
PAGE
9
3
1
2
3
4
5
2
7
2
3
4
5
6
1
3
2
1
5
4
9
1
Assembly
F
Please additionally secure all screwed connections in metal with screw locking device.Note
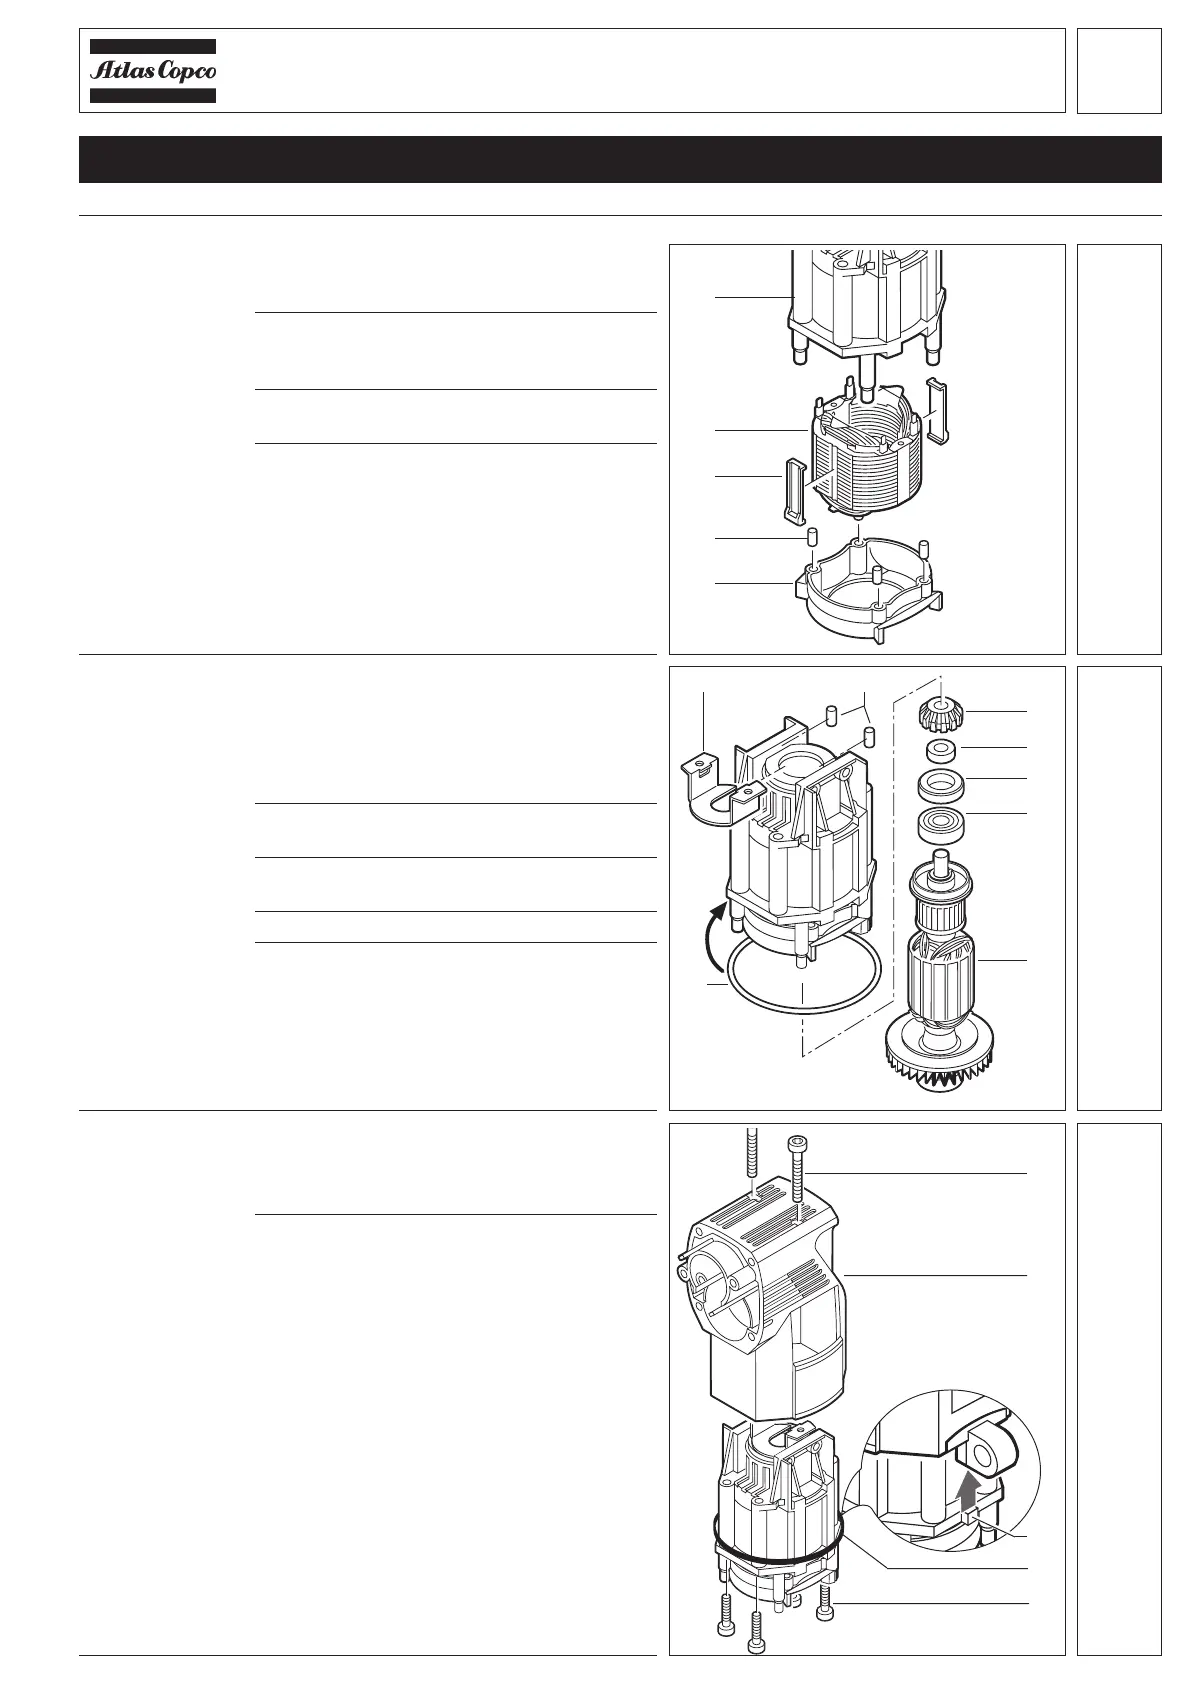
1 Push the bearing (6), the washer (4) and
the seal ring (5) (take care of the right
position: the small boring faces the
toothed gear) onto the armature shaft and
press on the toothed gear (3) as fas as
will go.
2 Insert the complete armature (7) into the
field.
3 Push the silicone buffer (2) onto the field
housing.
4 Fix the angle (1) in the field housing.
5 Push the seal ring (9) onto the field
housing.
Assembling and
mounting the
armature
1 Fit the centering ledges (3) to the field (2)
(take care of the right position, see
illustration).
2 Insert the field (2) into the field housing
(1) (lightly hit the field housing with a
plastic hammer).
3 Insert the silicone buffer (4) into the air
supply ring (5).
4 Insert the air deflector plate (5) (take care
of the right position, see illustration).
Mounting the
field
1 Insert the motor (4) into the motor
housing (2) (take care of the right
position: the lug (3) must fit into the relief
of the motor housing).
2 Fasten the motor with screws (1) and (5)
(2,5 Nm).
Mounting the
motor
 Loading...