3
PAGE
Repair Instructions No.181.03/98
PHE 6 H / PHE 6 S
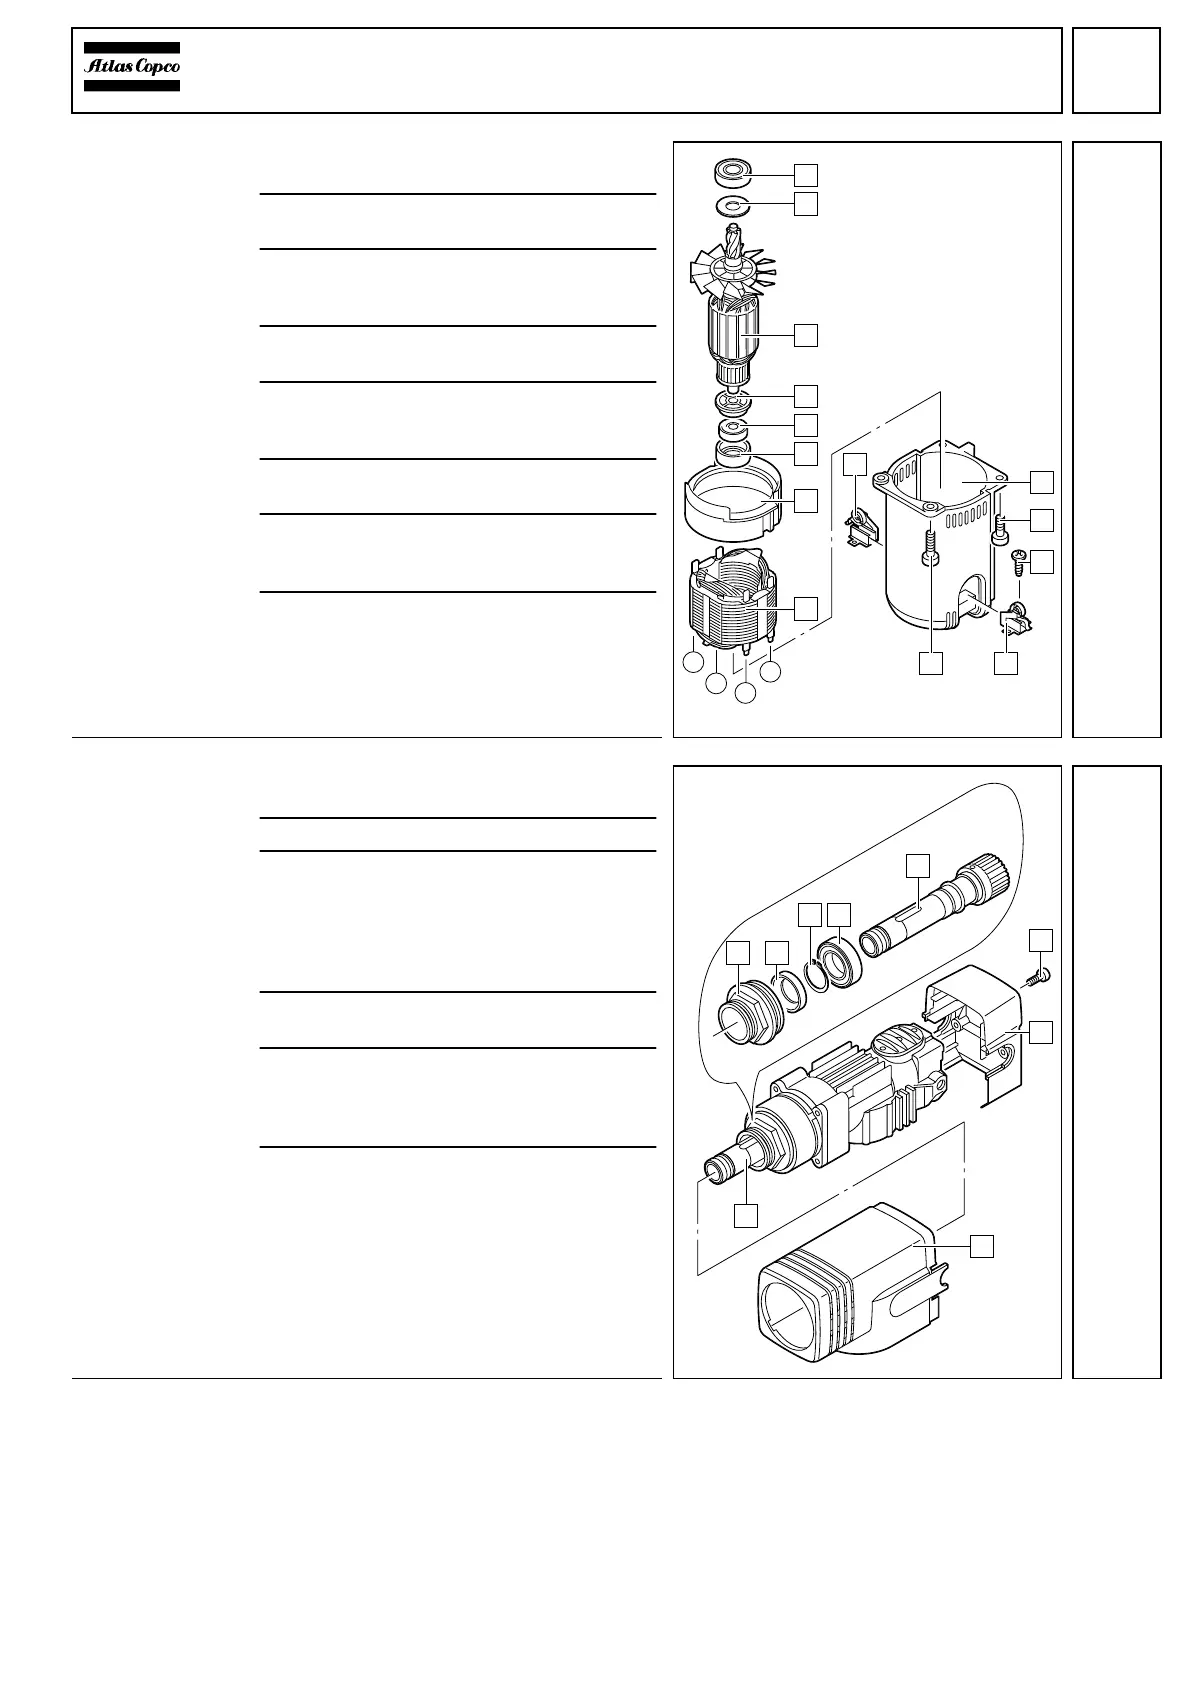
Detaching the
armature
1
Loosen the two short (A) and the two
long (D) screws.
2
Remove the motor housing (9) with the
field (1) and the air deflector ring (2).
3
Remove the air deflector ring (2) from the
motor housing (9) and expel the field (1)
from the motor housing (9).
4
Loosen the screws (B). Remove the brush
holders (C) from the motor housing (9).
5
Pull out the complete armature by turning
it. If necessary, hit the motor housing light-
ly with a plastic hammer for support.
6
Remove the bearing sleeve (3) from the
armature bearing (4).
7
Press off the armature bearings (4)
and (8) with aid of the forcing disks
(service tool).
8
Remove the insulating disk (5) and the
ring (7).
PHE 6 S:
Detaching the
spindle sleeve
1
Loosen both screws (6) and remove the
back part of the plastic housing (7).
2
Remove the plastic housing (8).
3
Fix the machine in a vice provided with
protective chops and remove the nose-
piece (1) (SW 50).
☞
Attention! The nosepiece (1) has a left-
handed thread!
4
Press the rotary shaft seal (2) from the
nosepiece (1).
5
Remove the complete spindle sleeve (5)
from the housing. If necessary, hit the
housing lightly with a plastic hammer to
loosen the drill spindle.
6
Remove the spring ring (3) and press off
the bearing (4).
i
k
j
h
CD
C
1
6
5
4
3
2
8
7
A
B
9
6
3
21
8
7
4
5
5
 Loading...