....
N
0
CJ
'<I:
....
I.Cl
U"I
M
I.Cl
......
cover must be flush with th e surface of the sill
extension.
(D Tips
Some mode ls may also have a cover for the
rear vehicle lift point .
Taking the wheel off/installing the spare
Follow these instructions step-by-step for chang-
ing the wheel.
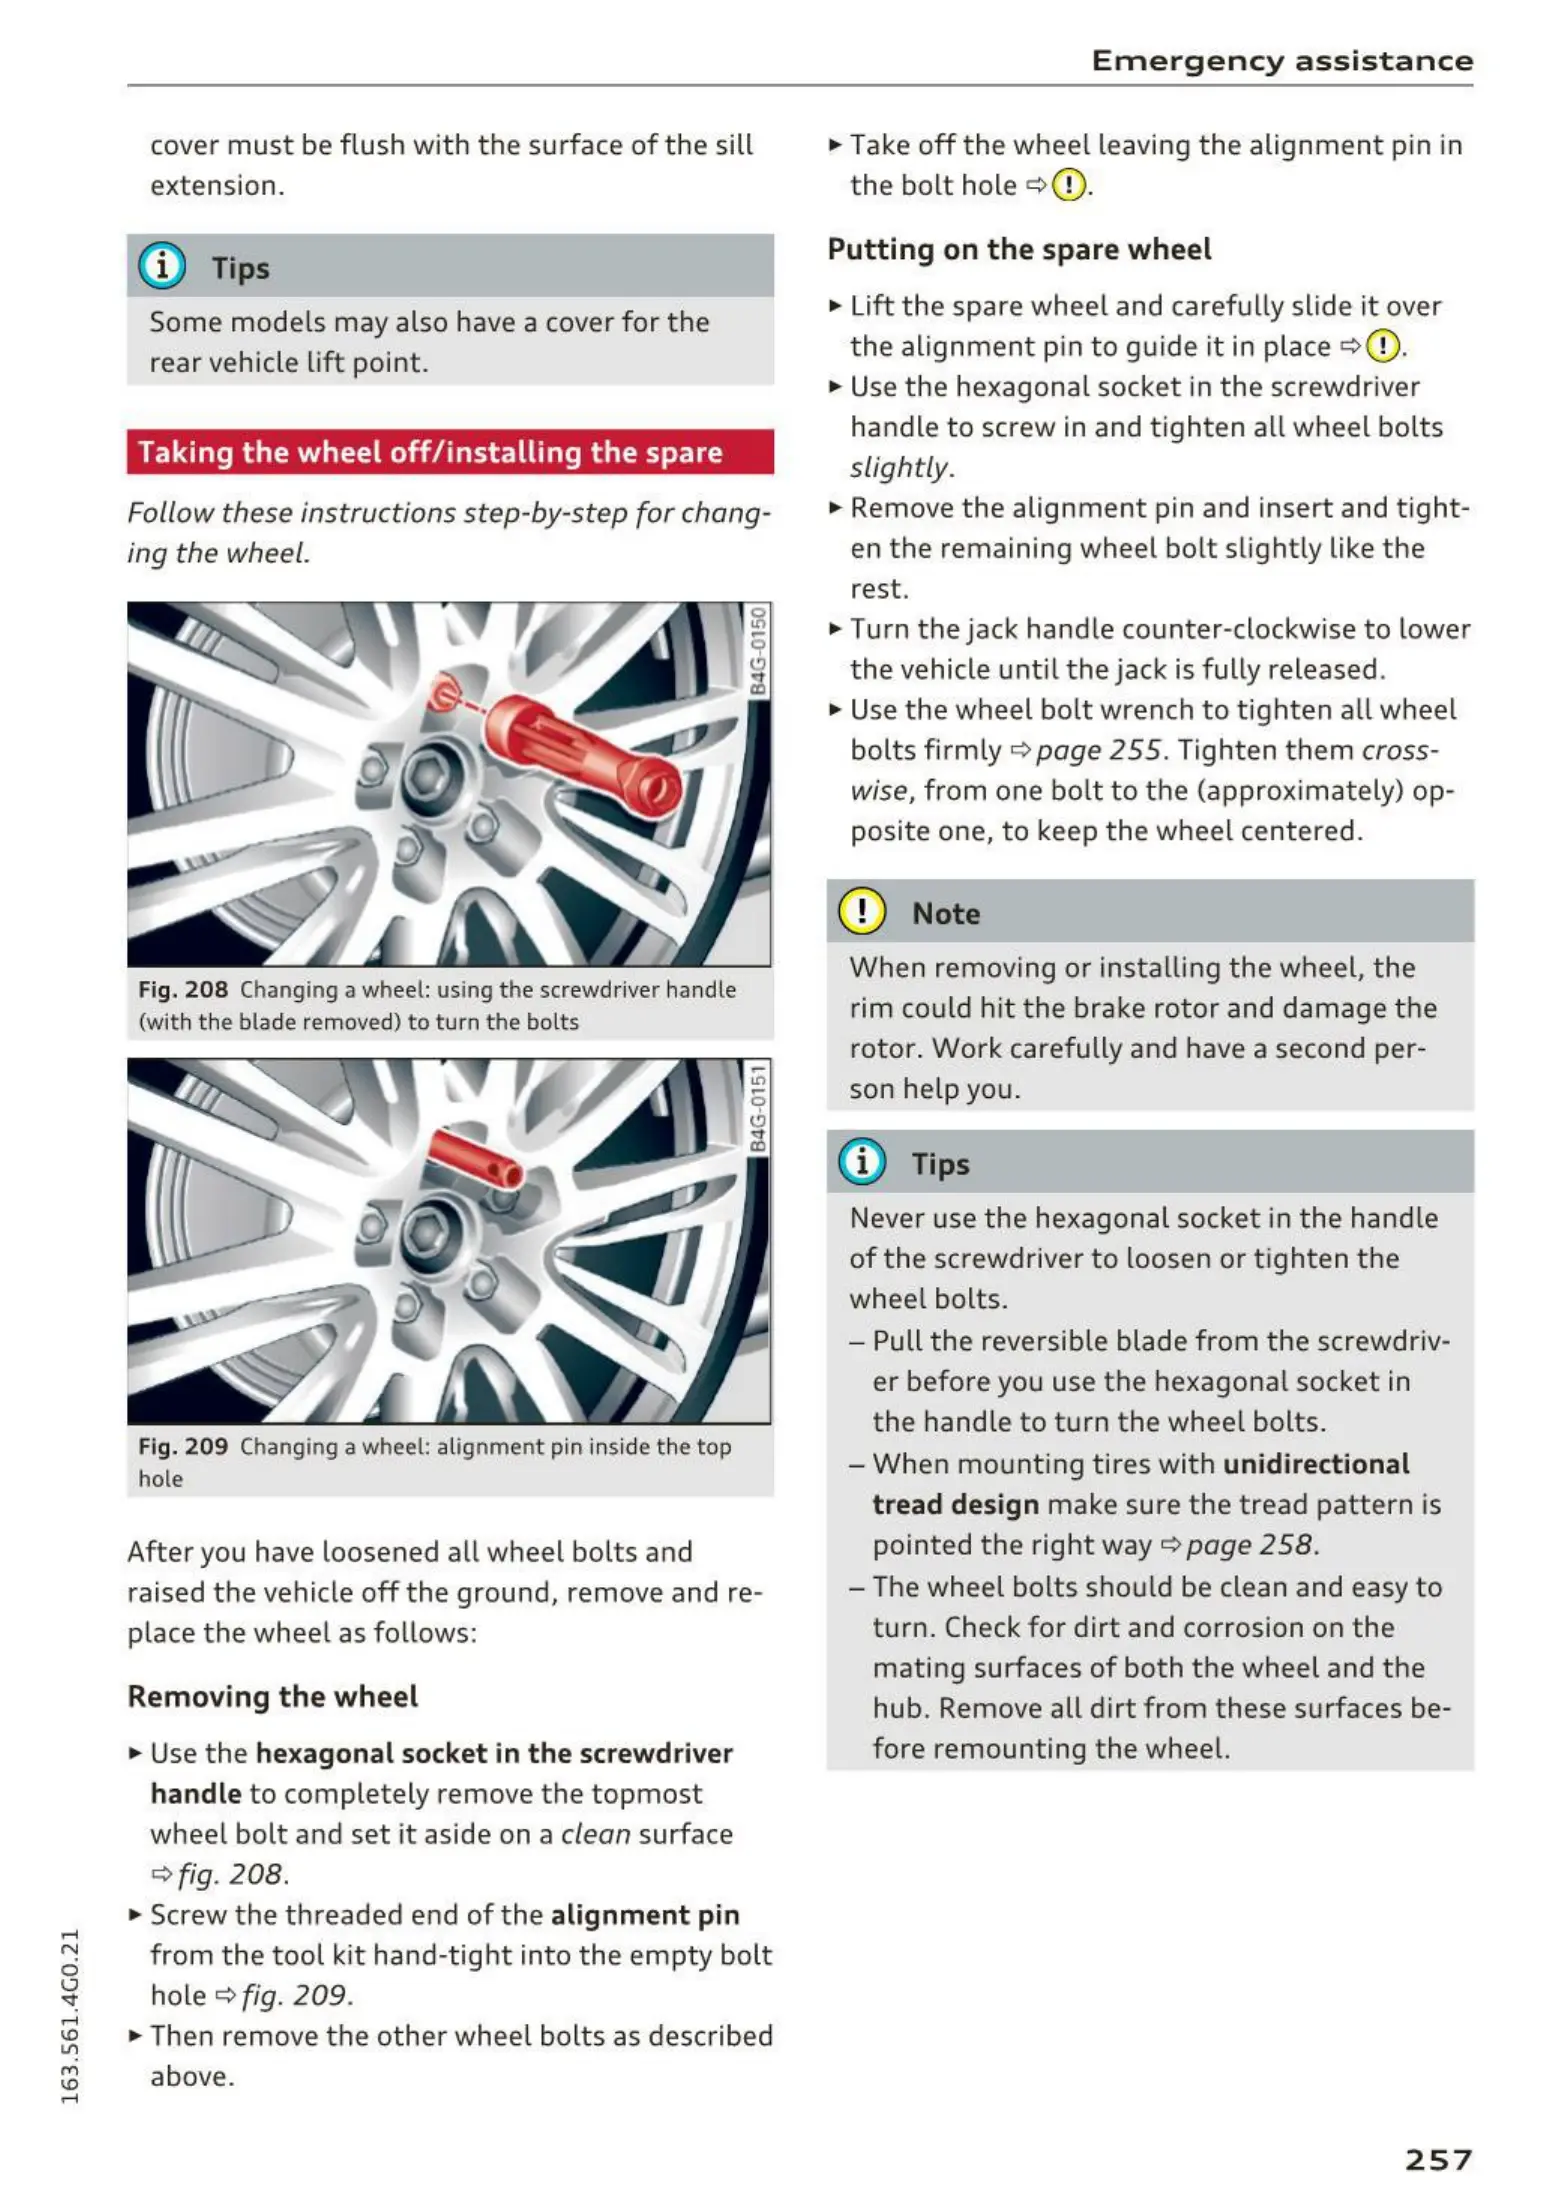
Fig. 208 Changin g a wheel: using the screwdrive r handle
(with the blade removed) to turn the bolts
Fig. 20 9 Changing a wheel: alignmen t pin inside the top
hole
After you have loosened all wheel bolt s and
raised the vehicle off the ground, remove and re-
place the whee l as fo llows:
Removing the wheel
• Use the hexagon al socket in the screwdriver
handle
to completely remove the topmost
wheel bolt and set it aside on a
clean surface
Qfig . 208.
• Screw the threaded end of the alignmen t pin
from the tool kit hand-tight into the empty bolt
hole
Q fig. 209 .
• Then remove the other whee l bolts as described
above .
Em er gen cy a ss istanc e
• Takeoff the whee l leaving the alignment pin in
the bolt hol e
Q0.
Putting on th e spare whe el
• Lift the spare whee l and carefu lly slide it over
t he alignment pin to guide it in place
Q0.
• Use the hexagonal socket in the screwdr iver
handle to screw in and tighten all wheel bolts
slightly .
.. Remove the alignment pin and insert and tight-
en the remaining wheel bolt slight ly like the
rest.
• Turn the jack handle counter -clockwise to lower
the vehicle unt il the jack is fully released .
• Use the wheel bo lt wrench to t ighten a ll wheel
bolts firmly
9 page 255. Tighten them cross-
wise,
from one bo lt to the (approx imately) op-
posite one, to keep the wheel centered.
(D Note
When removing or installing the wheel, the
rim could hit the brake rotor and damage t he
rotor . Work carefully and have a second per -
son help you .
@ Tips
Never use the he xagonal socke t in the hand le
of t he sc rewdriver to loosen or t ighten the
whee l bolts.
- Pull the reversible blade from the screwdr iv-
er before you use the hexagona l socket in
the handle to t urn the whee l bolts .
- When mount ing tires with
unidirectional
tread design
make sure the tread pattern is
pointed the right way
Q page 258.
- The wheel bolts shou ld be clean and easy to
turn. Check for dirt and corrosion on the
mating surfaces of both the wheel and the
hub. Remove all dirt from these surfaces be-
fore remounting the wheel.
257