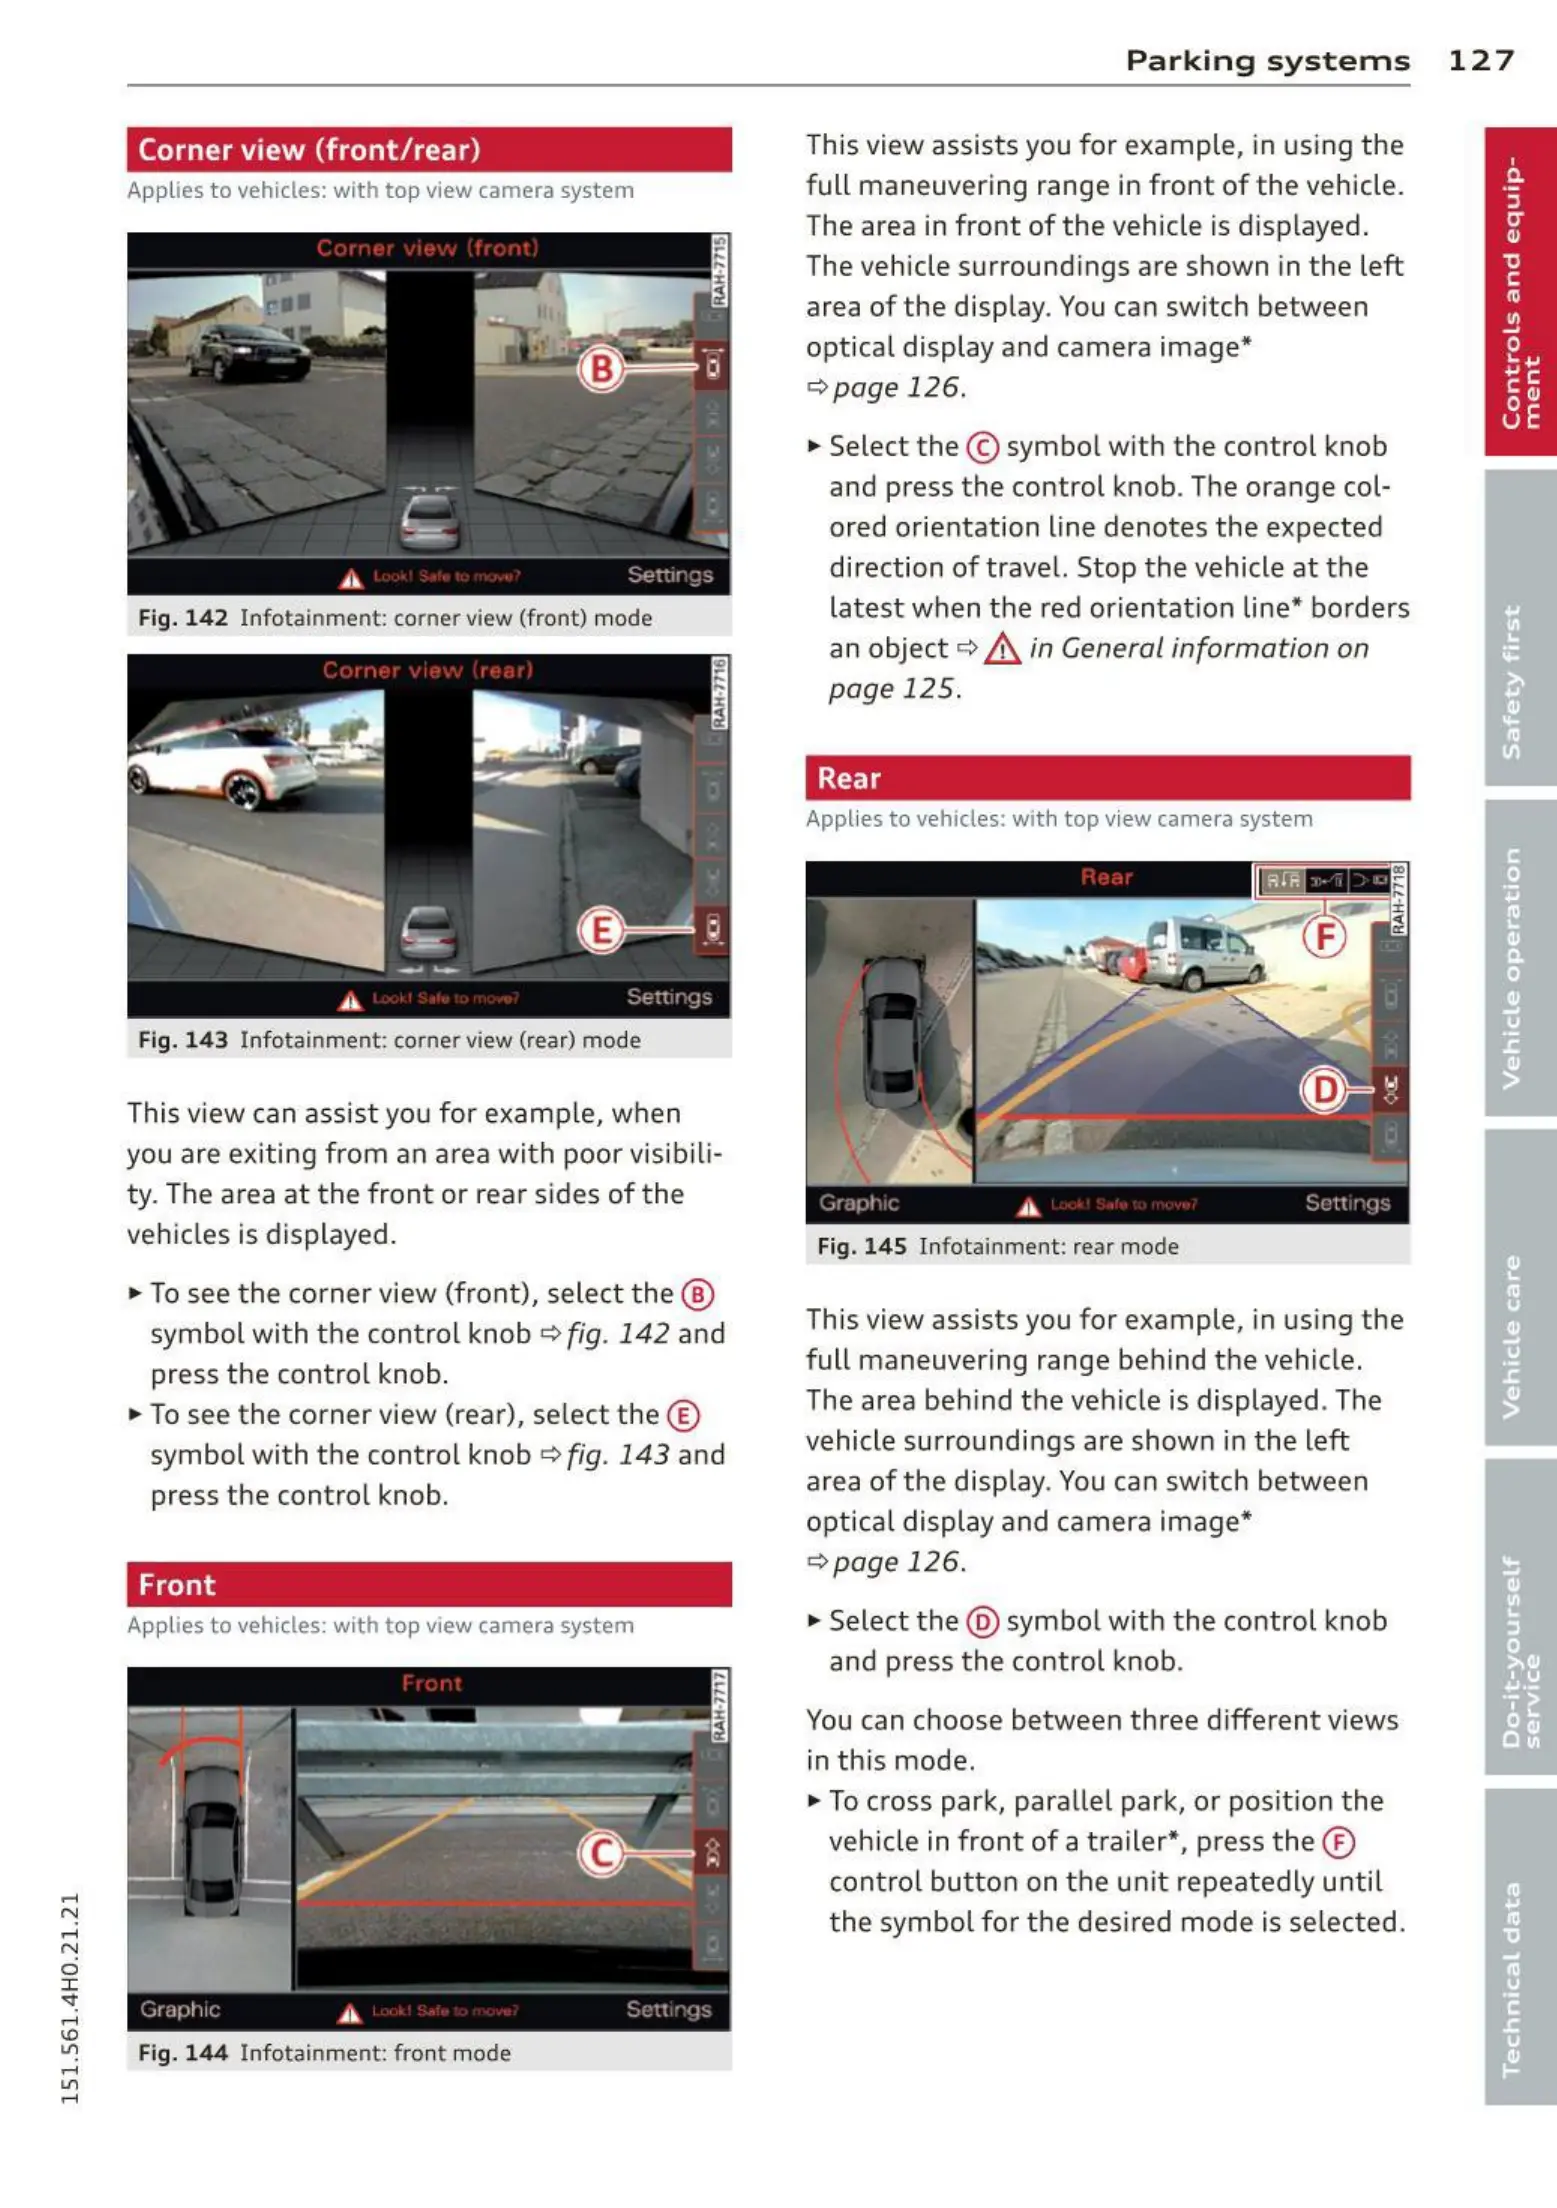
Corner view (front/rear)
Applies to vehicles: with top view camera system
Fig. 14 2 Infotainment: corner view (front) mode
Fig. 14 3 Info tainme nt: corner view (rear) mode
This view can assist you for examp le, when
you are exiting from an area with poor visibili-
ty . The a rea at the front or rea r sides of the
vehicles is displayed.
"T o see t he corner view (front), select the ®
symbol wit h the cont rol knob ¢
fig. 142 and
press the contro l knob .
.. To see the corner view (rear), se lect the ©
symbol with the contro l knob ¢
fig . 143 and
press the control knob.
Front
Applies to vehicles: with top view camera system
Fig. 144 Infota inme nt : fro nt mode
Pa rking sys tems 12 7
This view assists you for example , in us ing the
full maneuvering range in front of the vehicle.
The area in front of the vehicle is displayed .
The vehicle surround ings are shown in the left
area of t he display . You can switch between
optical display and camera image*
<?page 126 .
" Select the © symbo l with the control knob
and press the control knob . The orange col-
ored orientation line denotes the expected
direction of travel. Stop the vehicle at the
latest when the red orientat ion line* bo rders
an objec t ¢ .&.
in General information on
page 125.
Rear
Applies to vehicles: with top view camera system
Fig. 145 Infotainment : rear mode
This view assists you for example, in using the
full maneuvering range behind the vehicle.
The area beh ind the vehicle is displayed . The
vehicle surroundings are shown in the left
area of the disp lay. You can switch between
optical display and camera image*
<?page 12 6.
" Select the @ symbol with the control knob
and press the control knob .
You can choose between three d ifferent views
in th is mode .
" To cross park, parallel park, or pos it ion the
veh icle in front of a t railer*, press the ®
cont rol butto n on the unit repeatedly until
t he symbol fo r the des ired mode is se lected.