Towing a trailer 203
Controls Safety Driving tips General maintenance Self-help Technical data
– Also check the shaft section of the ball joint and its asso-
ciated mechanical parts to make sure they are clean and
undamaged.
Continued ⇒ page 203, “Fitting the ball joint (step 2)”.
WARNING
It is important to keep the mounting fixture clean. Otherwise the
ball joint may fail to engage securely (accident risk).
Applies to vehicles: with removable towing bracket
Fitting the ball joint (step 2)
The spring mechanism inside the ball joint must
be in the "ready" position.
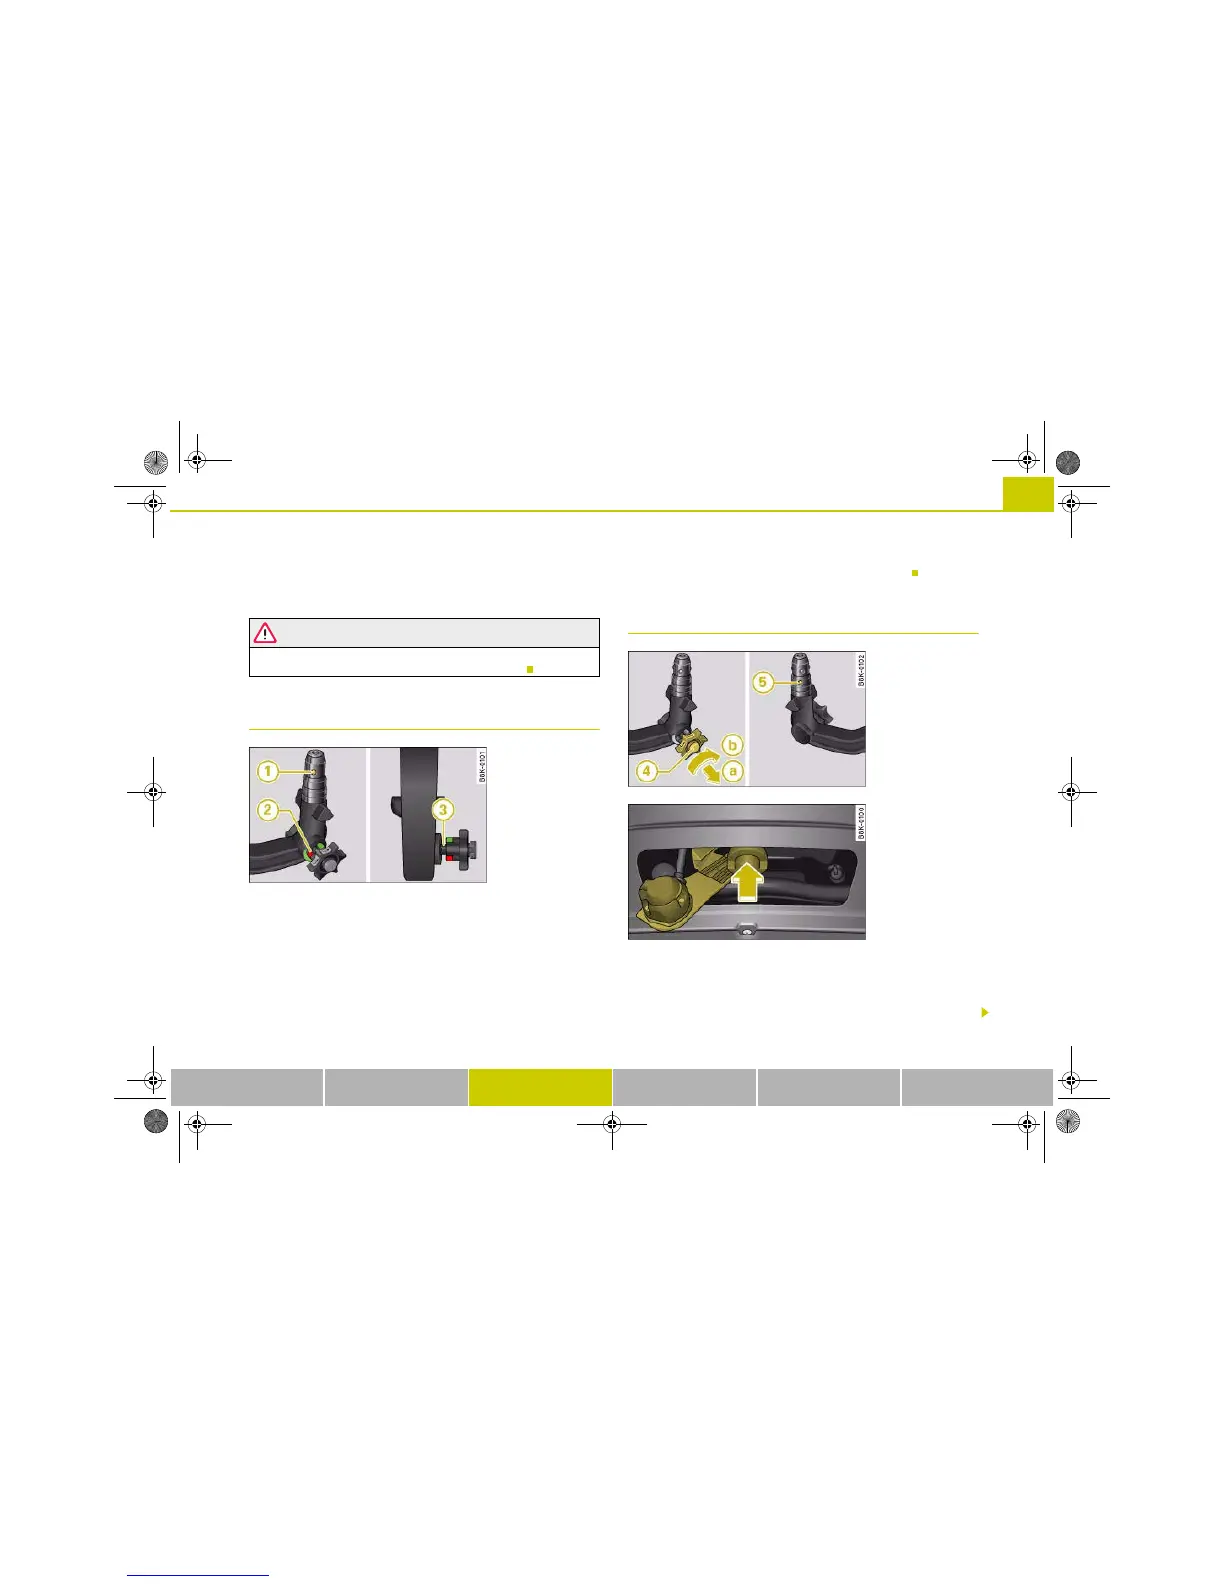
– Check that the red marking ⇒ fig. 198 on the knob is
inside the green zone on the ball joint.
– Check that the locking ball is inside the hole in the
shaft section of the ball joint.
– Check that the knob protrudes visibly from the ball joint,
so that there is a clear gap between the knob and the
ball joint.
The ball joint can only be installed if the internal spring mechanism
is in the ready position.
Continued ⇒ page 203, “Fitting the ball joint (step 3)”.
Applies to vehicles: with removable towing bracket
Fitting the ball joint (step 3)
Setting the spring mechanism to the "ready"
position (if required)
– Insert the key ⇒ fig. 199 for locking the ball joint into
the lock on the knob and turn it clockwise.
Fig. 198 Removable
towing bracket: Ball
joint